
Looking for a Christmas gift that the kiddos can make and give? How about a DIY dotted Christmas mug. Let their creativity be the star of this gift!
Making a Dotted Christmas Mug
This DIY gift is made by purchasing a ceramic mug and then using a pattern to add dots around with a permanent marker.
Then once the masterpiece is finished it is baked in the oven to set the marker. Next you can fill the mug with treats or a gift. Finally, wrap it all up and you are ready for Christmas.
To get started you will need to gather your supplies.
-A pencil (for tracing)
-Contact paper or letter stickers (to help you make your dot design)
-Nail polish remover
-Scissors
-Oil-based permanent markers.
Getting Started
Start with your ceramic mug of choice. To do this project on a budget check your local dollar store for mugs.
Be mindful of the color of mug. White works best when using lots of different colored markers. We used an off white colored mug and some of the colors showed up a little faded.
Begin by wiping your mug with nail polish remover. Now, I’m no scientist but I think this removes something from the mug that then allows the permanent marker to better adhere to the mug.
Choosing designs and Stickers
When making your dotted mug you’ll need to decide what picture or word you want on it. Do you want it to say something Christmas like or have a reindeer or star on it?
Or it can be personalized with someone’s name. The choice is yours. Once you have decided you’ll know what letter stickers or pattern you want to trace.
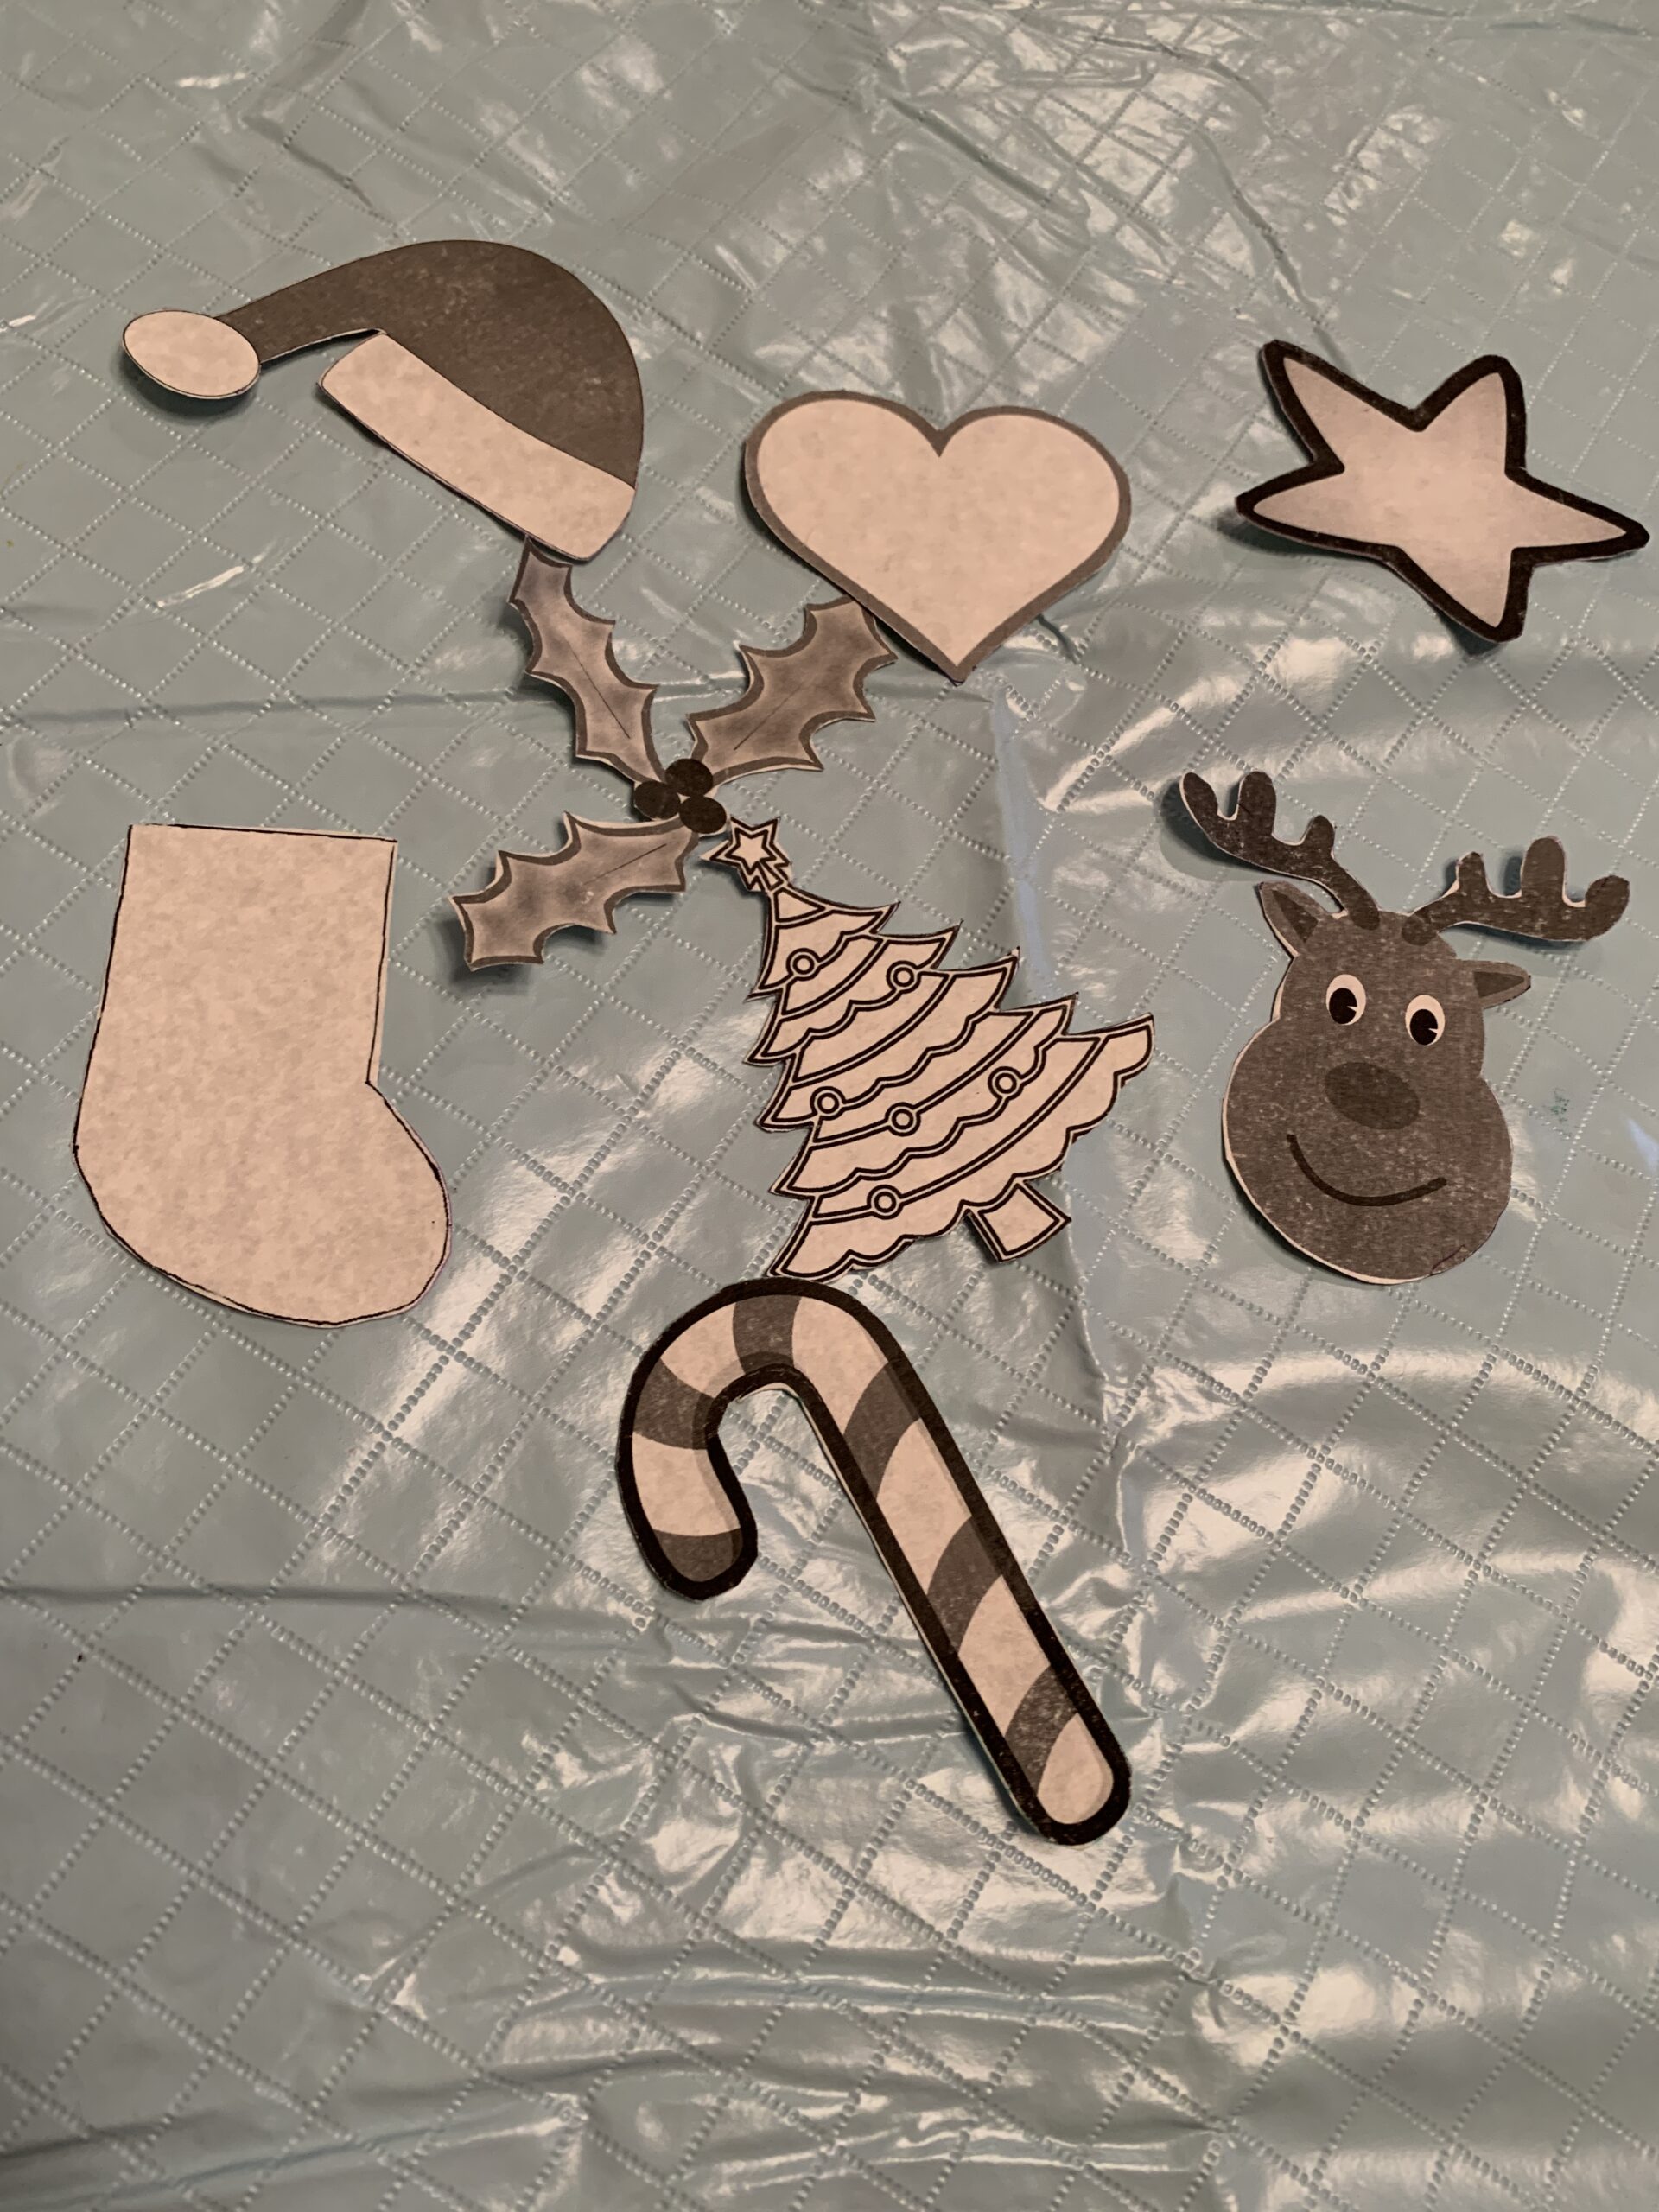
If you choose to have a Christmas themed mug you could cut out some patterns like the ones in the picture above.
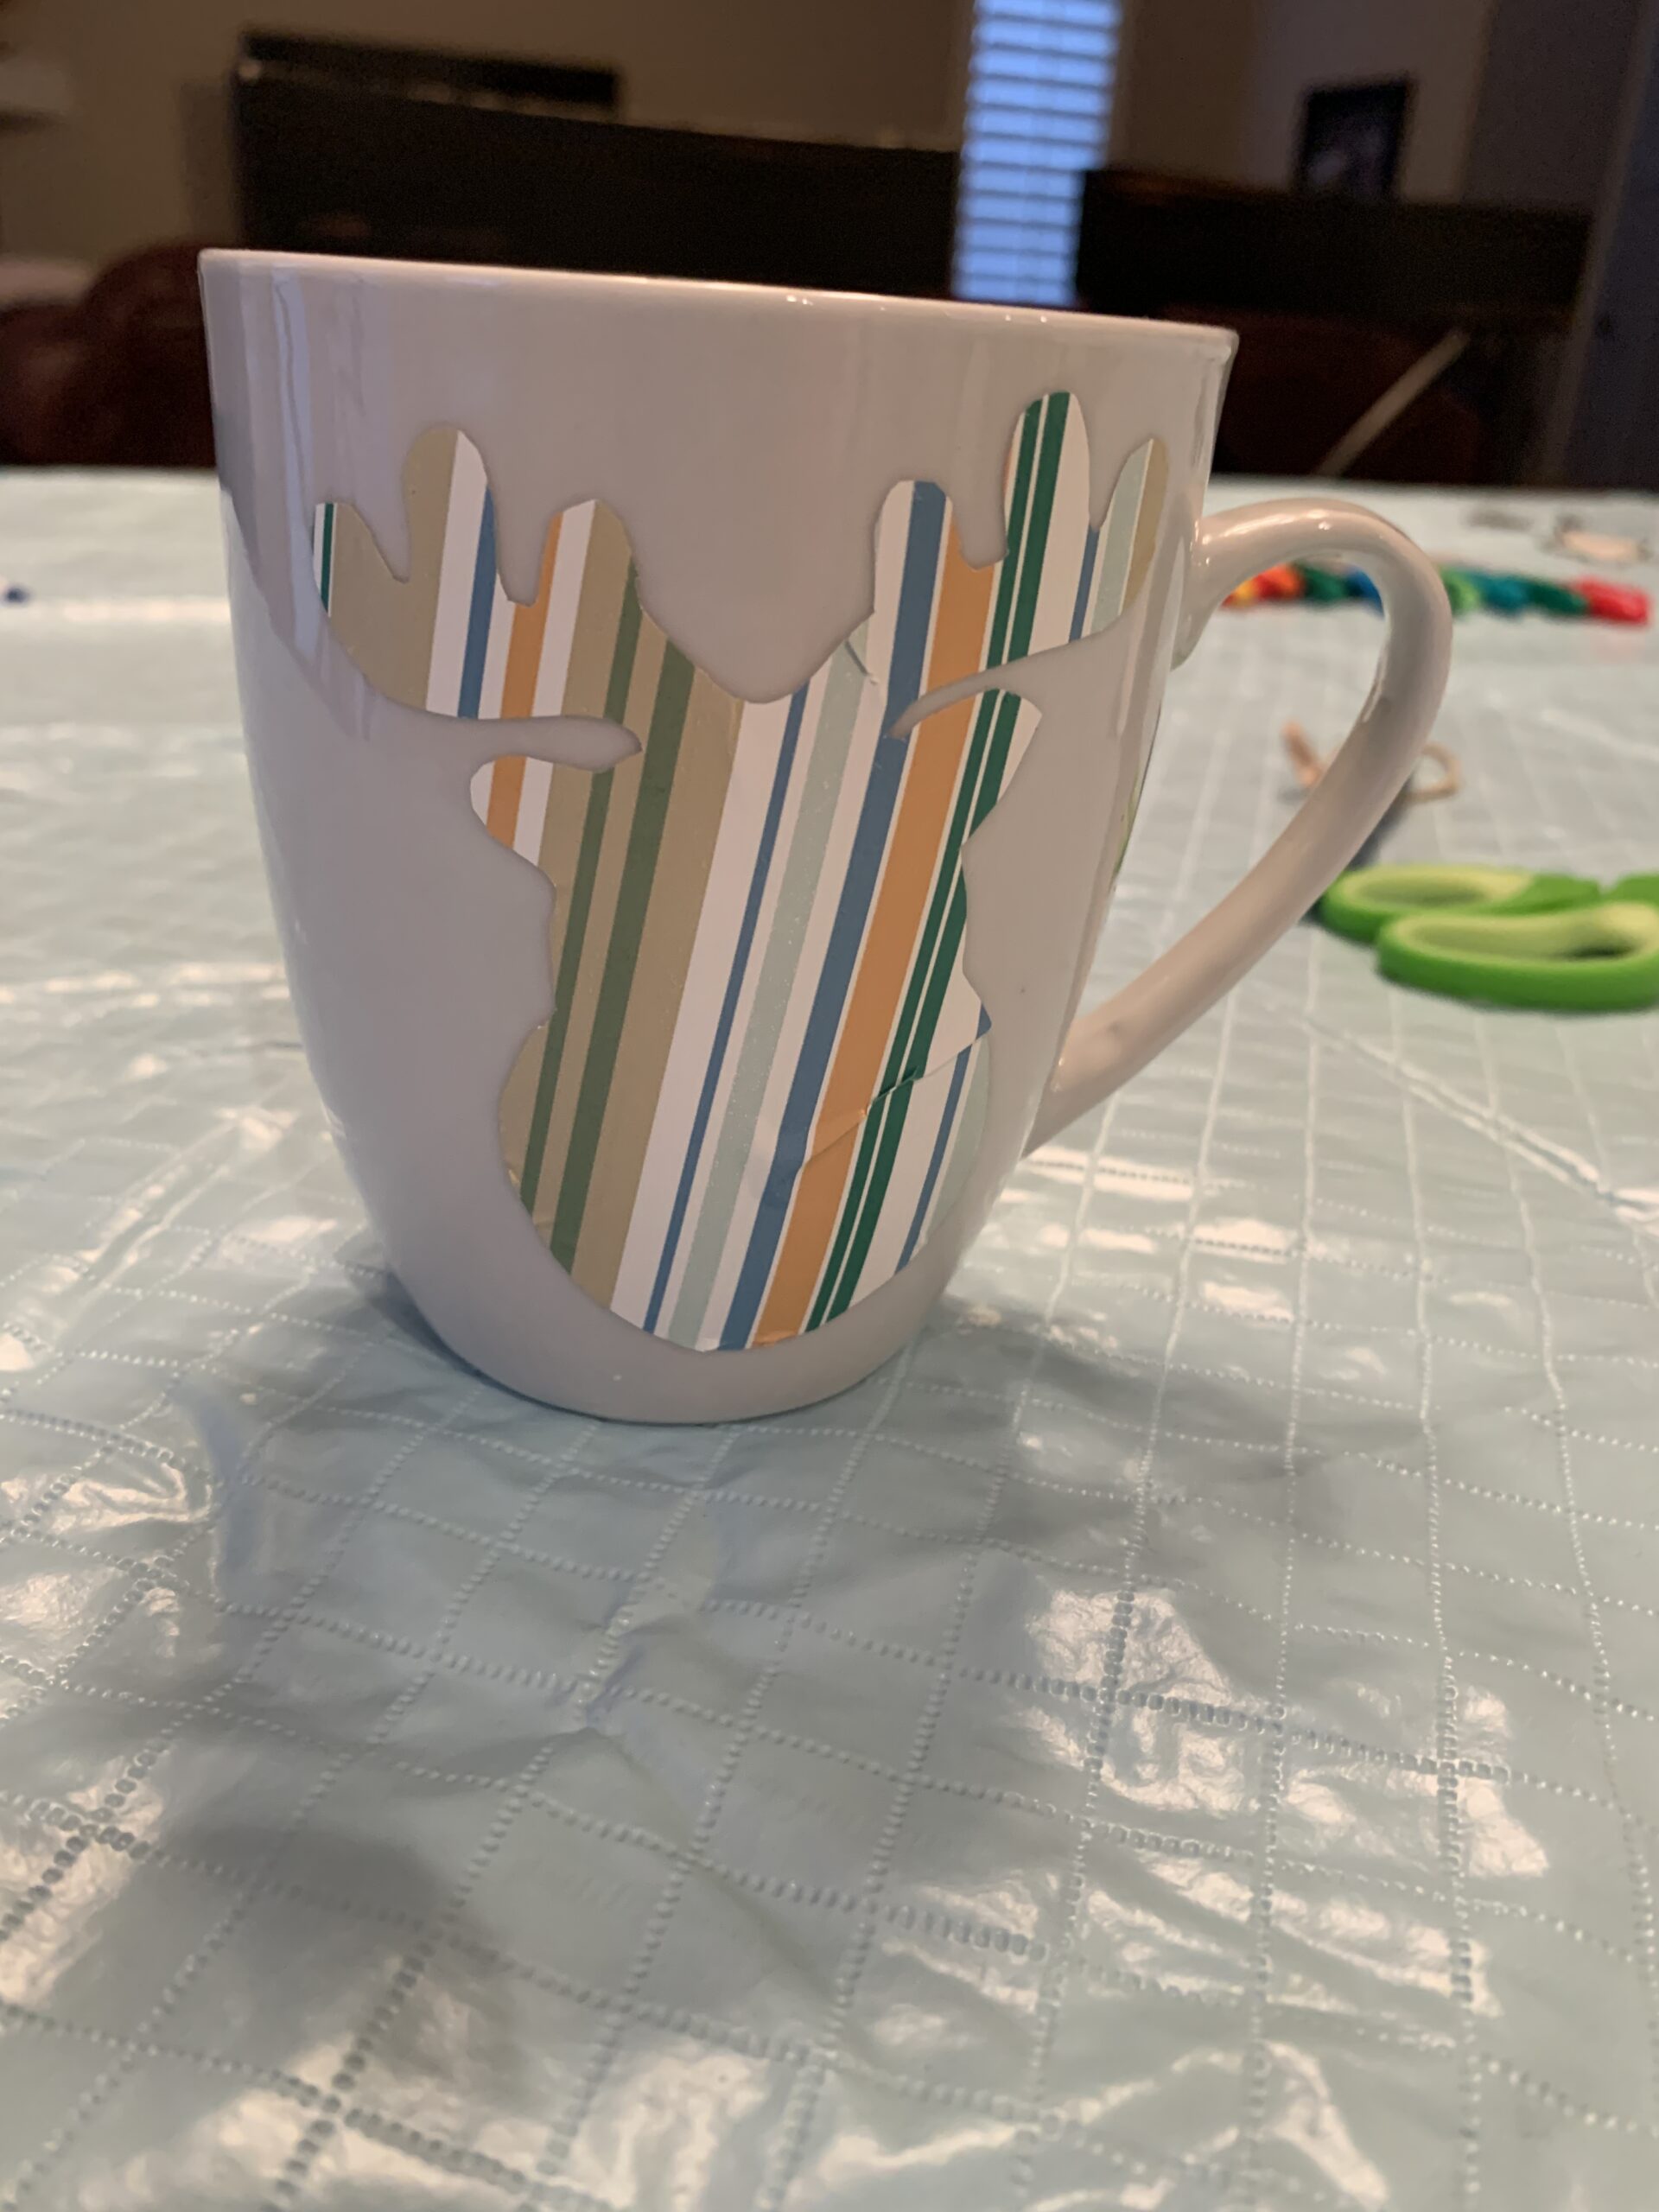
Next, use your pencil and trace the pattern you want to use onto a piece of contact paper. You’ll be using contact paper because you can stick it to your mug and then easily remove it when finished.
Once you have traced your shape grab your scissors and cut it out. Lastly, peel the shape off of the cut out contact paper and stick it onto your mug.
Be sure to get it on your mug where you want your design to be. Since you are using contact paper it should be fairly easy to reposition the pattern on the mug should you need to.
If you would like to do a word on the mug you could also trace letters on the contact paper. Or, if you have letter stickers that would be much easier and faster. Then apply the letters to your mug.
Let the Dotting Begin
Now for the fun part. The dotting of the DIY dotted Christmas mug.
Grab your oil based permanent marker. You’ll want to have oil based because water based will wash off your mug. That’s no good. Sharpie brand permanent markers work well for this project.
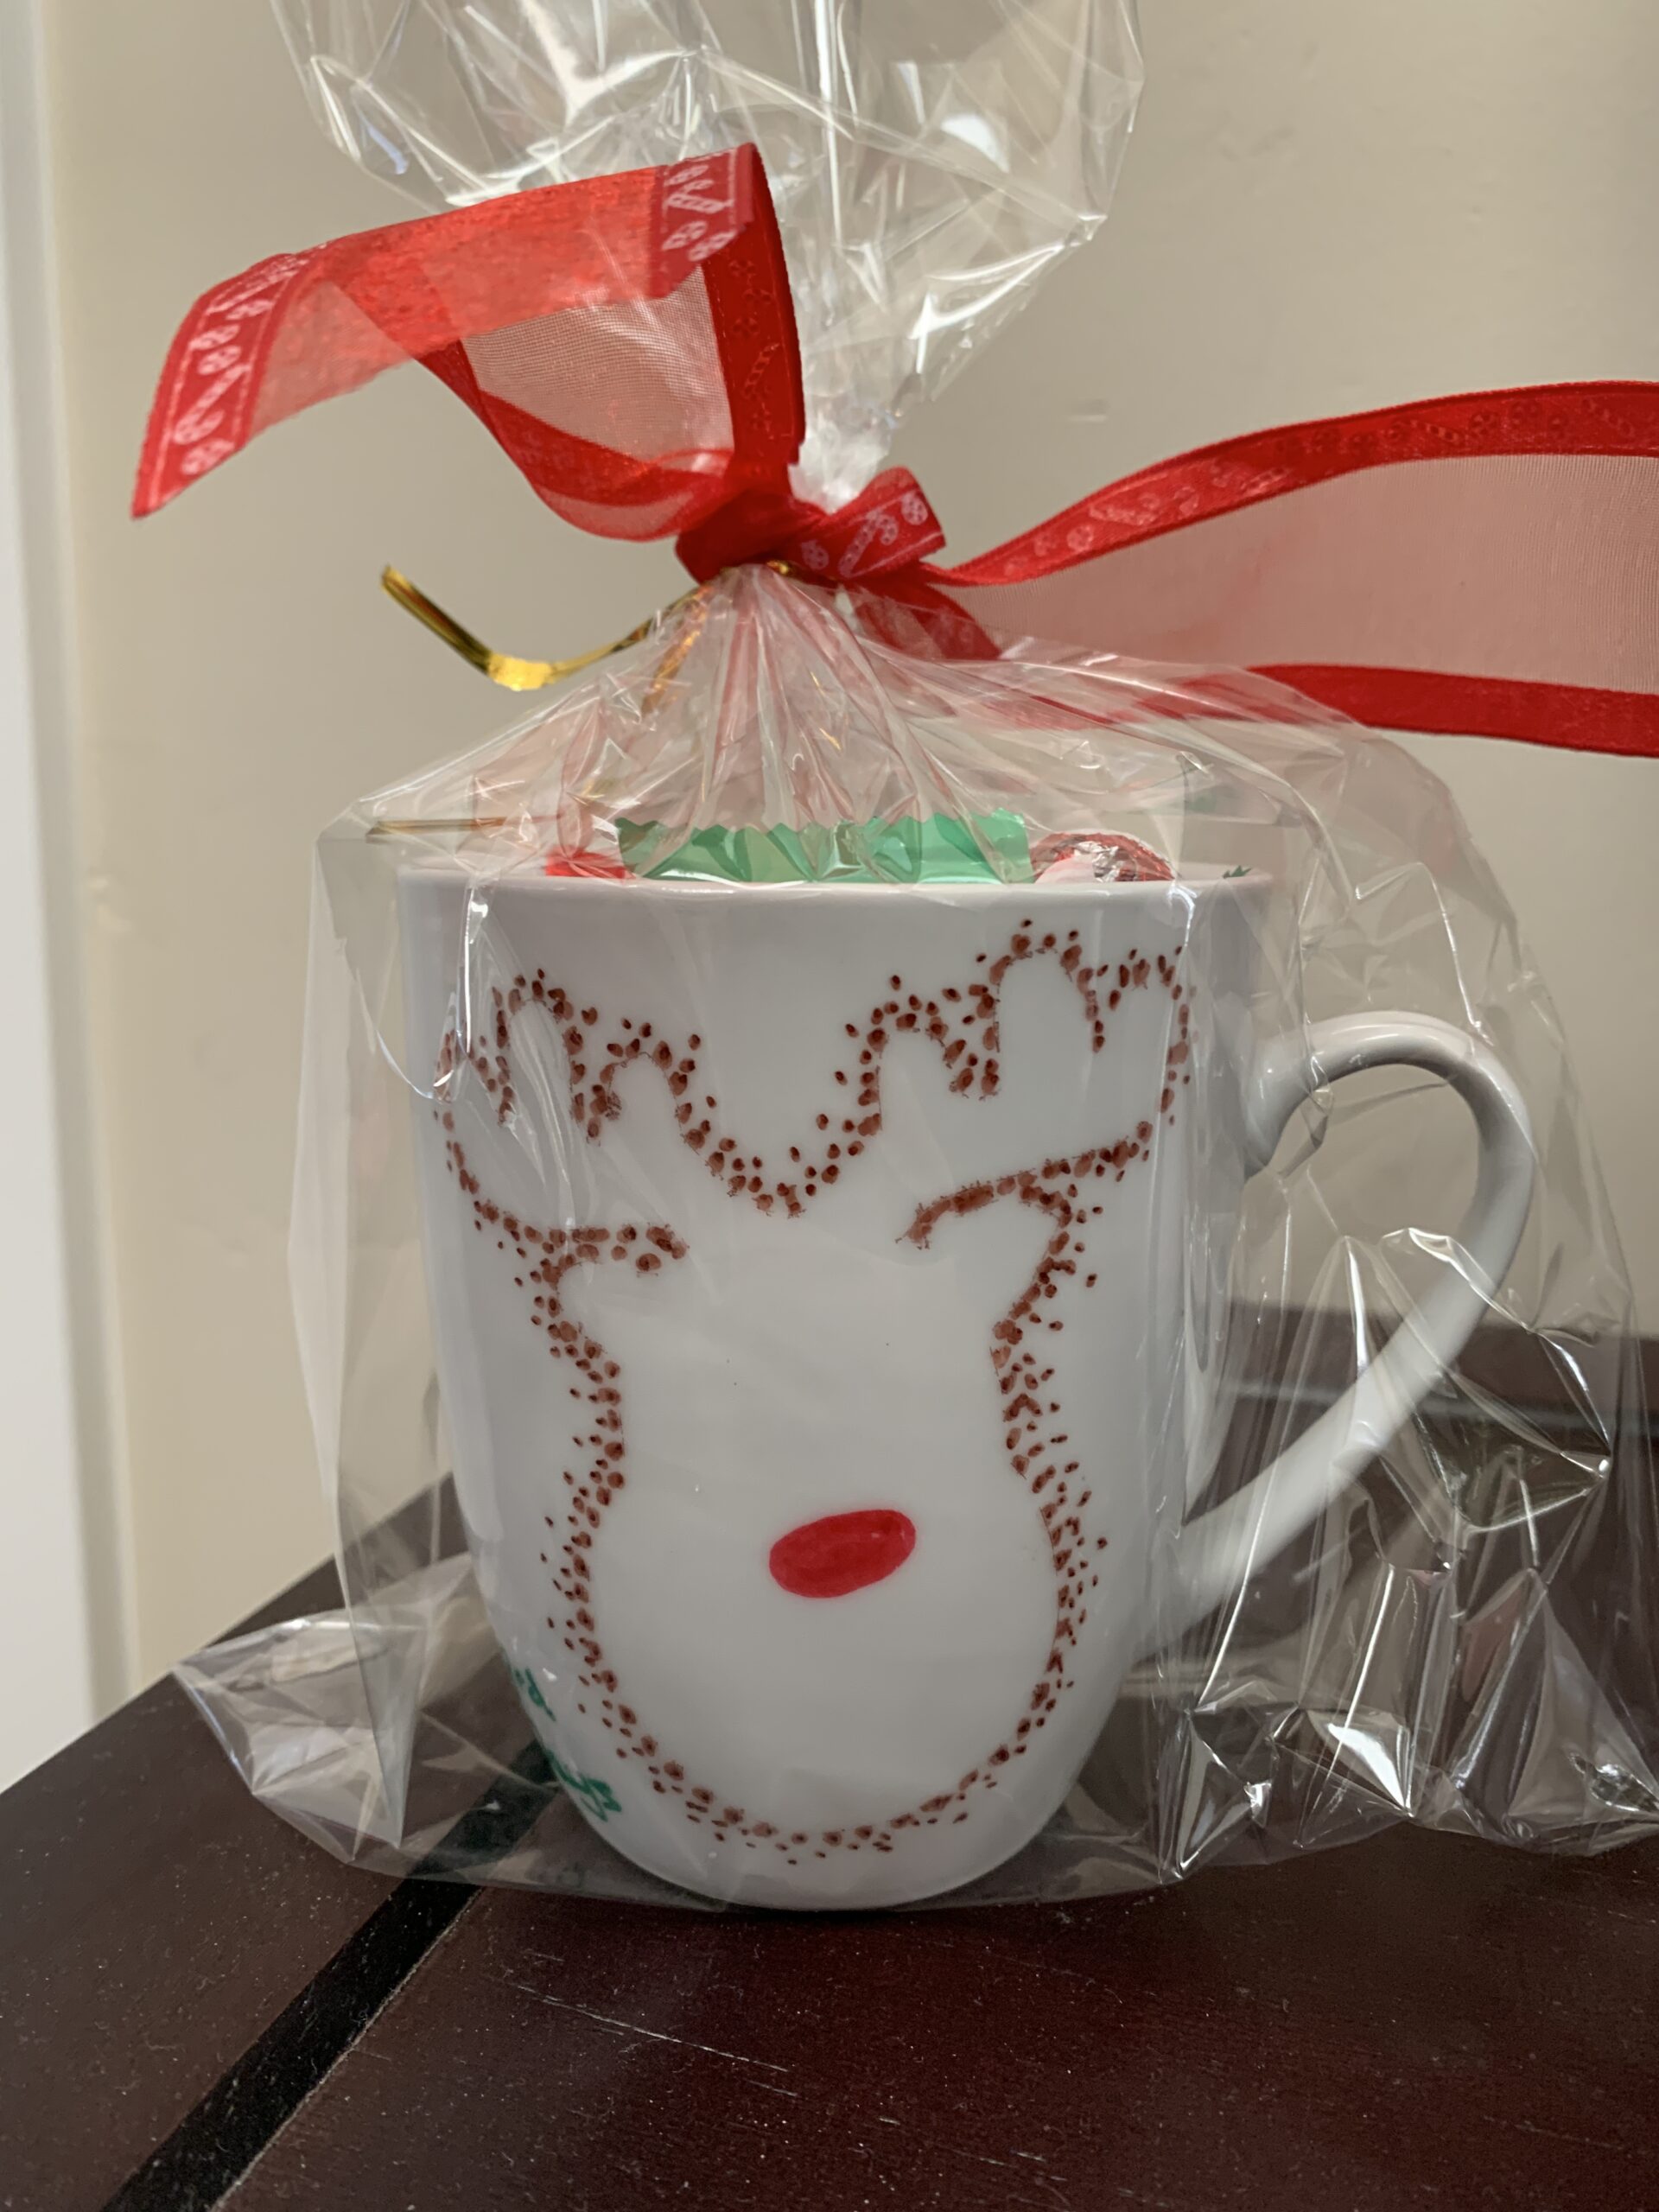
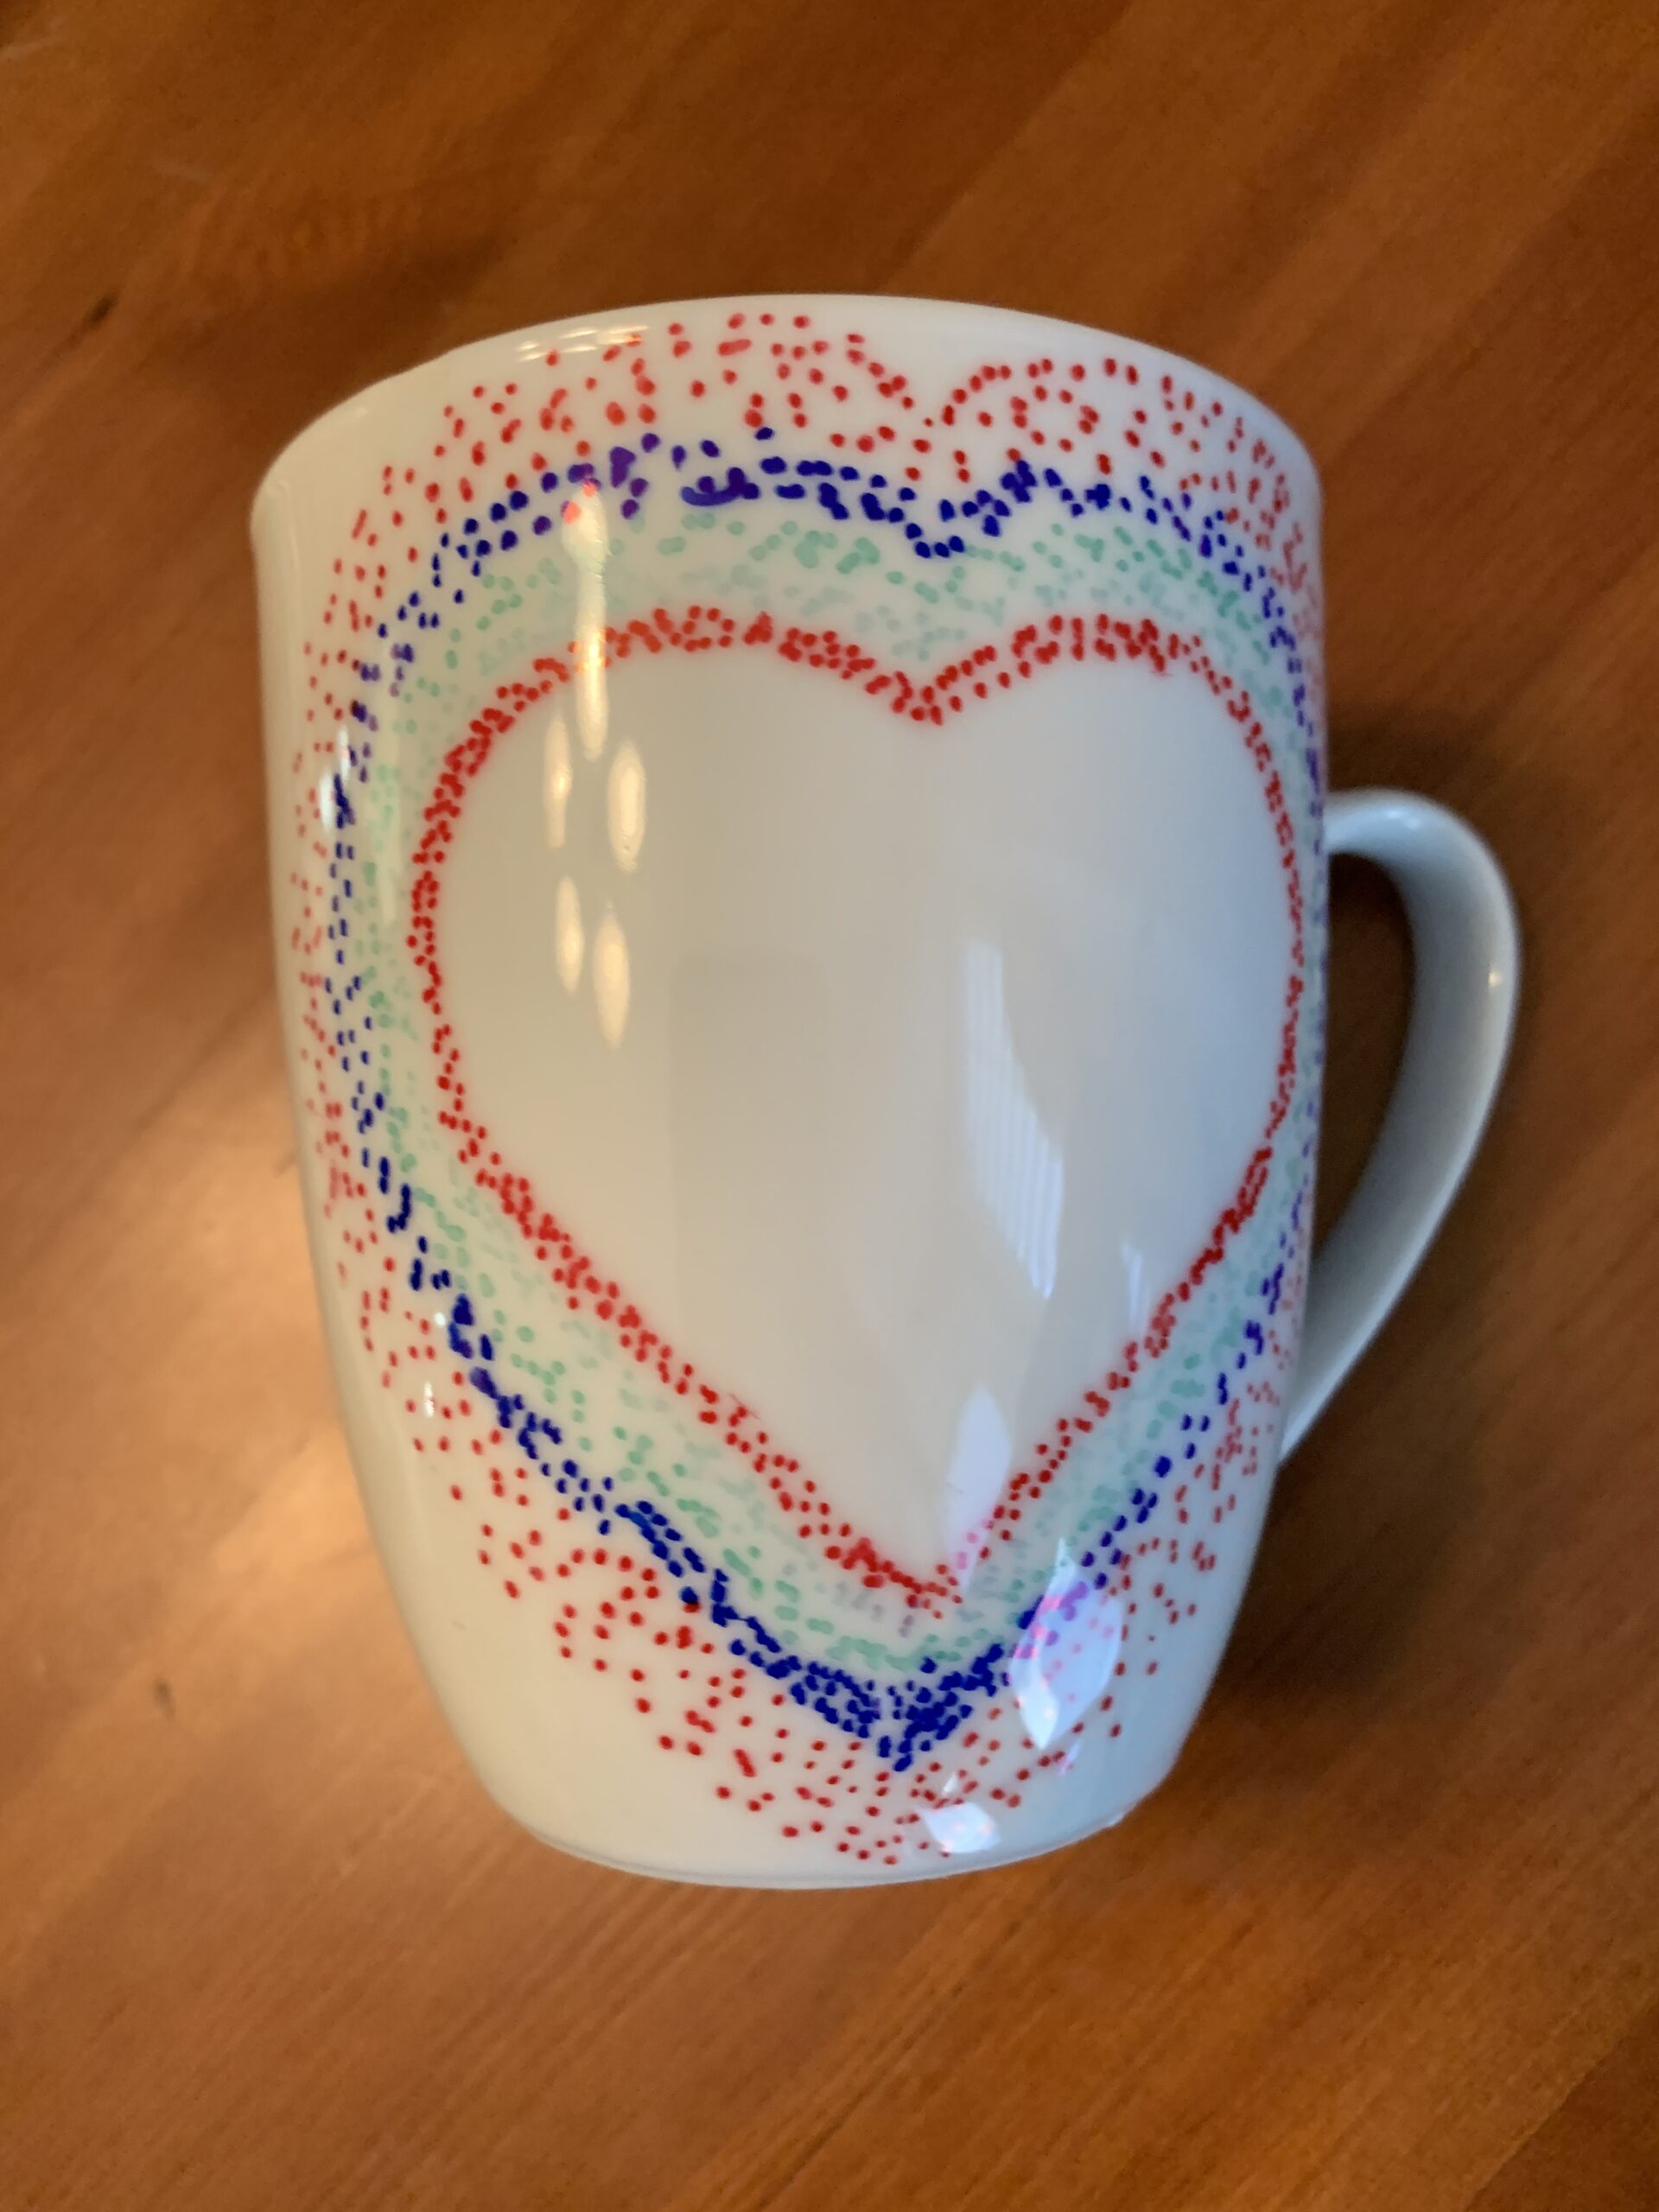
Start by making lots of dots very close together next to your pattern. Feel free to change the color of marker you use at any time.
Next, dot all around your pattern or letters. Then, as you get further out from your pattern start to make the dots further apart.
You can go as far out as you would like making your design LARGE or small.
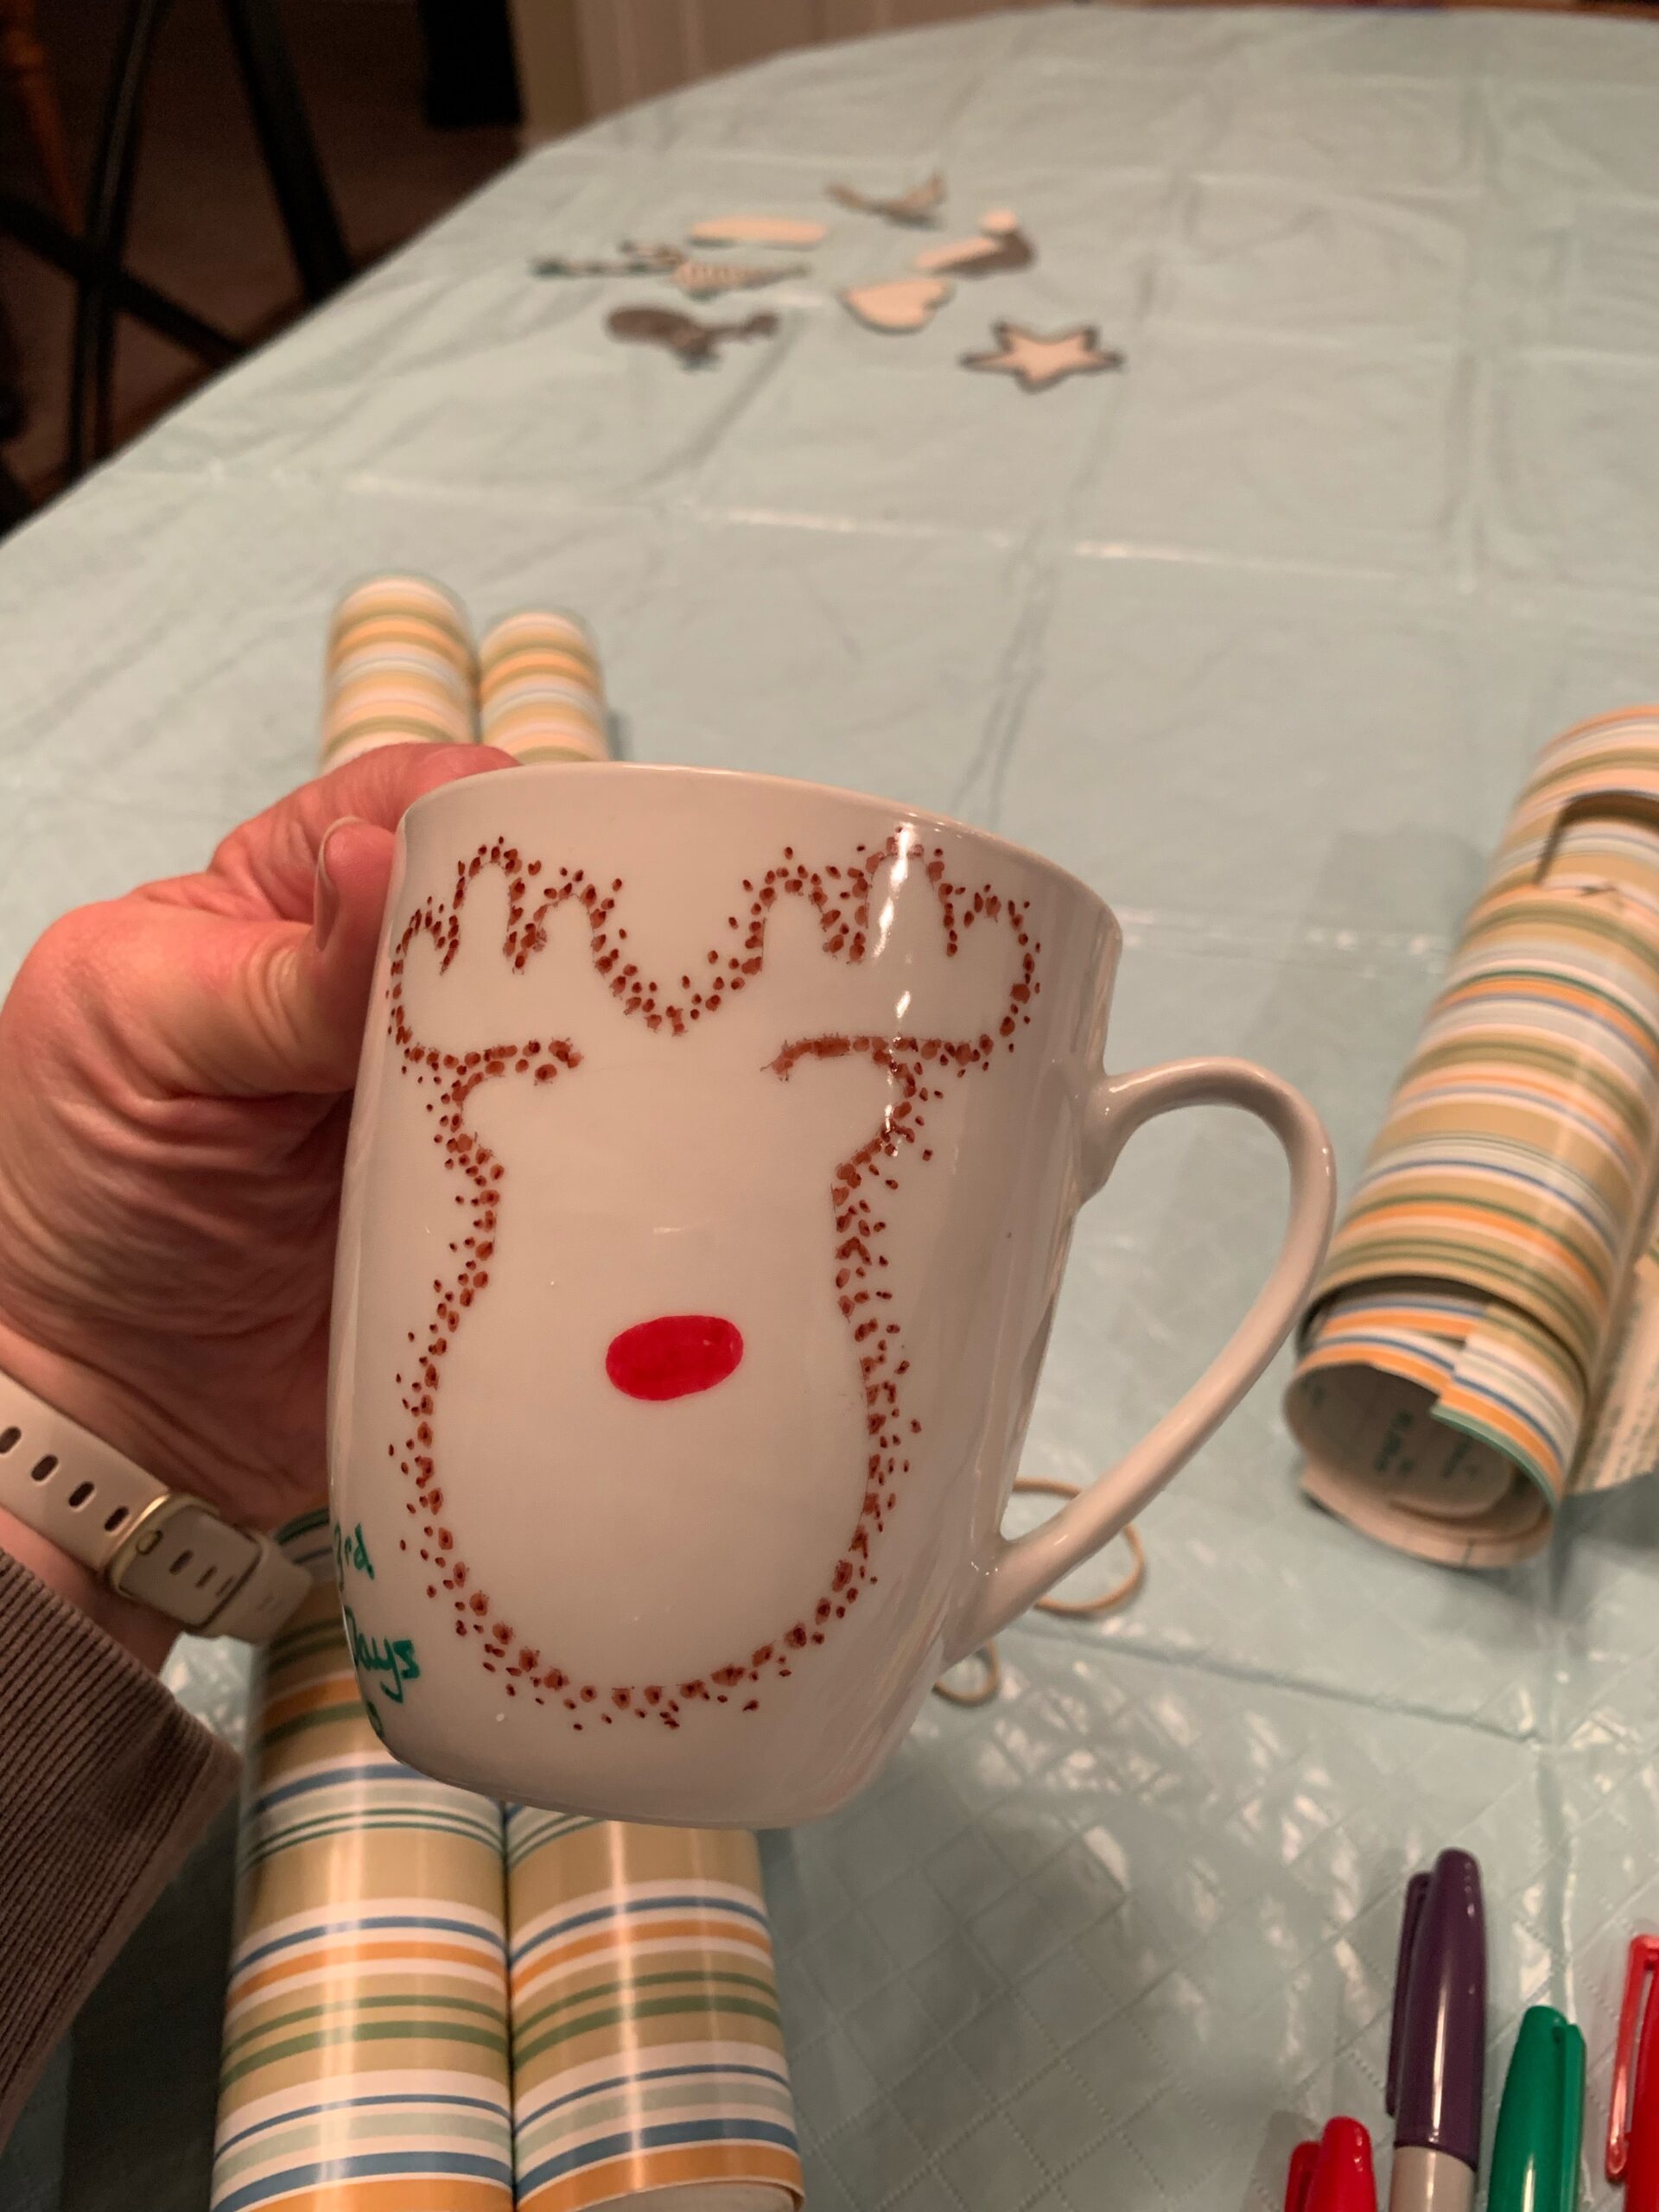
Once you’ve finished your dots you can carefully remove the stencil/sticker from the mug. Be sure not to smudge the dots you have made if they aren’t fully dry yet.
Let Your Creative Juices Flow
If you like things simple then after you finish your dotting around the pattern you are done. Or, you can let your creative juices flow.
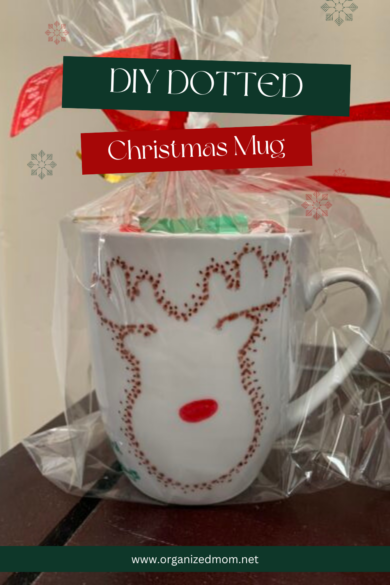
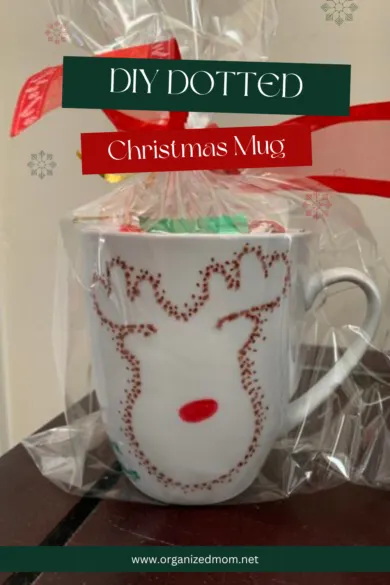
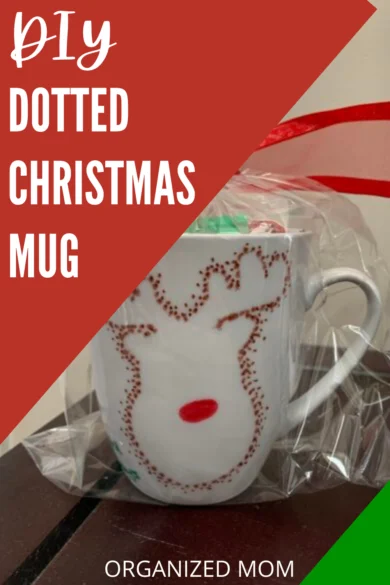
You can fill in where you pulled the sticker off. Give Rudolph a red nose and some eyes or decorate the inside of your dotted stocking.
Not feeling like doing dots? You can use your pattern to trace and then go ahead and color it in and be creative.
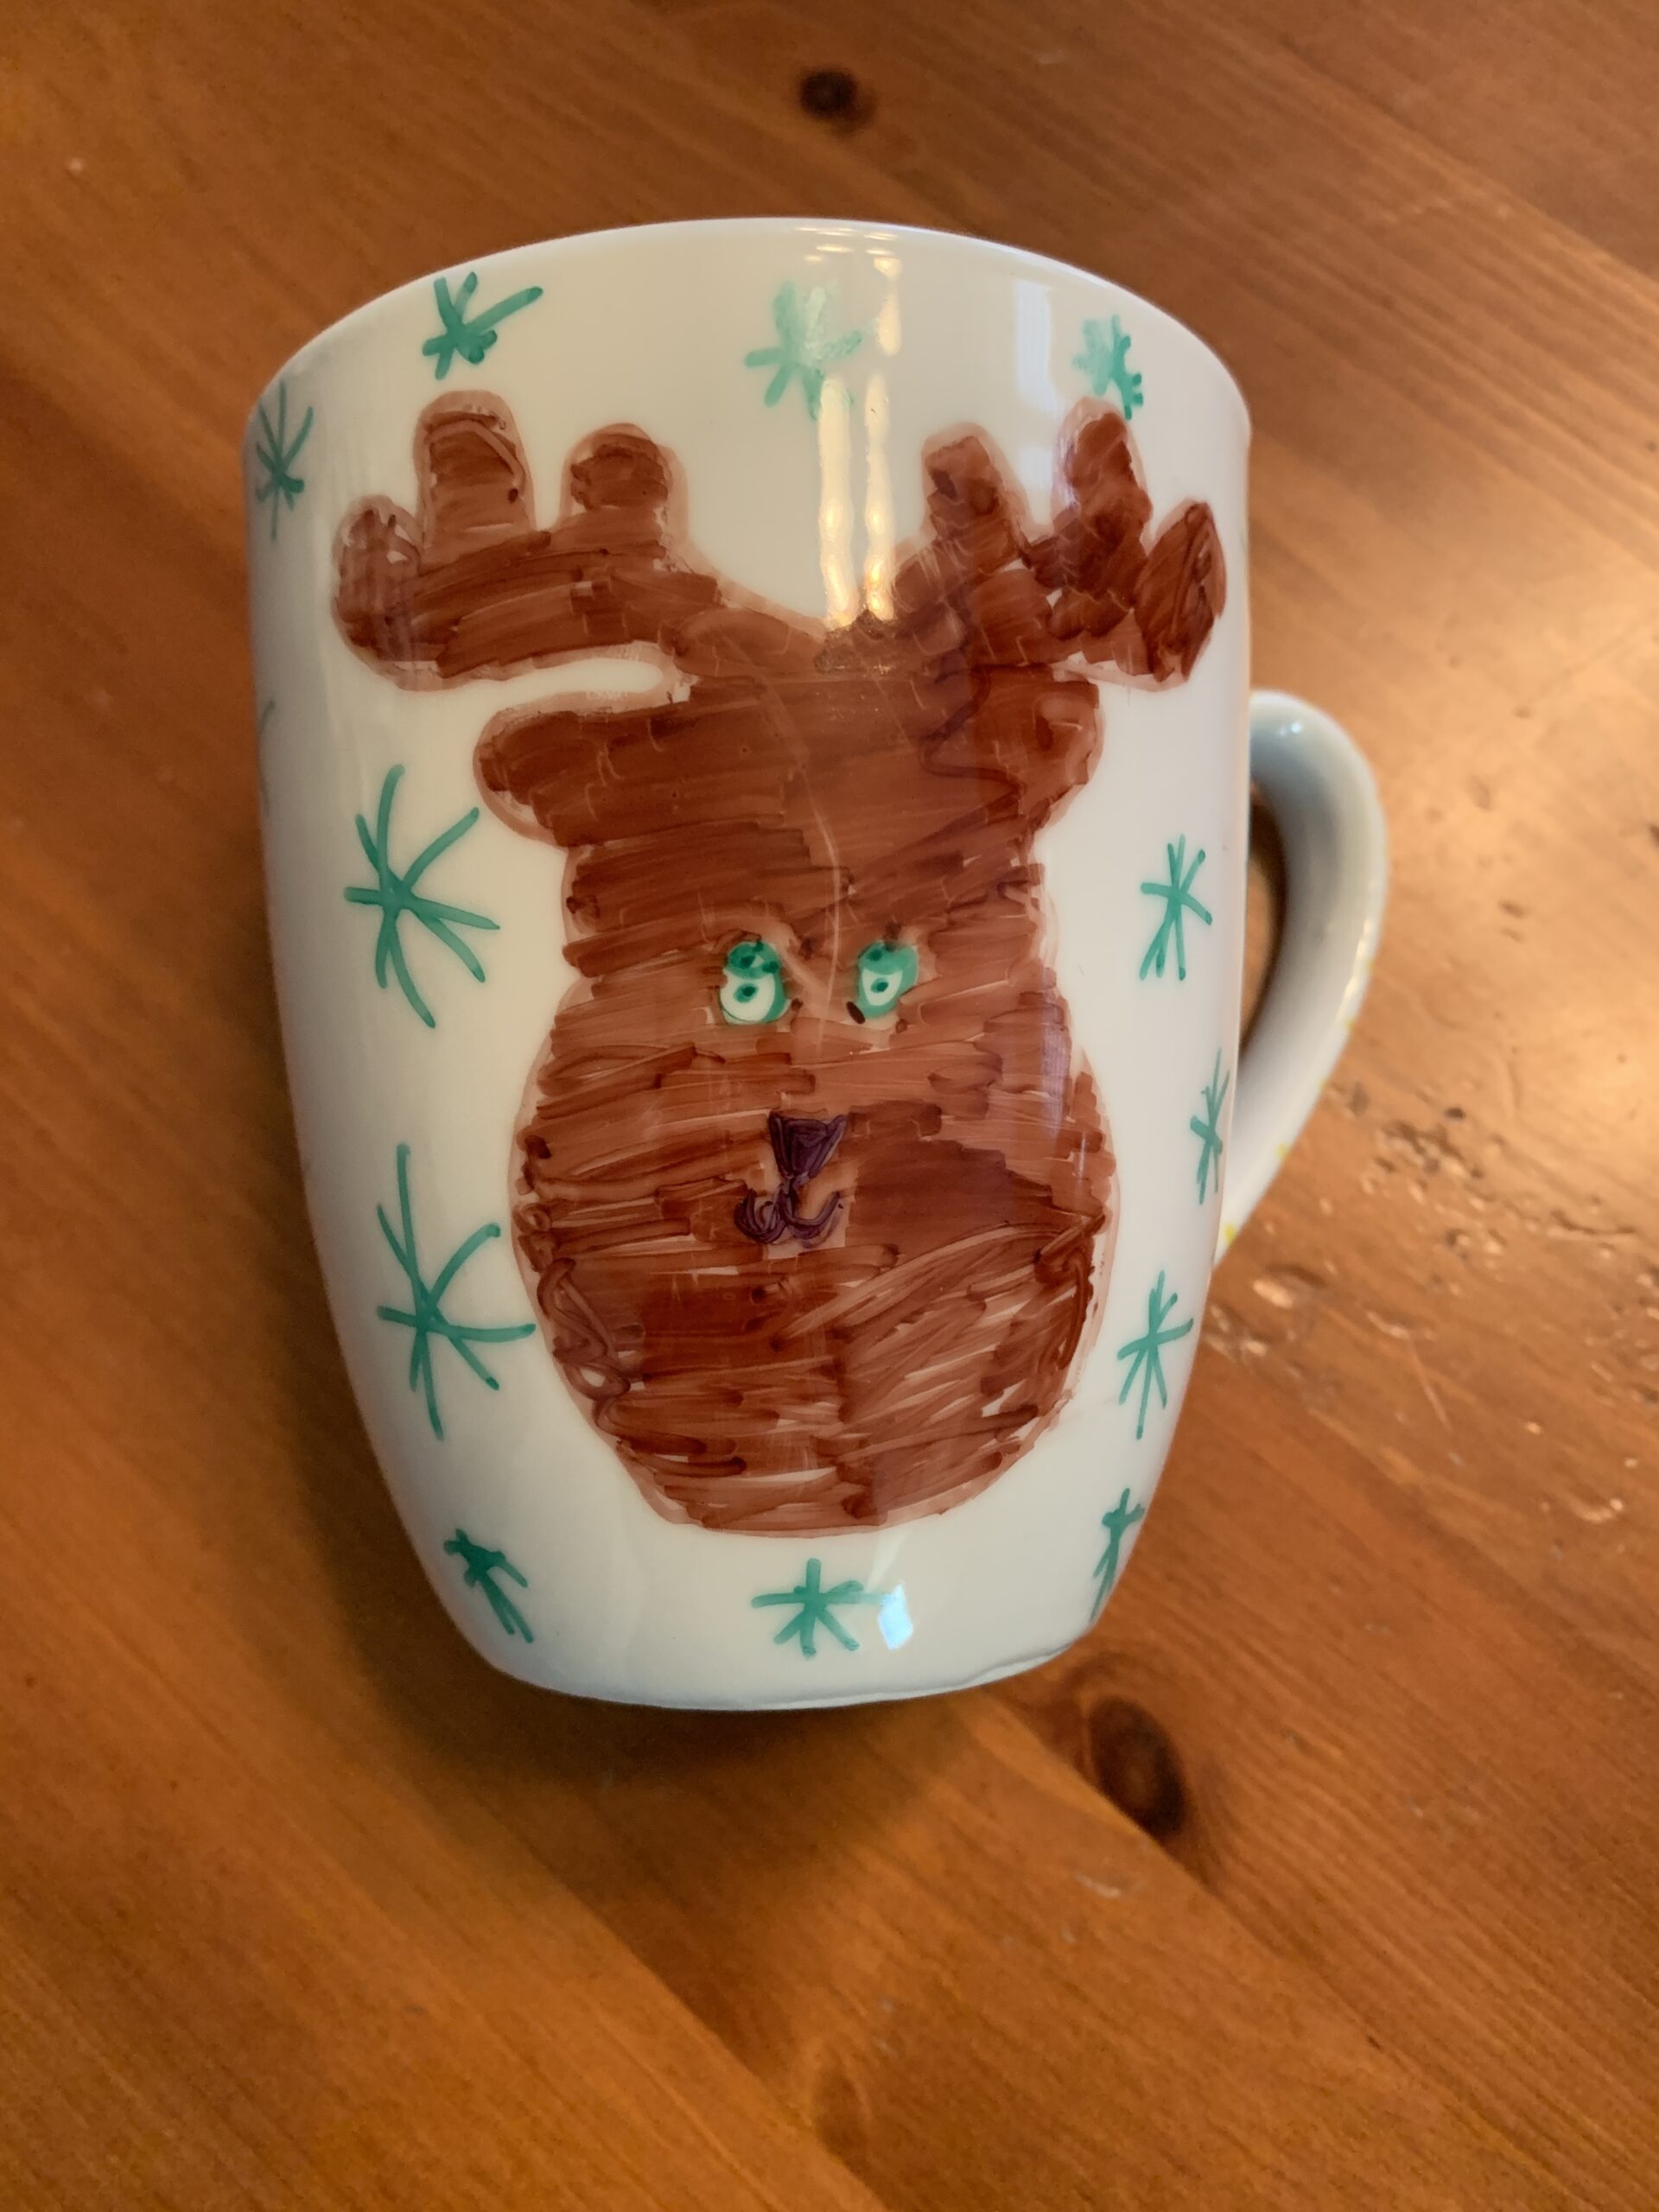
You can add another word or pattern to dot around. You can ditch the pattern and go freehand. Draw anything you’d like on the mug.
In addition to your design how about adding a quote, saying or special message in your own handwriting.
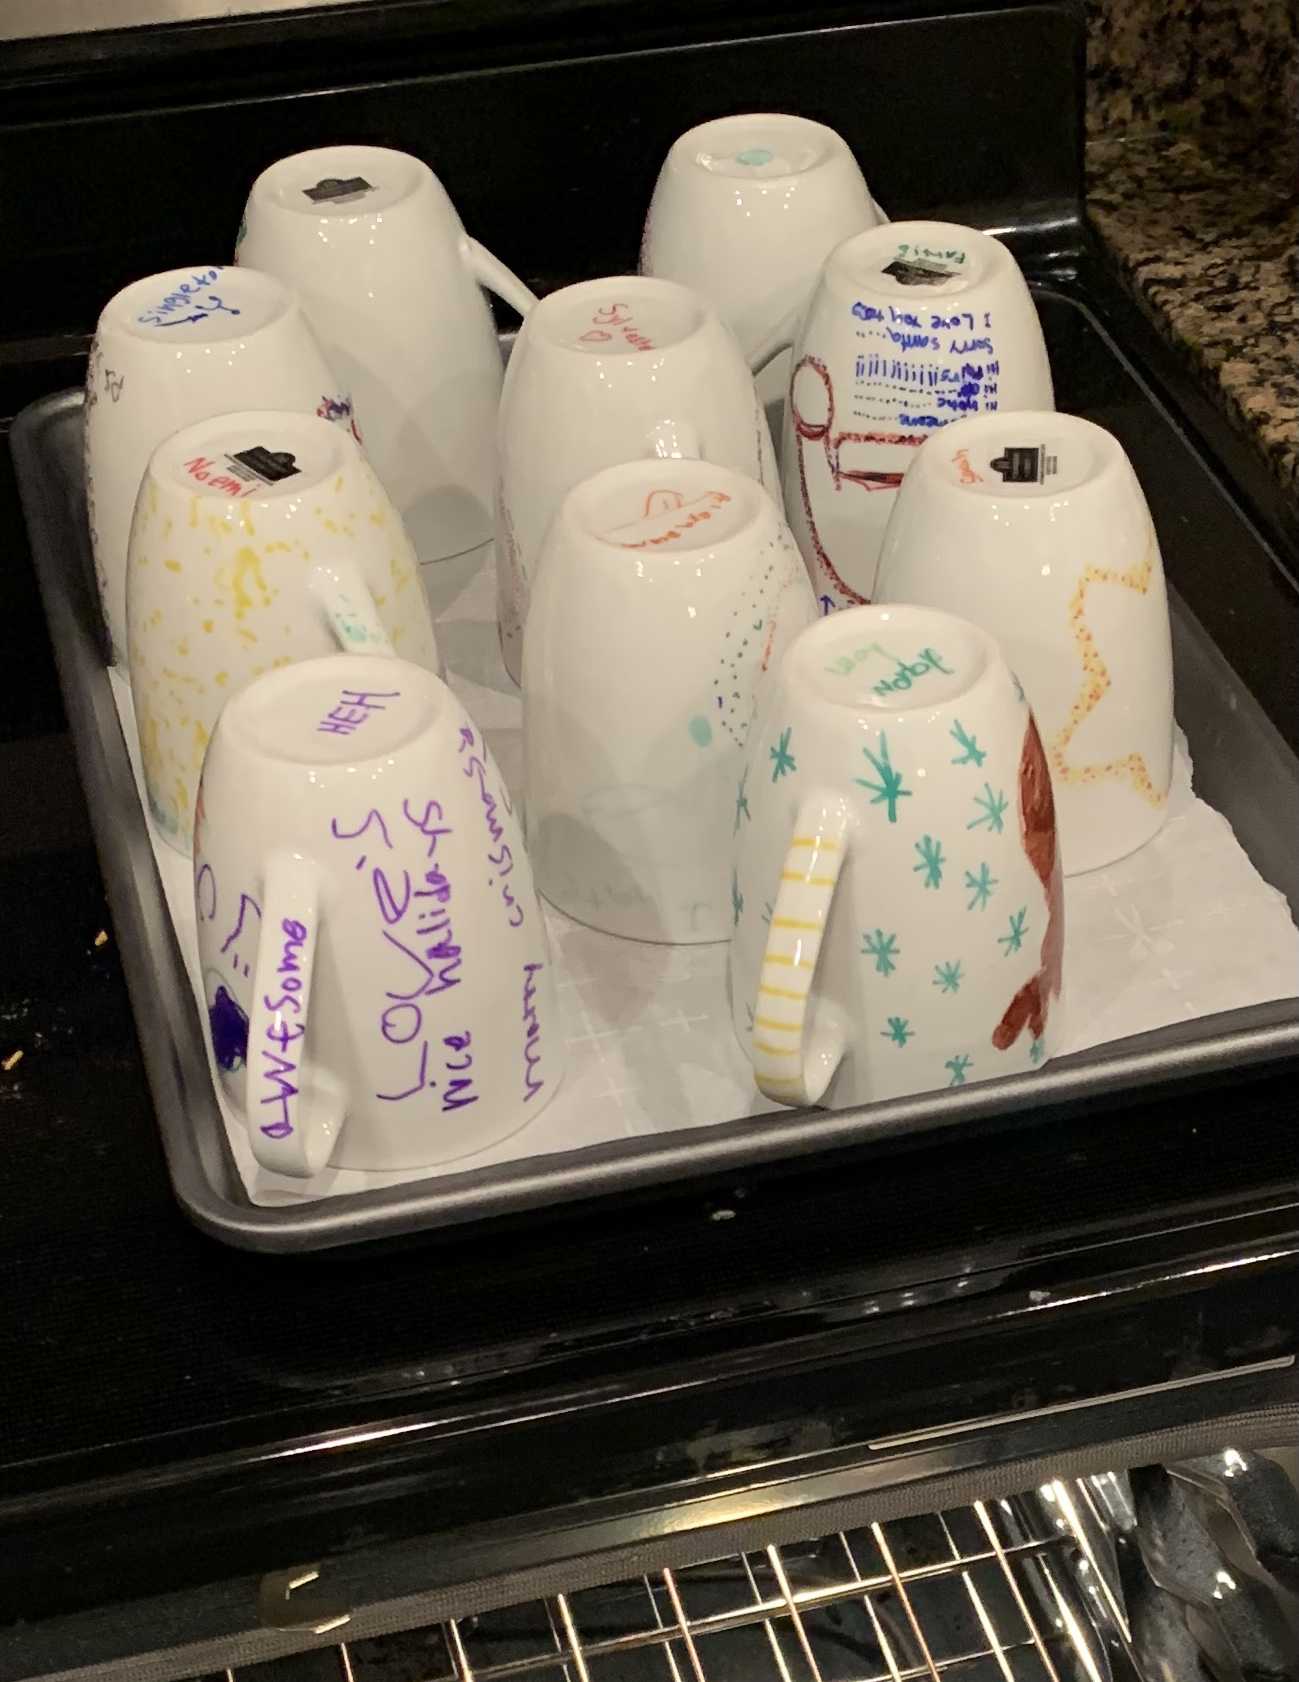
Don’t forget the handle of the mug. It’s a great place to add some extra detail and color. Or flip the mug over and add your TO: and FROM: to the bottom of the mug.
Setting the Design of Your DIY Dotted Mug
Once you have the mug just the way you like it and the patterns have been removed it’s time to pop the mug into the oven.
Start by placing your mug on a cookie sheet and into a cool oven. Turn the oven on to 250°F. Then bake your mug (or mugs) for 2 hours. This allows the ink to set on your mug.
When the 2 hours are up turn the oven off and let the mug stay inside the oven until it has completely cooled. As a result, your mug won’t have any cracking.
When I tried this there were a few mugs after baking that still smudged a little when touched or washed off a little in the dishwasher. Hand washing these mugs might be the best way to go.
Wrapping it all Up
Finally, your dotted mug is all finished. Grab a bag of your favorite candy to fill the mug with. Or, add a little gift inside.
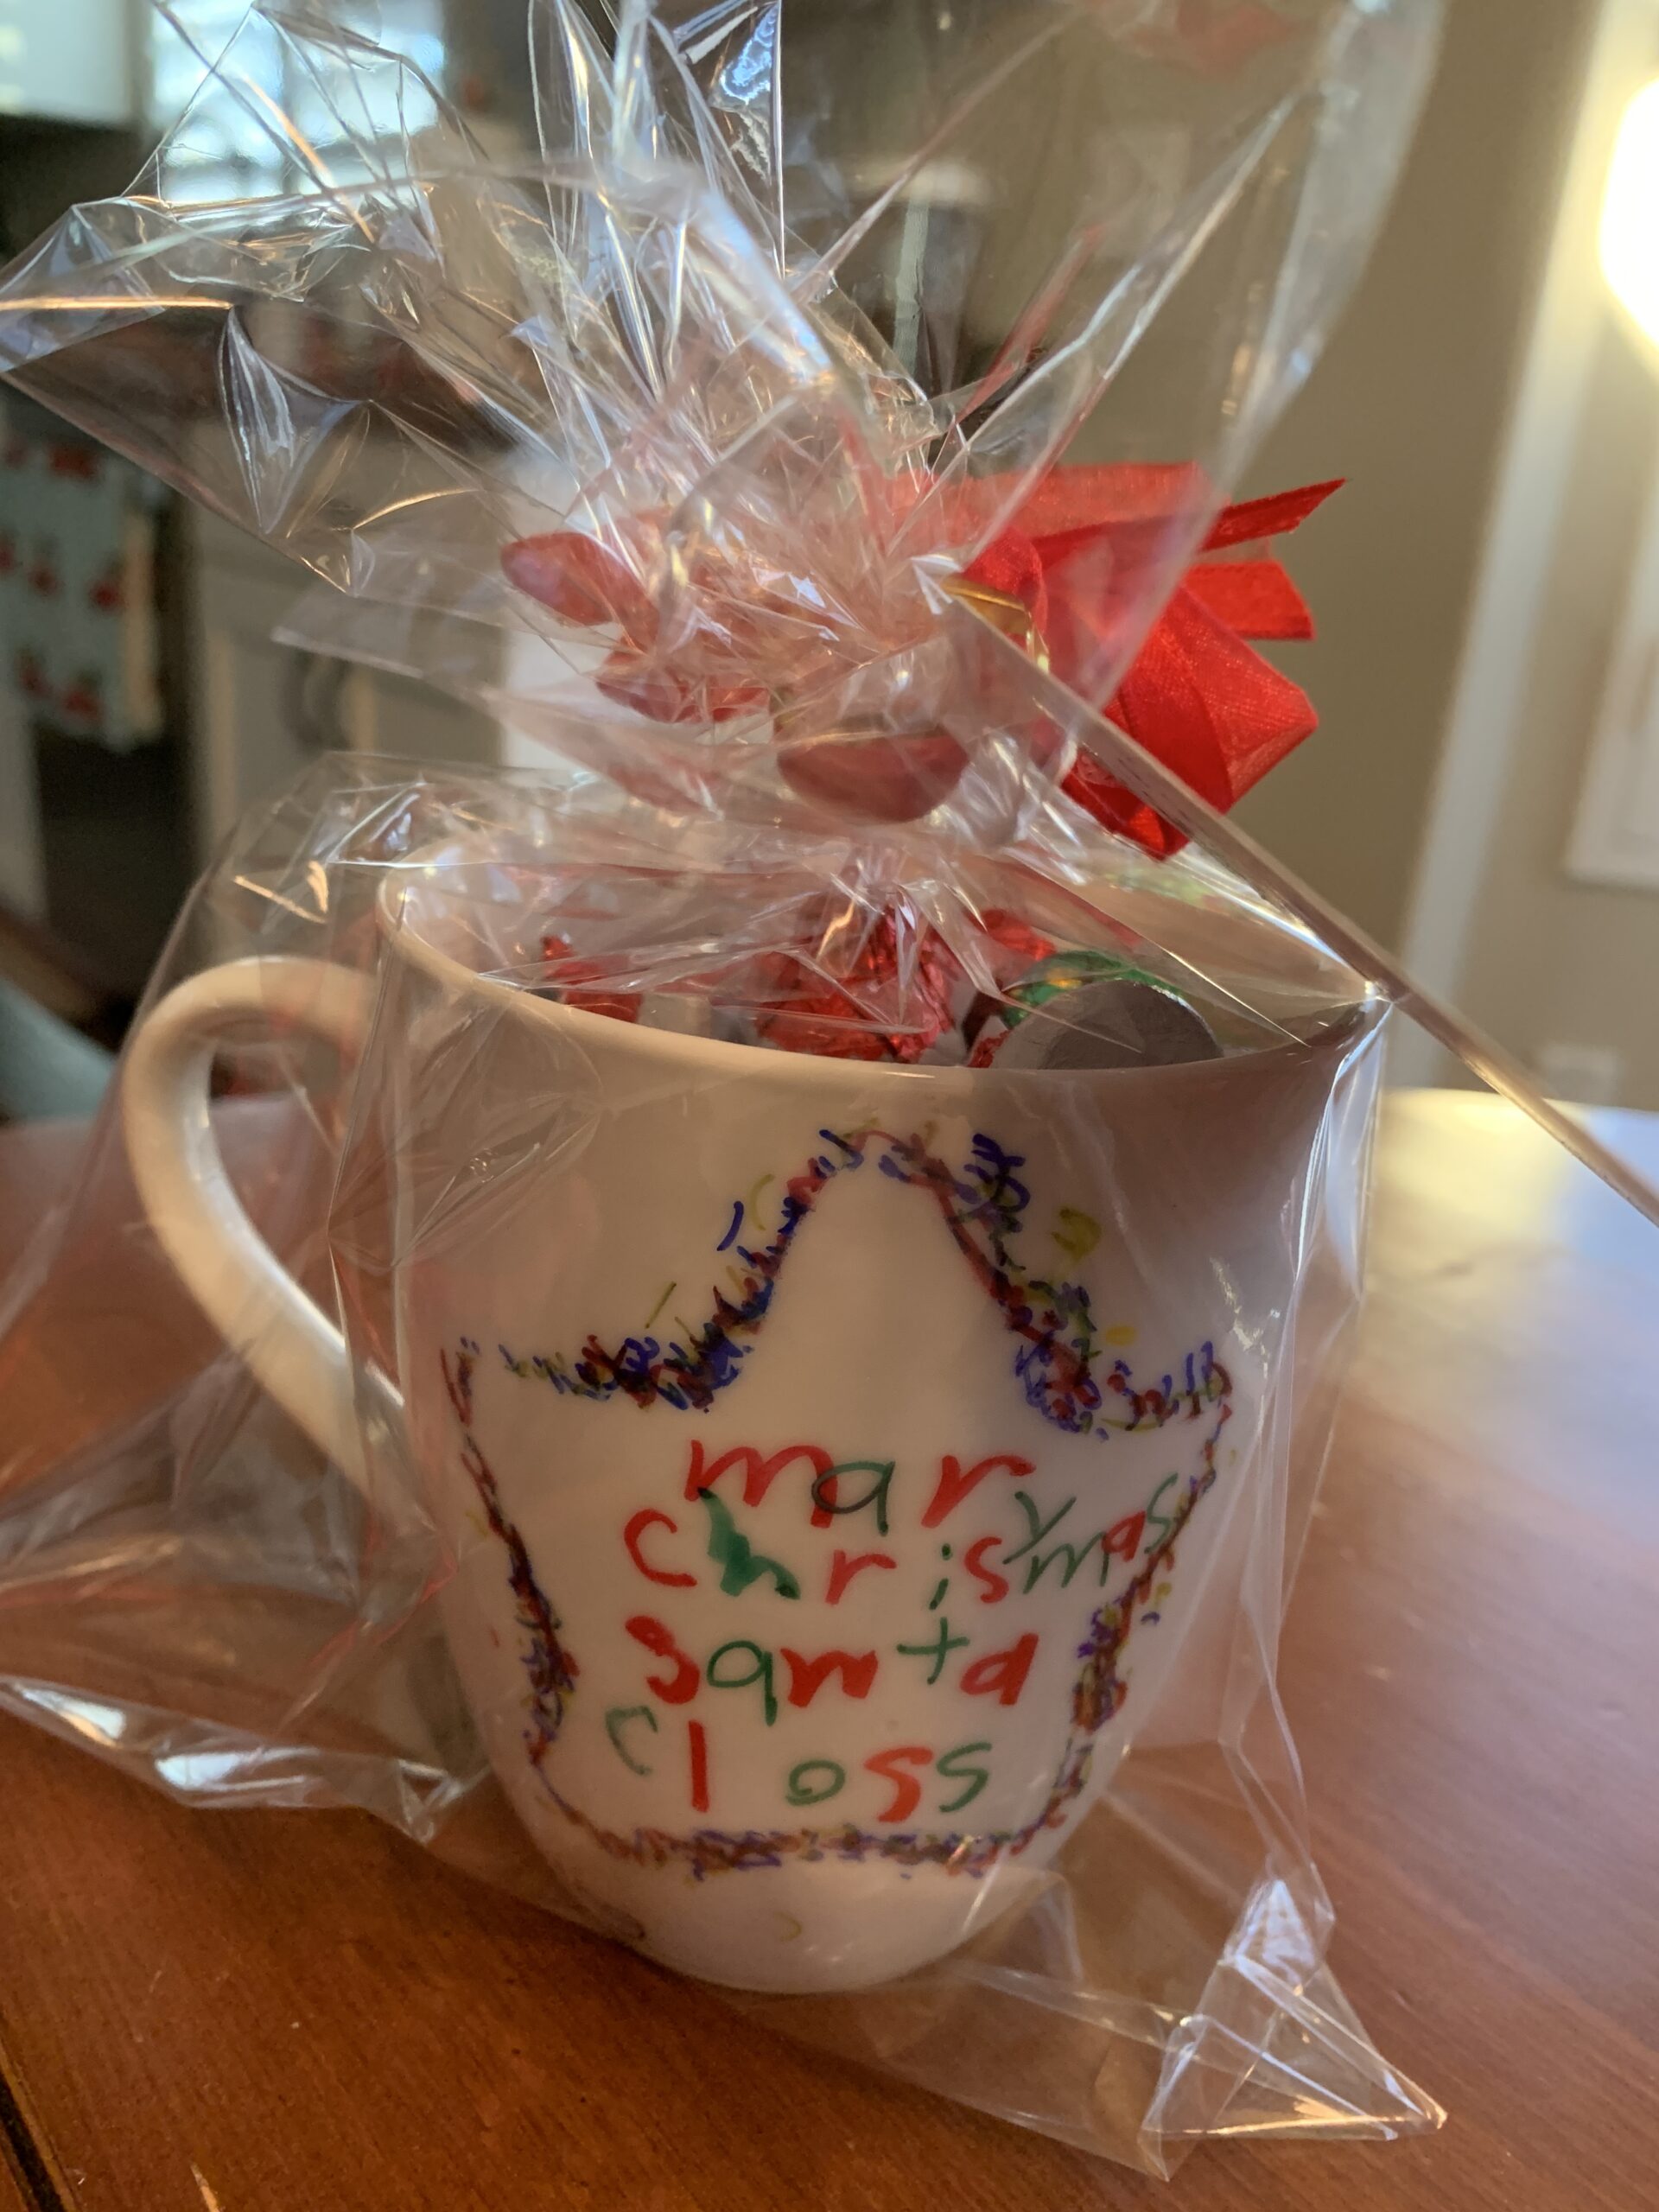
You can wrap it in a cellophane/plastic gift bag and tie it off with ribbon. If you don’t want the receiver to know what you have wrapped then add some tissue paper around your mug before putting it in the bag.
That’s it! You’re all finished making a DIY dotted Christmas mug. A budget friendly, creative and easy gift that you can make with the kiddos for anyone on your Christmas list!