
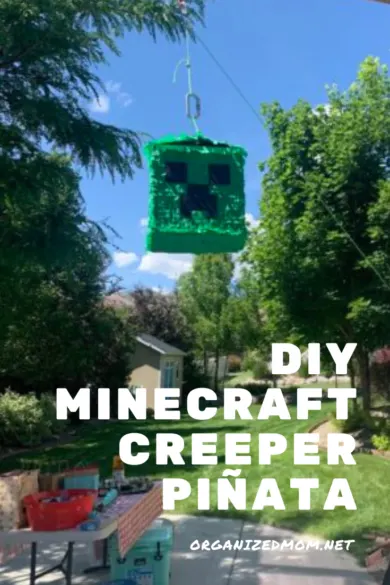


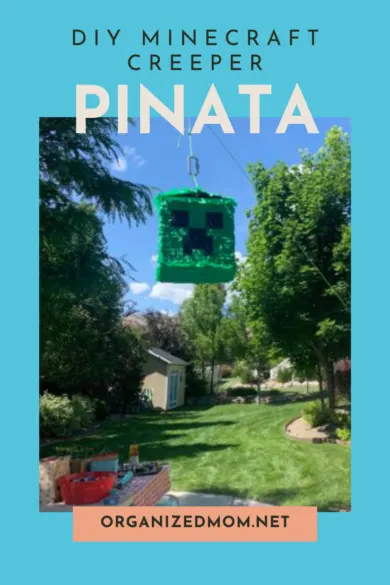
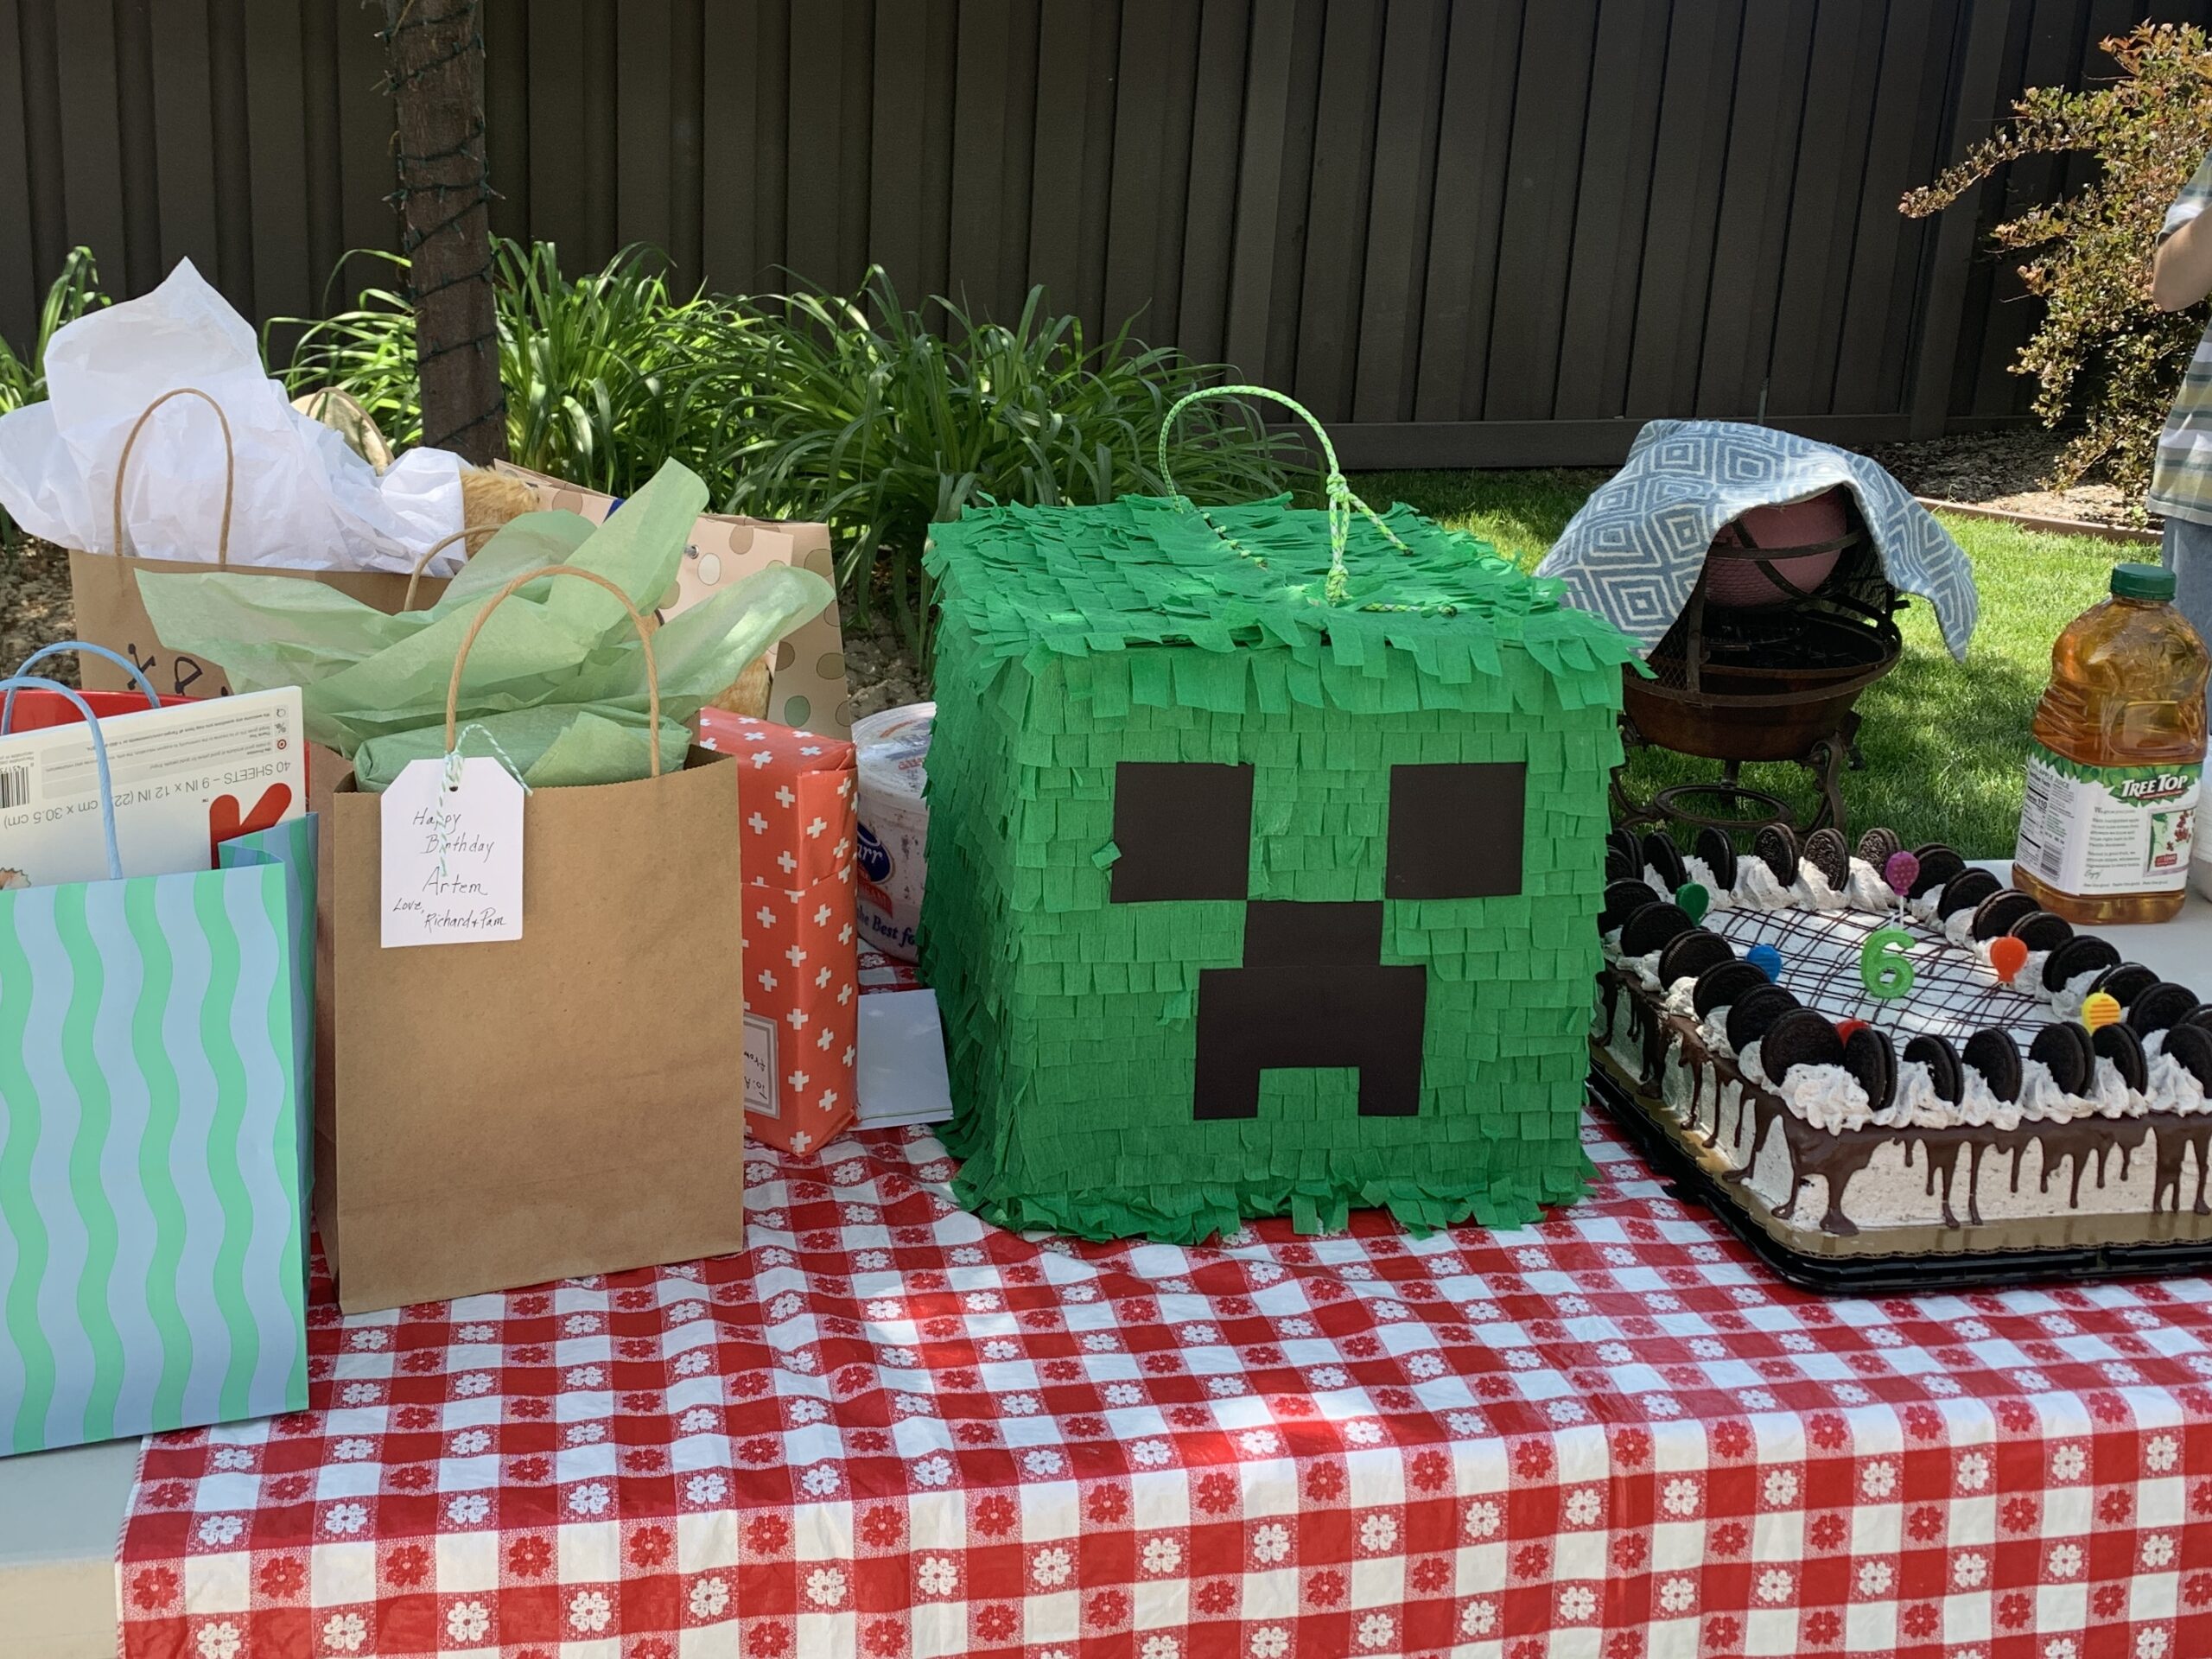
If there is a Minecraft fan in the house then this DIY Minecraft Creeper piñata is for you. With a few household items you will have a DIY Minecraft pinata in no time!

Easy Homemade Piñata for Minecraft Fans
In the past the piñatas I have made have been out of newspaper and homemade paste (paper mache). To see that process check out this tutorial. That was the plan for this piñata but with the evolution of online news I found it surprisingly hard to find enough newspaper. So I needed a new plan for my piñata making.
That’s when I was introduced to making a piñata with a cardboard box. It sounded much easier than messing with paper mache and waiting for it to dry (over and over and over). You’ll just need a few household items to make this DIY Minecraft Creeper piñata.
Why Make Your Own Pinata?
There are several reasons why you should make your own Creeper Pinata:
1. Cost-effective: Making your own pinata is much more affordable than buying one from a store. By using household items and a cardboard box, you can save money and still have a fun and interactive activity for your Minecraft-themed party. After looking around online, even finding some of the top deals, I saw these pinatas go for anywhere between $50-100. To me, that’s absolutely INSANE for a pinata when I can make it at home for nowhere near that and still have the perfect thing for the Minecraft birthday party.
2. Customization: When you create your own pinata, you have complete control over the design and appearance. With a DIY Minecraft Creeper pinata, you can ensure that it perfectly matches the theme of your party and captures the essence of the game.
3. Personal touch: Making a pinata from scratch allows you to add a personal touch to your party preparations. It can be a fun and creative project that you can involve your kids or friends in, making it a memorable bonding experience.
4. Creative outlet: Designing and crafting your own pinata provides a creative outlet for you to express your artistic skills. You can experiment with different colors, shapes, and materials, giving you the freedom to create a unique and eye-catching pinata that will impress your guests.
5. Fun activity: Making a pinata can be a fun activity in itself. It can be a great way to spend time with your family or friends, and it adds an element of anticipation and excitement to birthday parties. Plus, breaking the pinata and seeing the treats inside is always a thrilling moment for everyone involved, even if you know exactly what is in it.
By making your own DIY Minecraft Creeper pinata, you’re not only going to save money, but you also add a personal touch to your party. Your guests will appreciate the effort and thought put into the pinata, making it a memorable part of the celebration.
So why wait? Put on your crafting hat and get ready to create a one-of-a-kind Minecraft Creeper pinata that will be the highlight of your next party!
5 Easy Steps to Make a Minecraft Creeper Piñata
Step 1: Gathering Supplies
First things first, gather your supplies. You will need a cardboard box, glue sticks, green crepe paper and a piece of black paper (black construction paper works nice also), paracord (or some other strong rope/string to tie it shut), scissors and some candy. That’s it, you’ve finished the first thing!
Step 2: Picking a Minecraft Creeper box
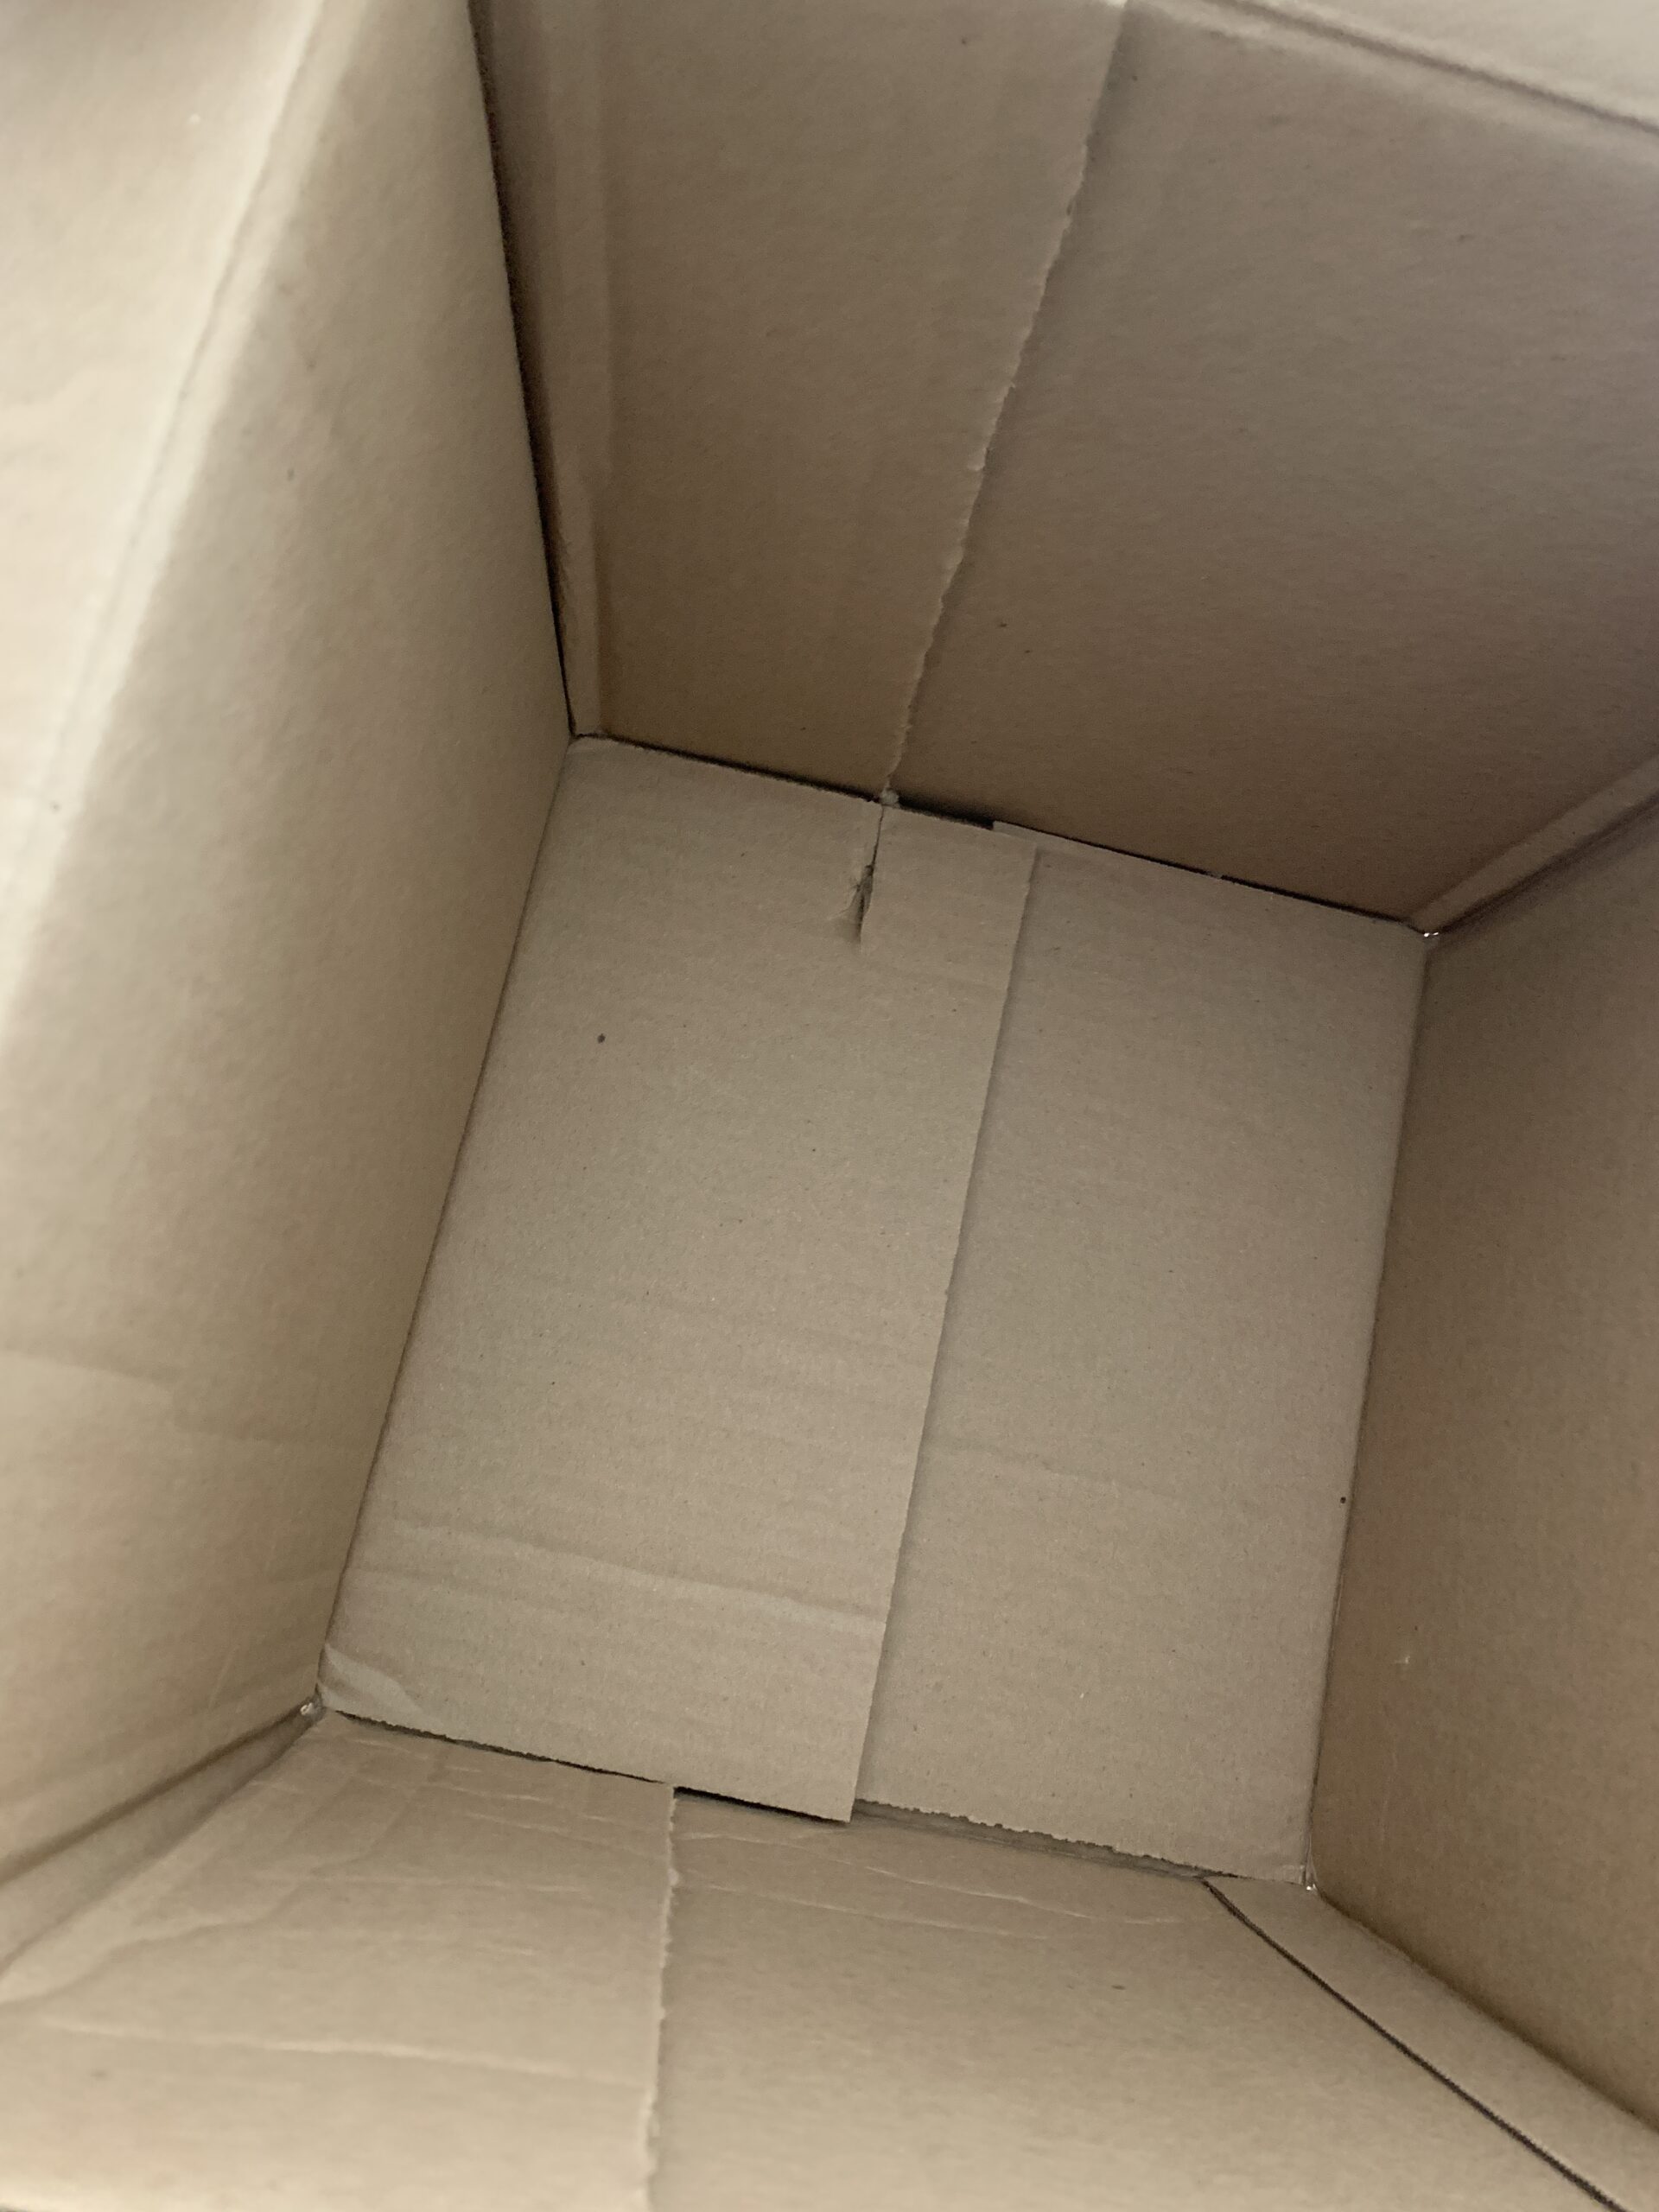
The trick to the Creeper is finding the right size of box. You can find one at the store like this one from Walmart for about $1.50. The only problem is it’s more of a rectangle shape than the square we are wanting for the Creeper.
After looking around online I ended up using a box I had received in the mail. It was also more of a rectangle but I was easily able to fix that by cutting the end of the box all the way around and then moving the cut portion farther into the box. Once it was in the square shape I wanted I was able to tape it in place. Tada!
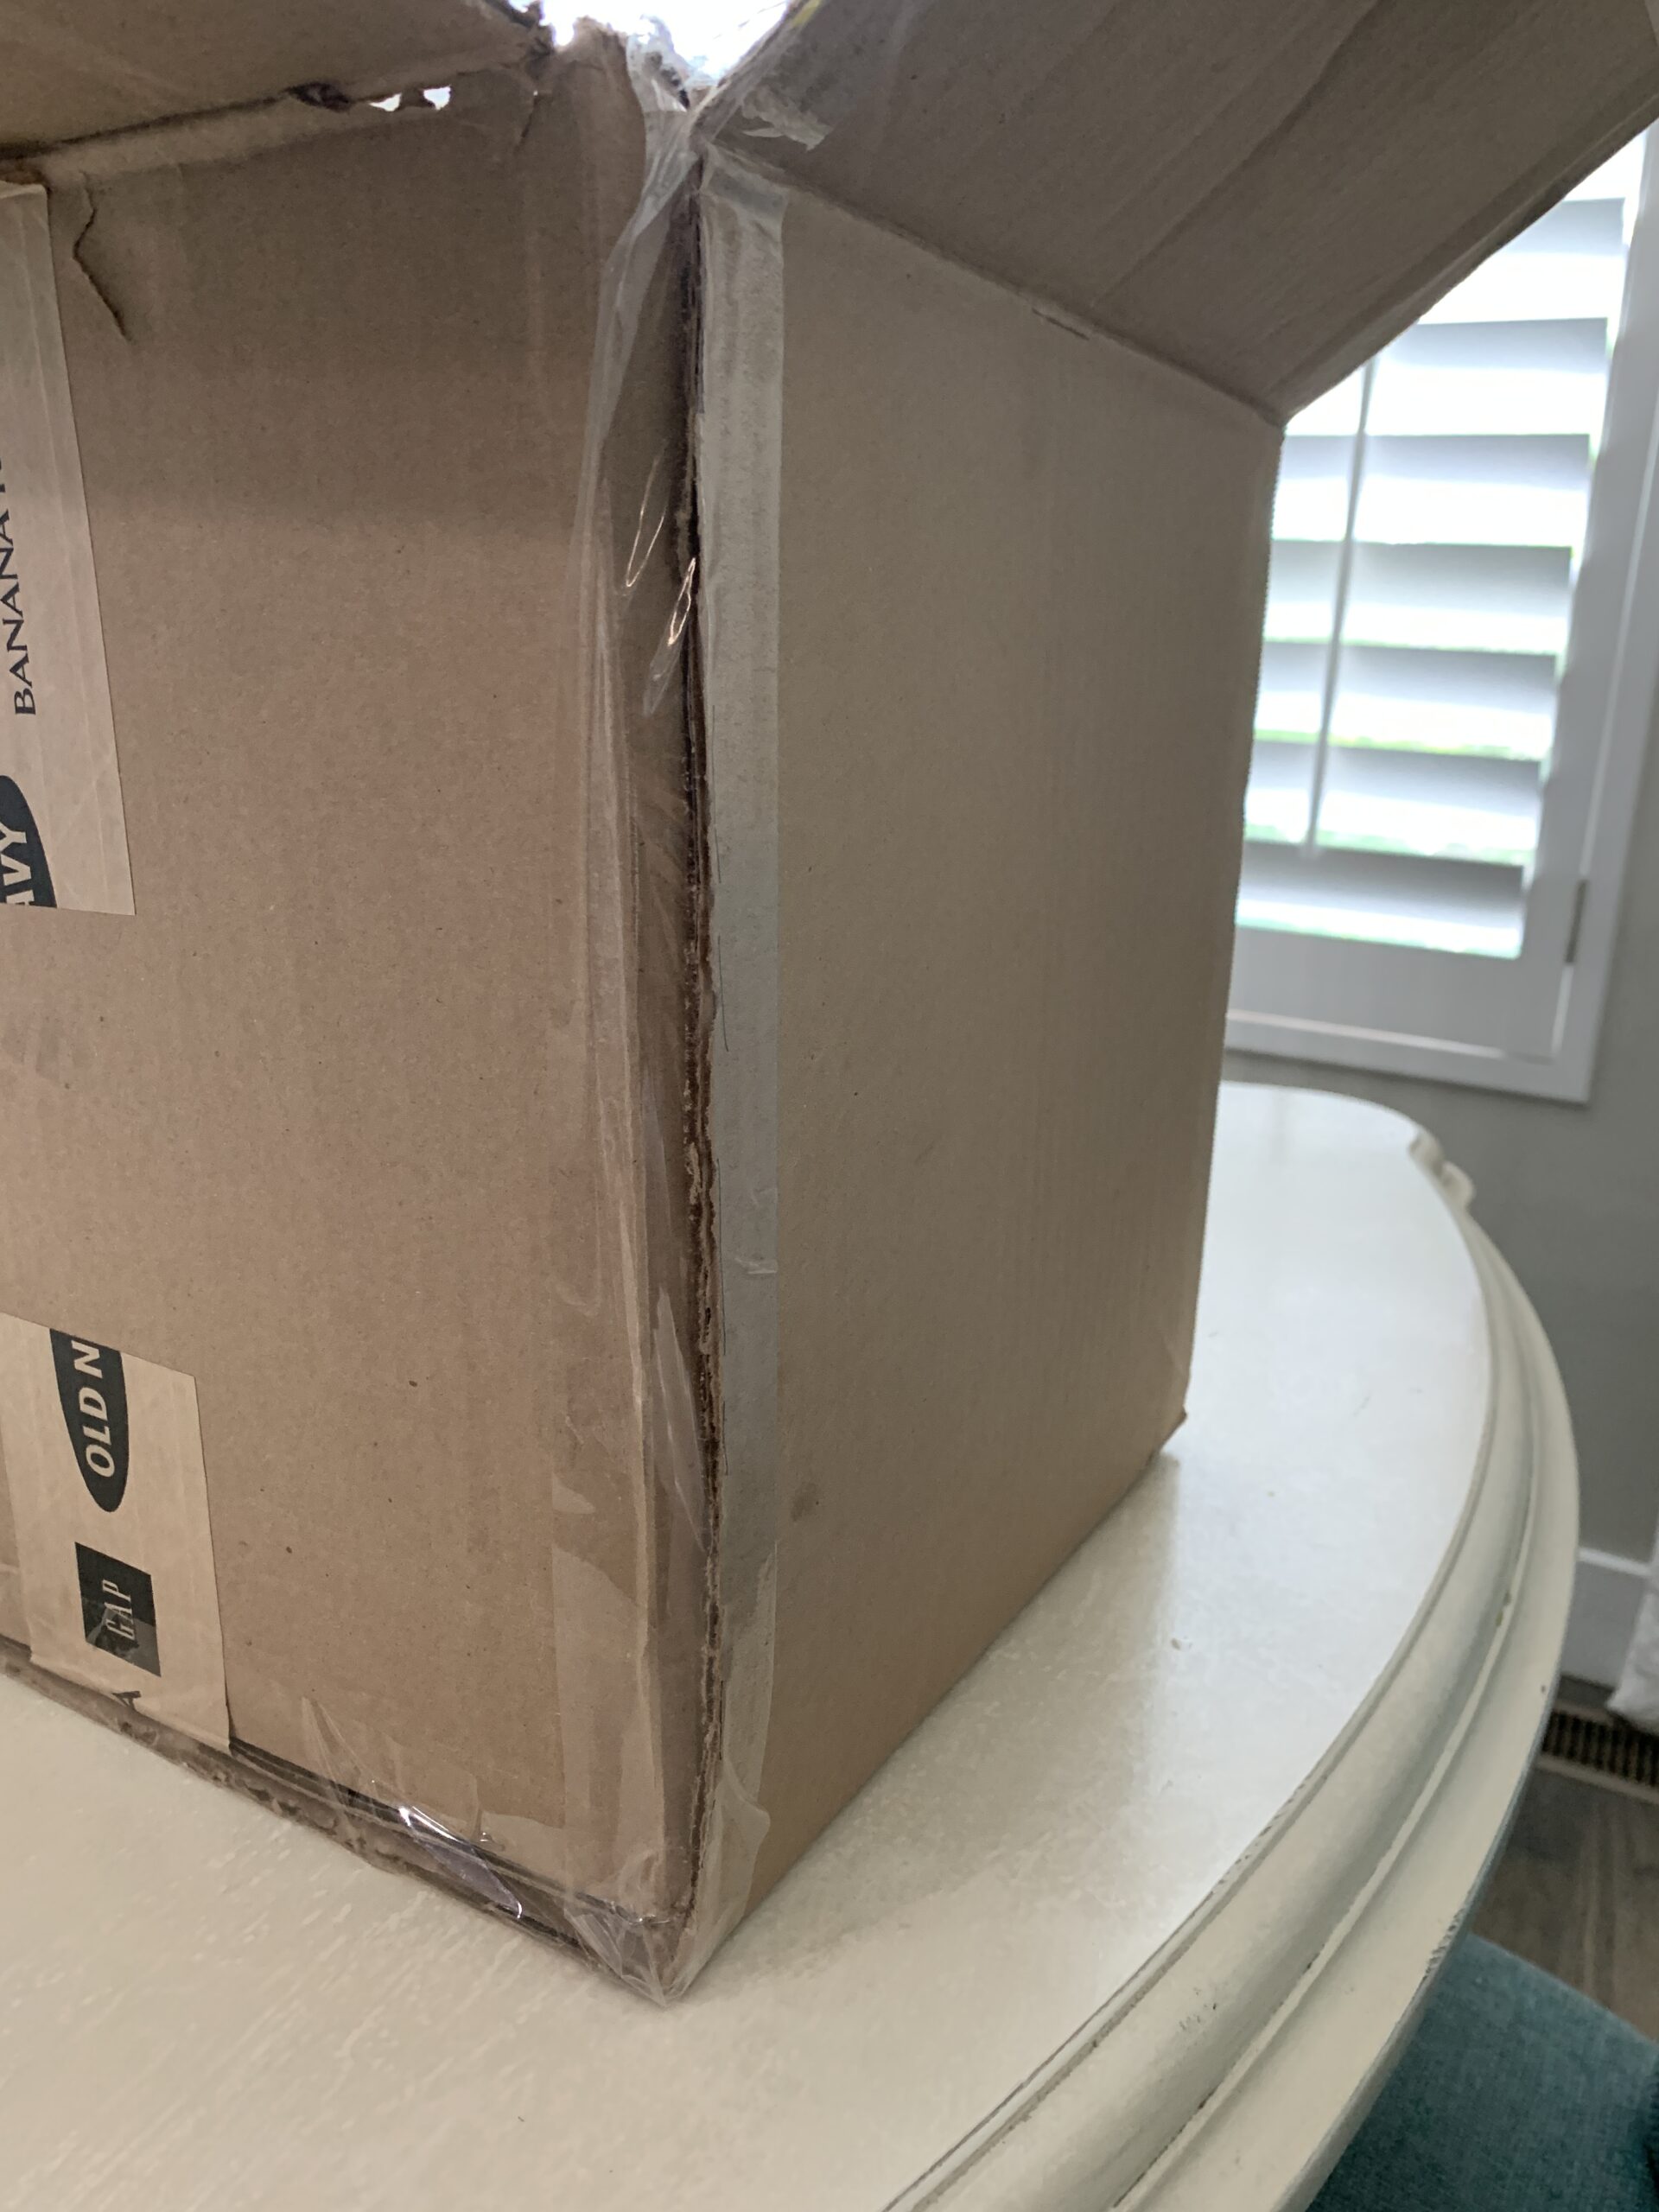
You’d be surprised at the amount of boxes you may have on hand and I found that I had the greatest selection for the best price (already paid for, lol) at my house versus online or the store. Just keep the size of pinata that you’re going for when checking out what you already have on hand.
And remember the basic shape you need to make it look like a Creeper head.
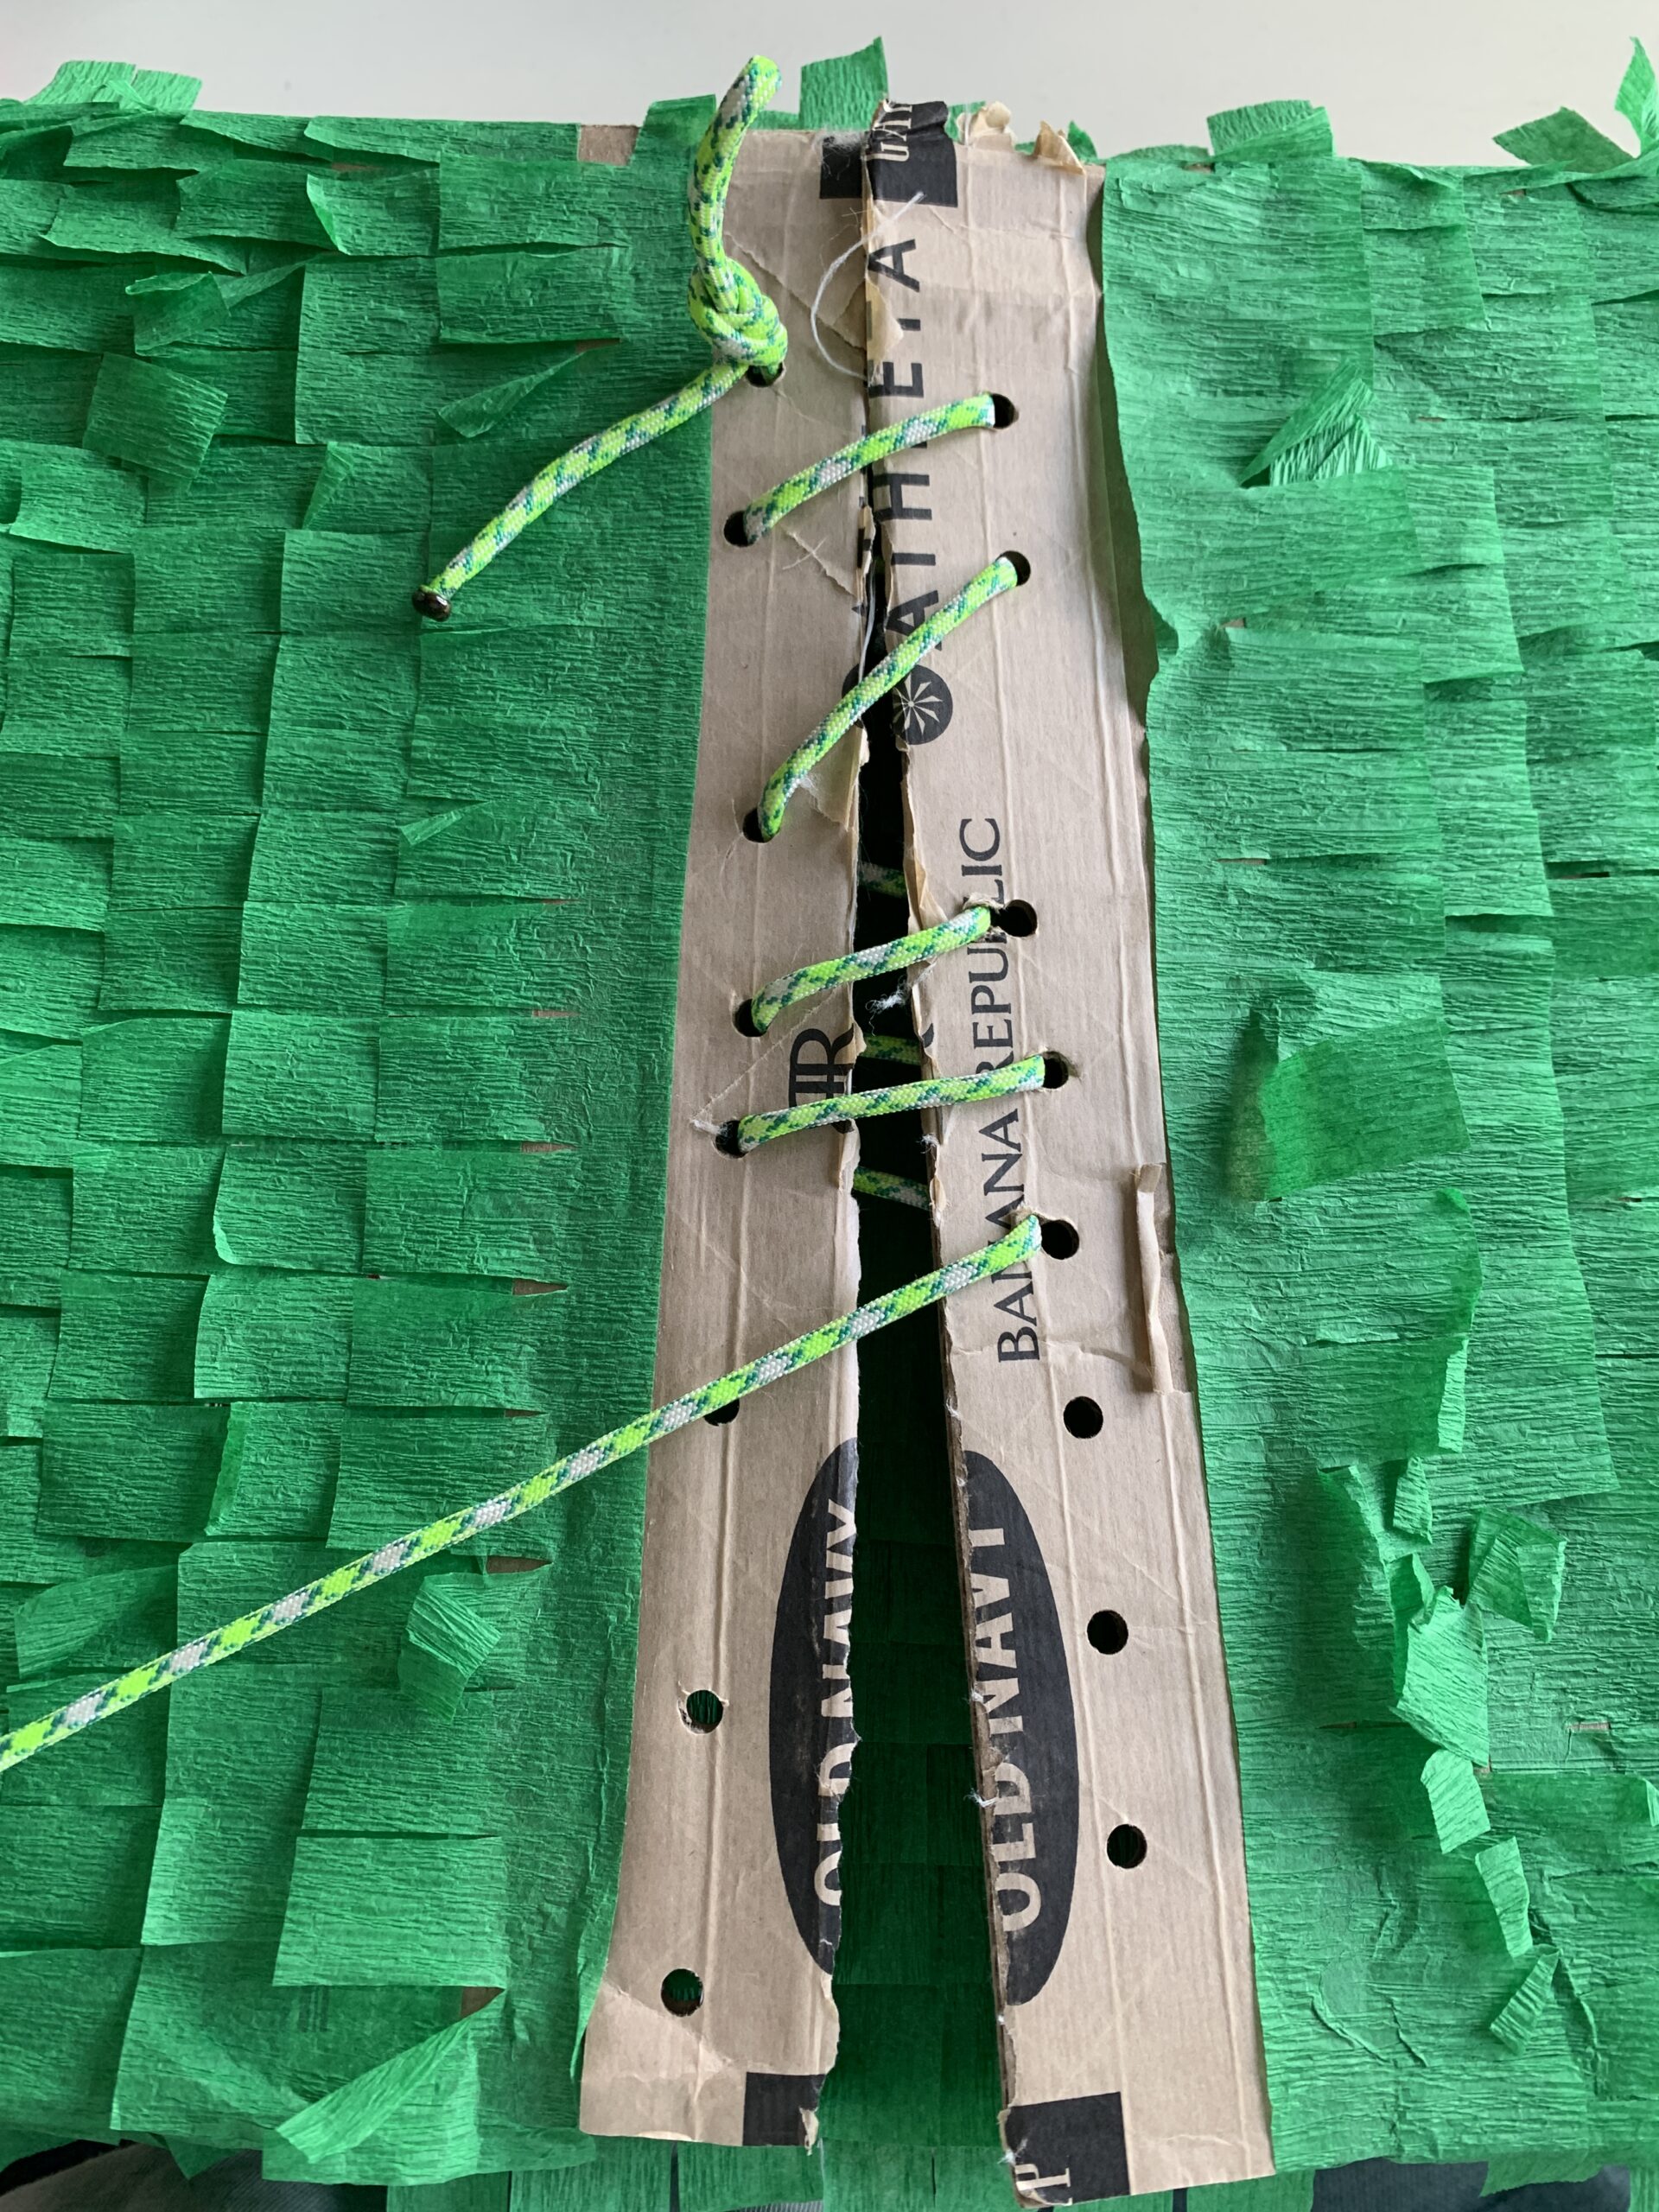
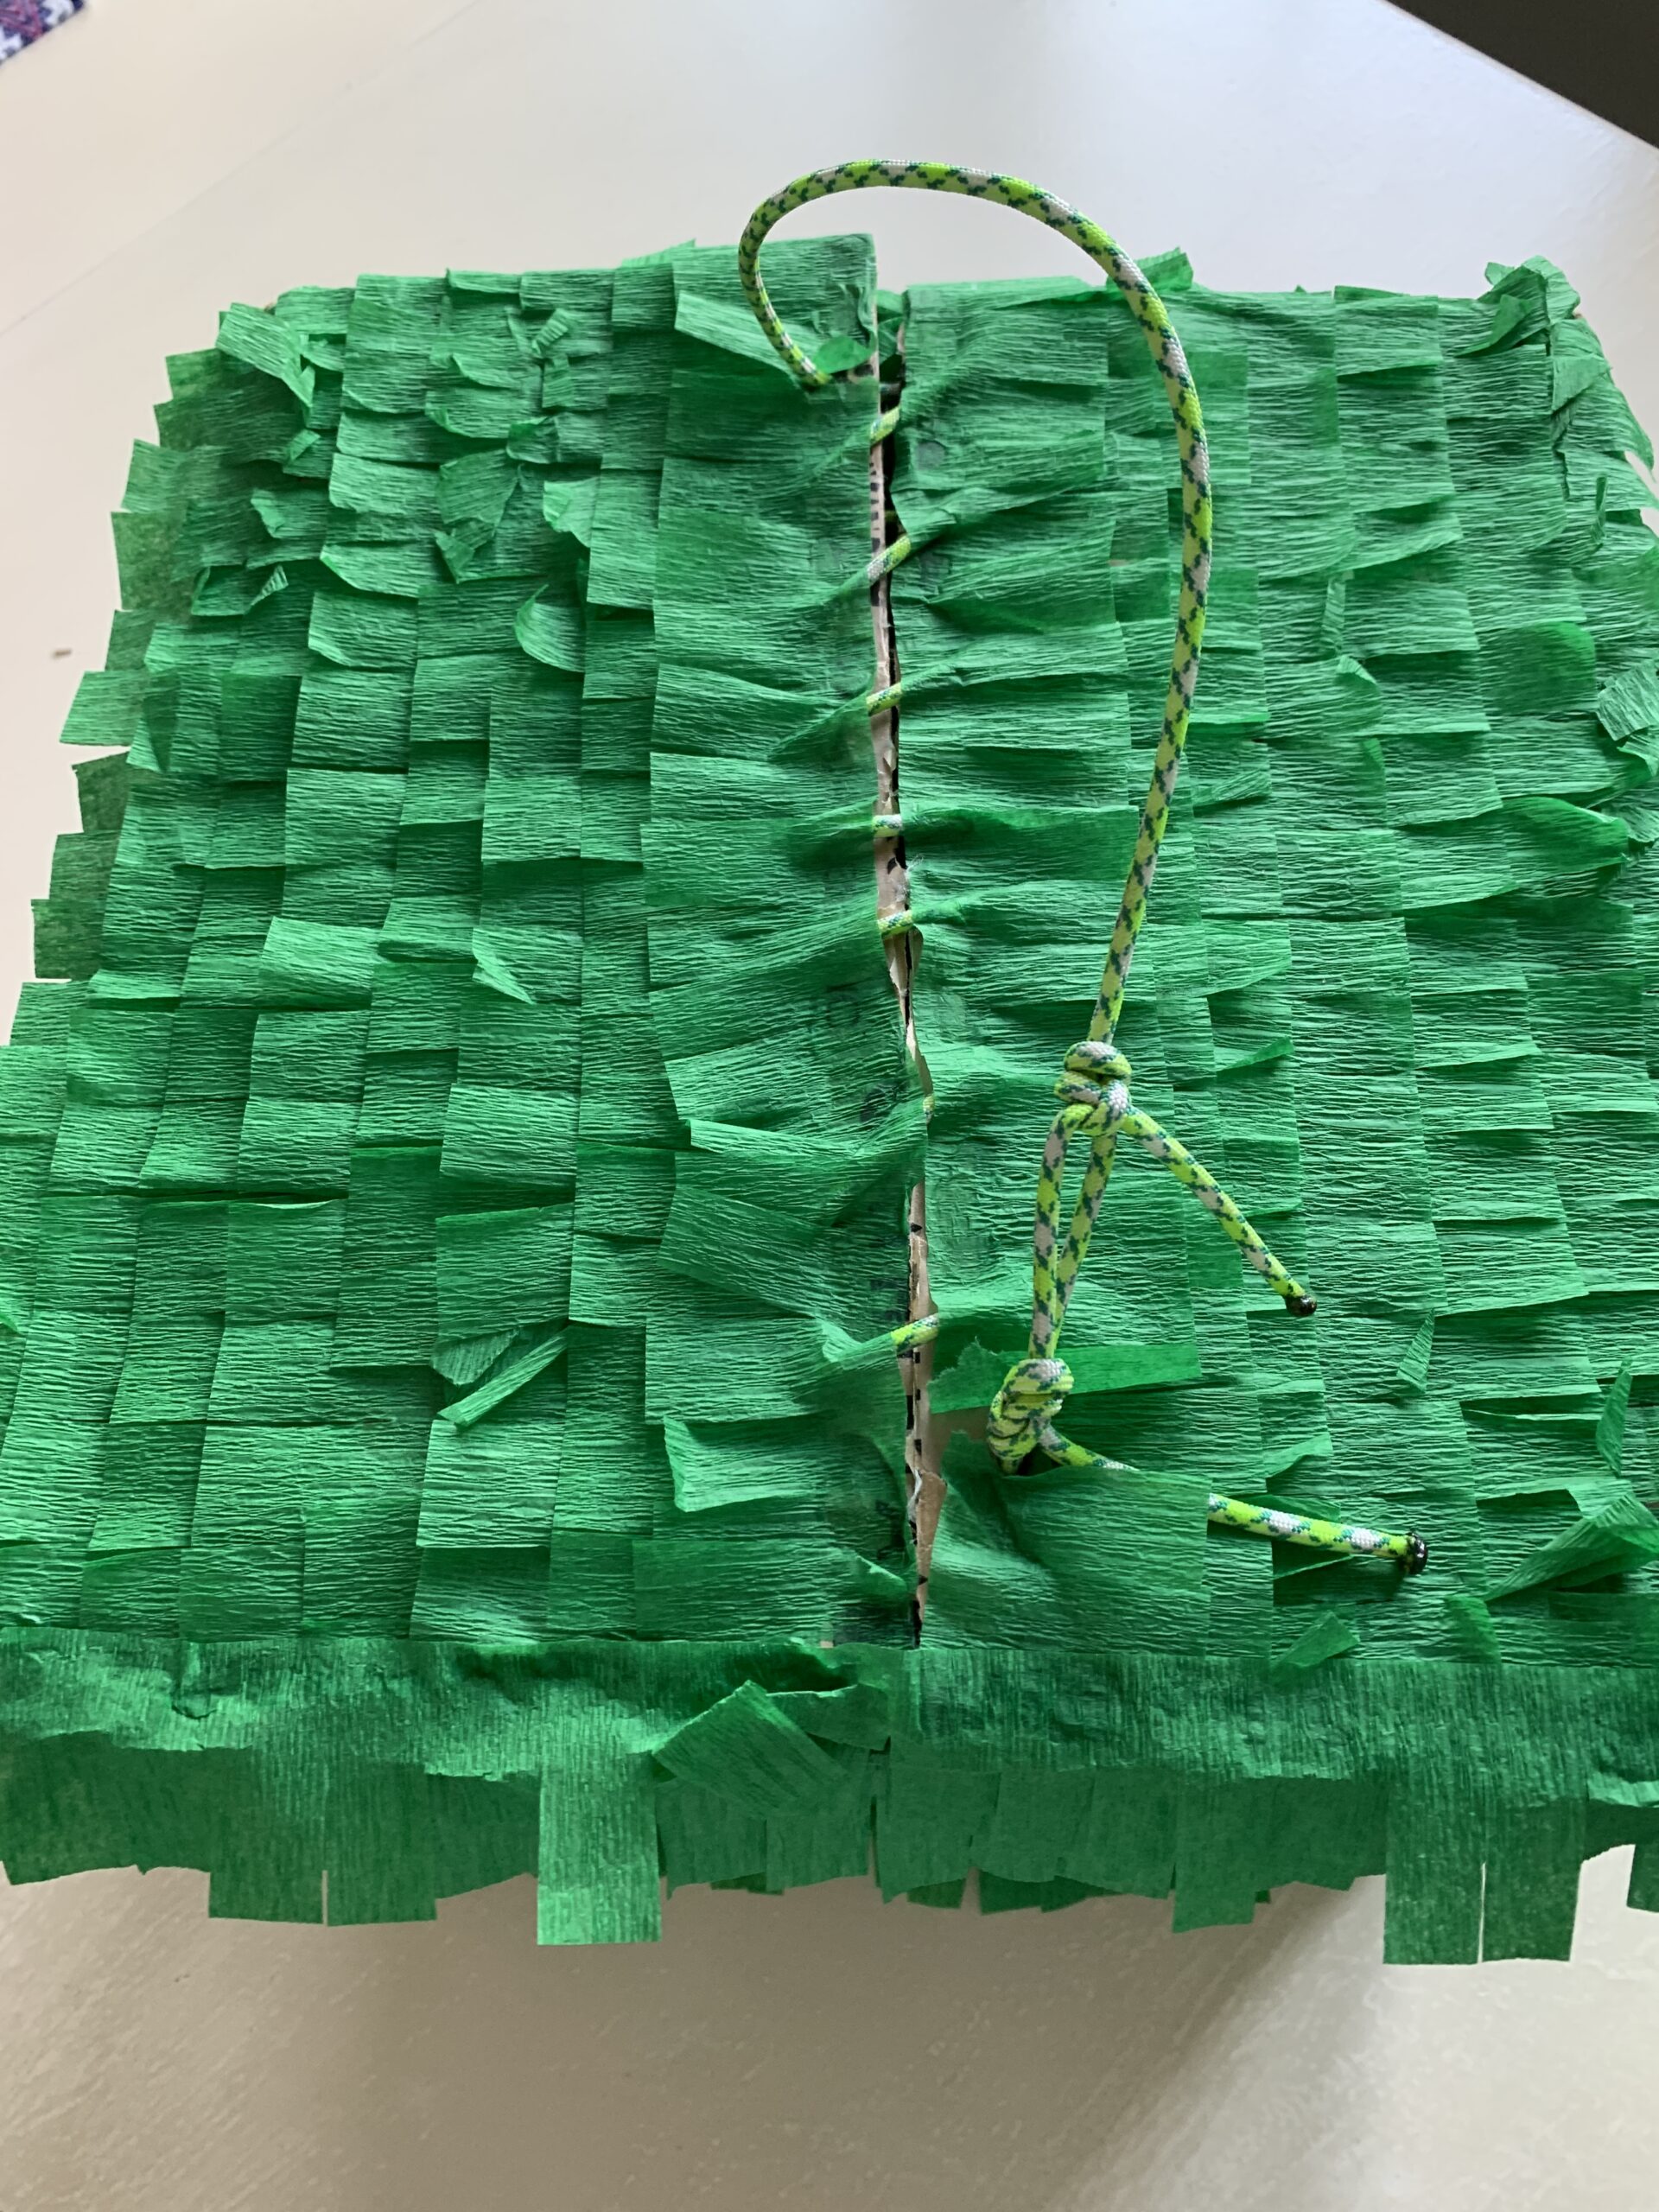
Before beginning the crepe paper use a hole punch to put holes on the outside flaps of the lid that will close the box. The holes will be at the edge of the flap (closest to the center) and similar holes on the opposite flap. The idea is to make it so you can “sew” it up at the end. No need for packing tape or shipping tape to try to tape it closed.
Step 3: Cutting Your Crepe Paper
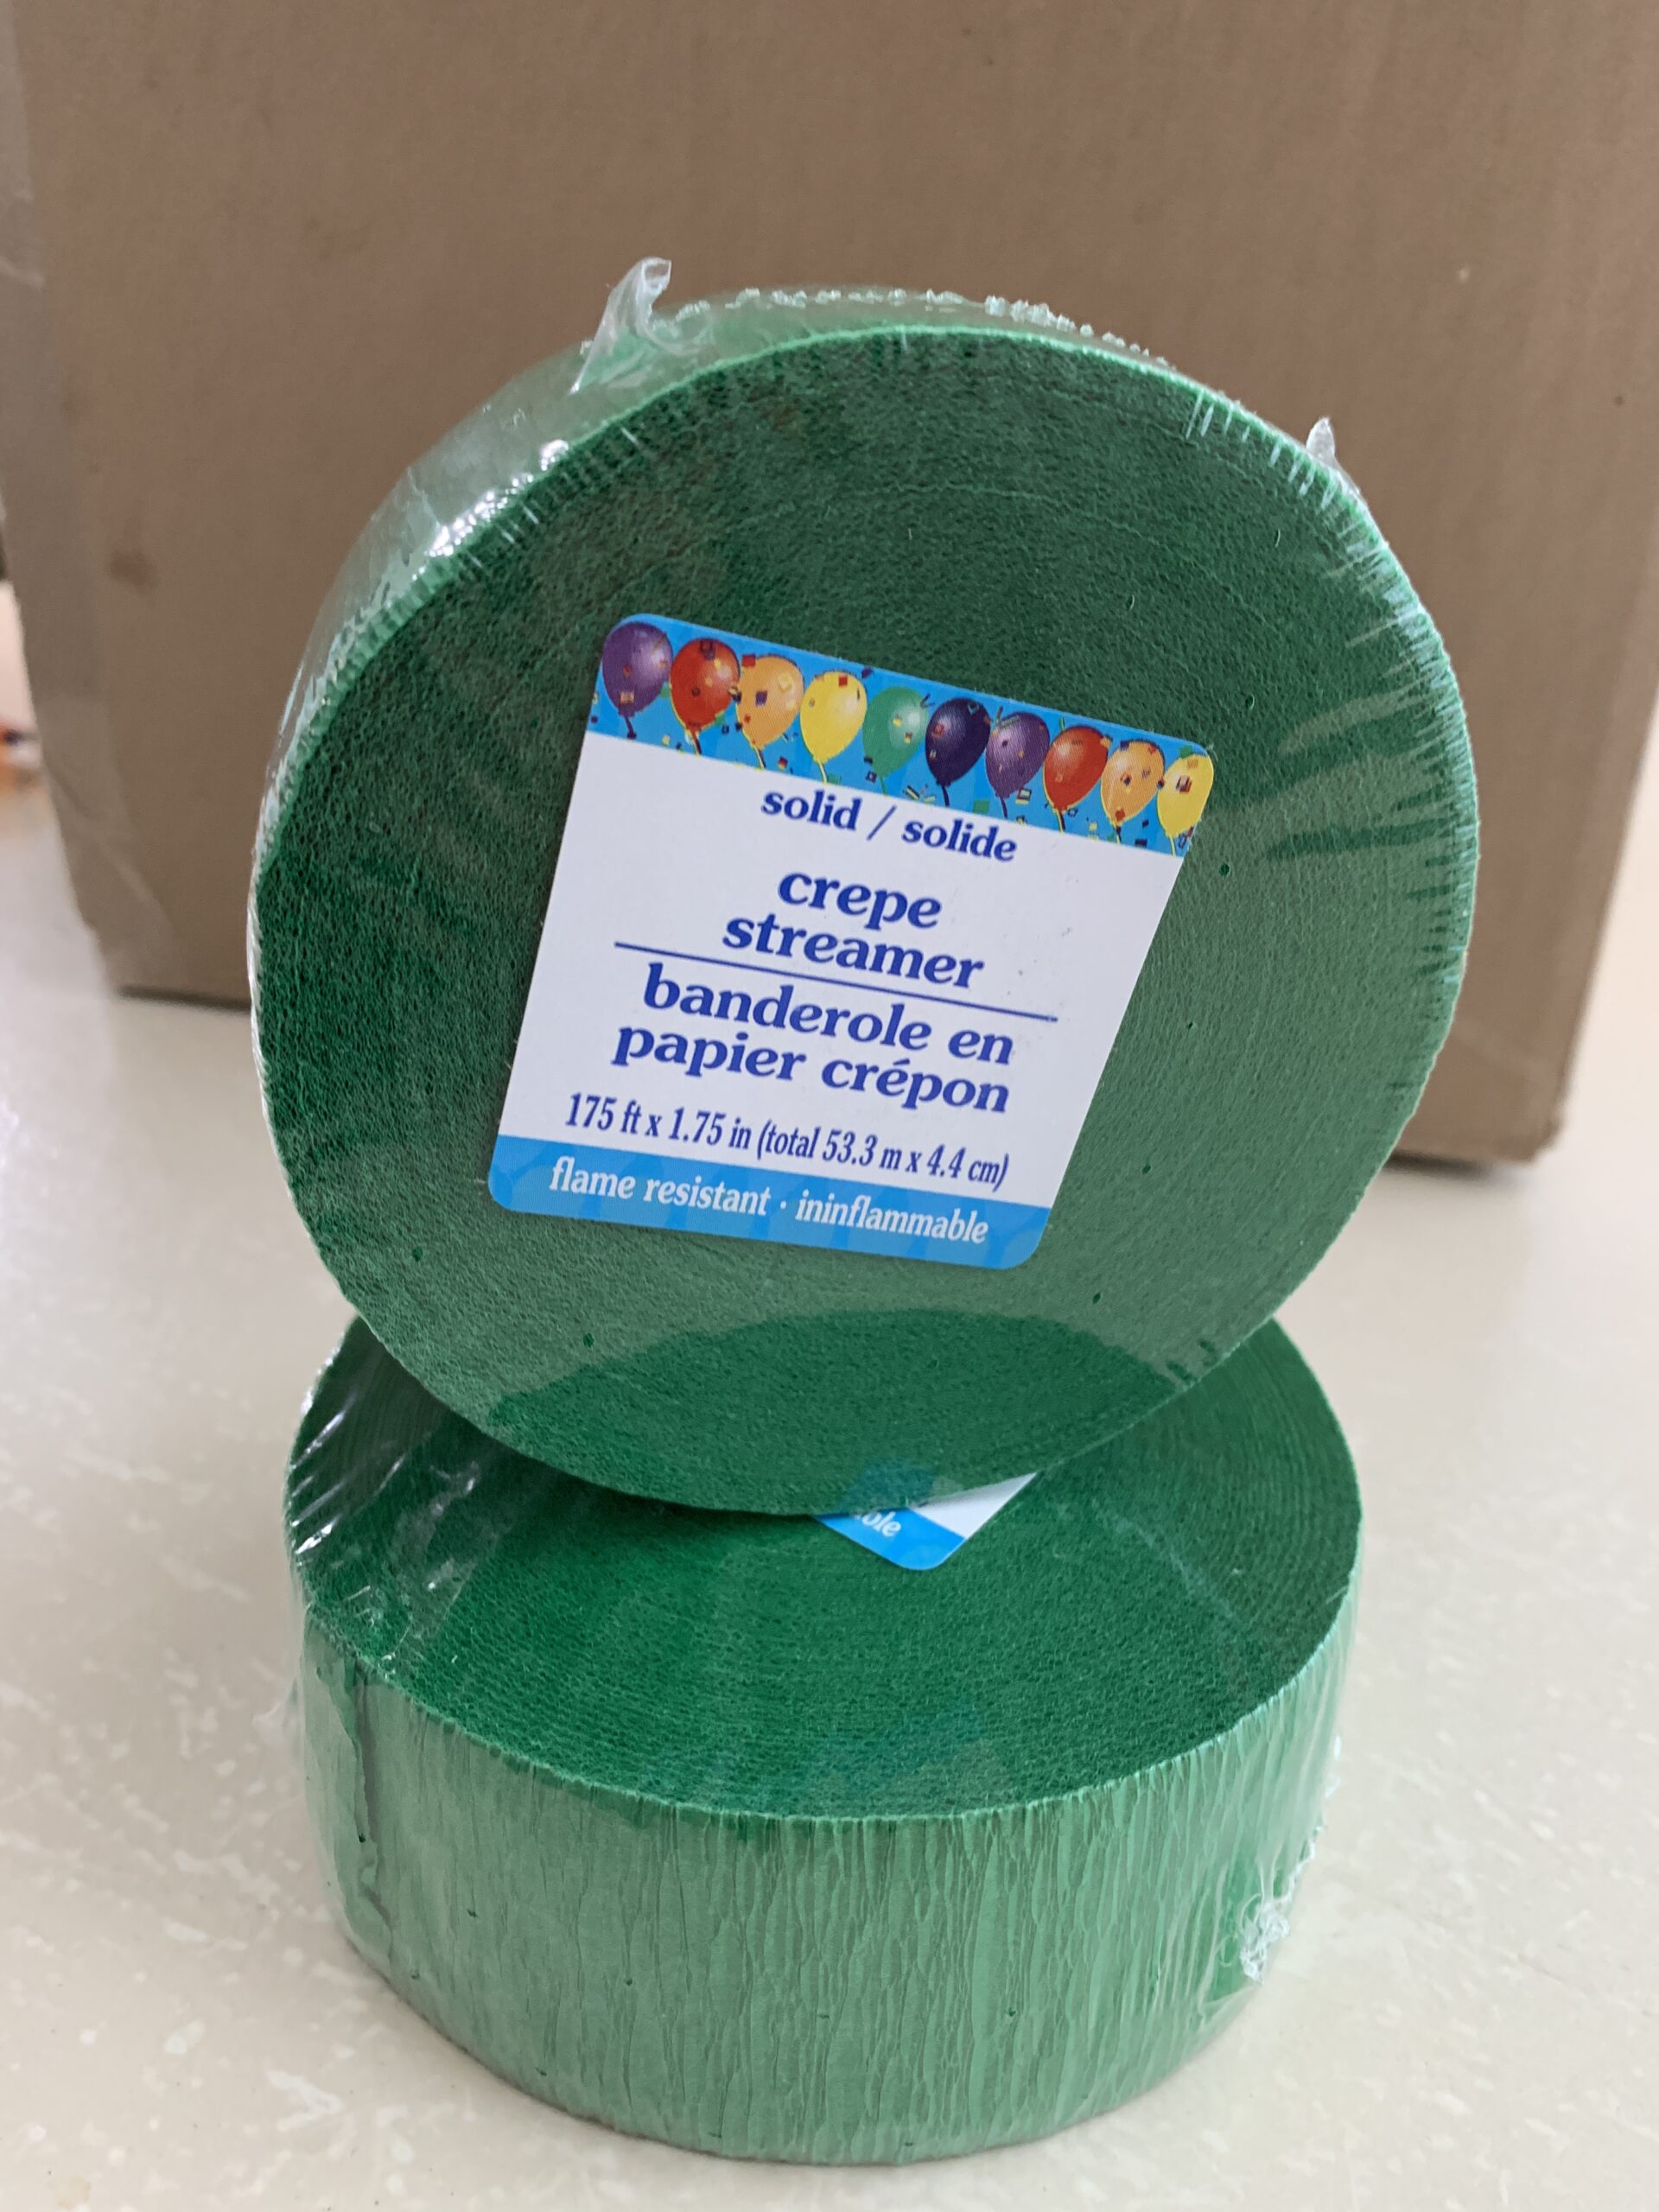
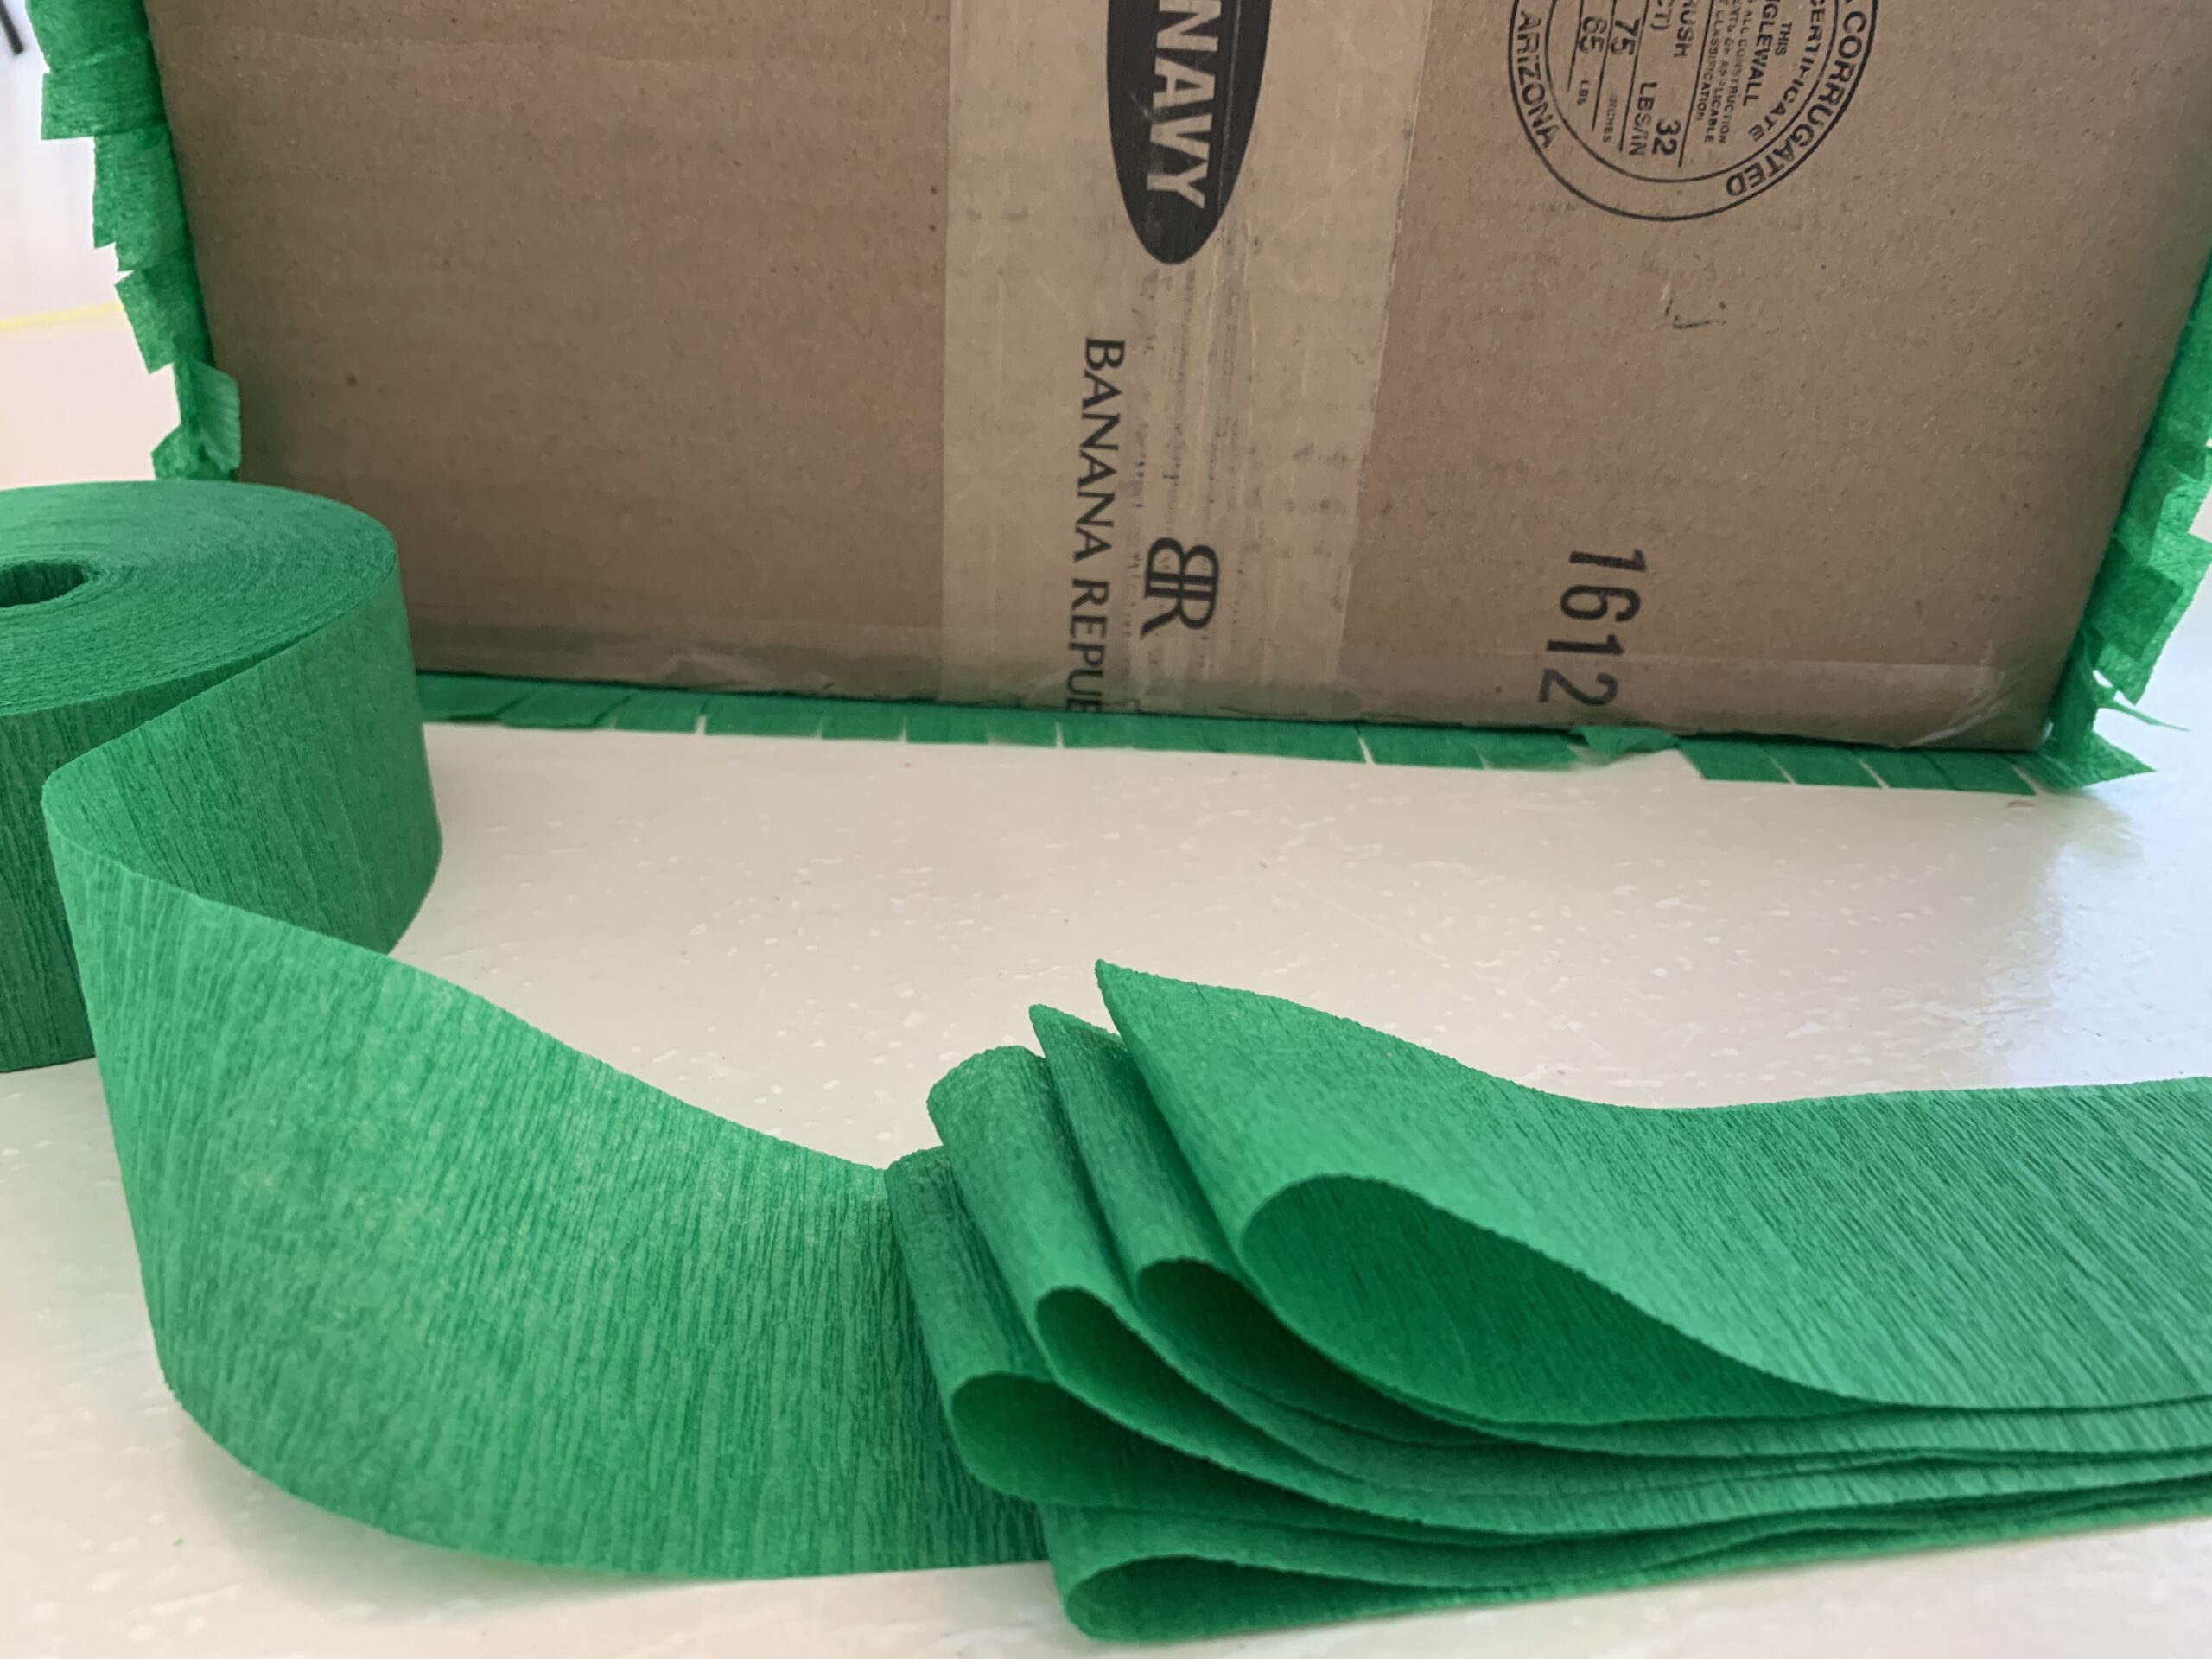
Now it’s time to grab your crepe paper. It doesn’t need to be anything fancy. You can find it at your local dollar store. I purchased 2 rolls of green crepe paper and only ended up using one. Depending on how close together you put the crepe paper you may use more than one.
First you will need to cut the crepe paper into strips and then cut it into fringe. You will want each strip of crepe paper to be long enough to overlap a bit onto the next side of the box (going horizontally).
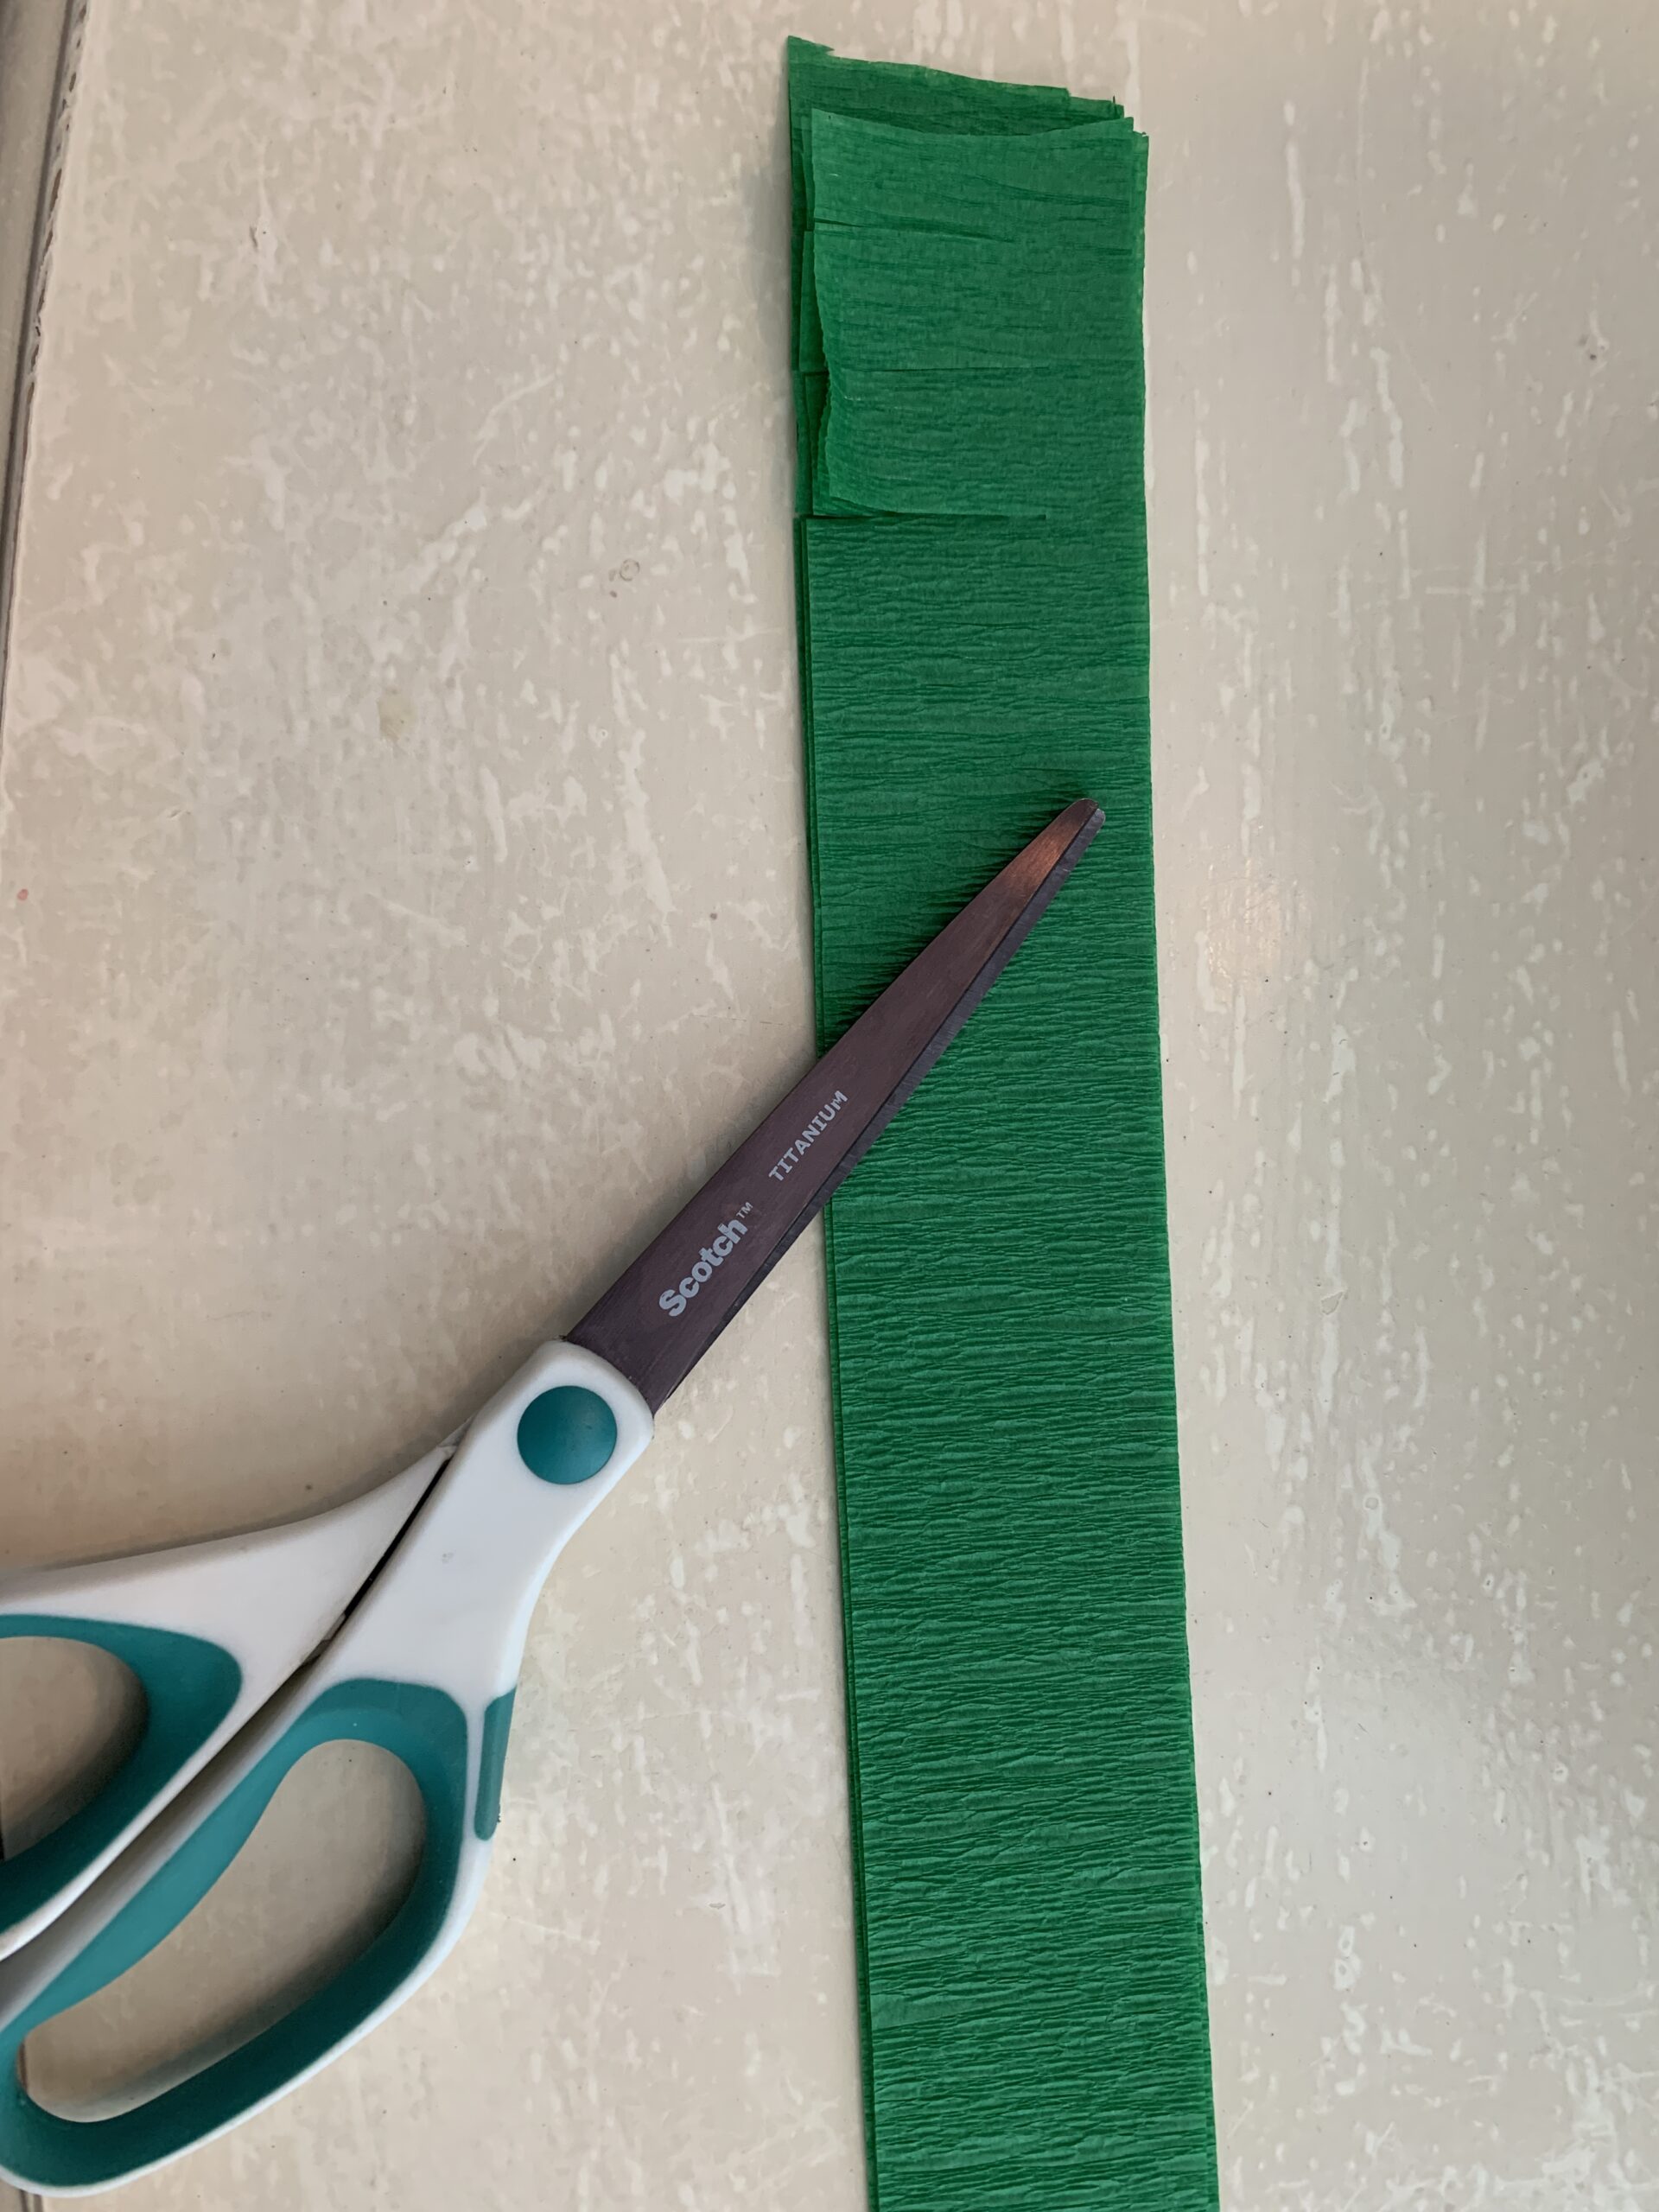
You will also need to cut the crepe paper strip about 3/4 of the way up (not cutting all the way through). These cuts will be about 1/4-1/2 inch apart.
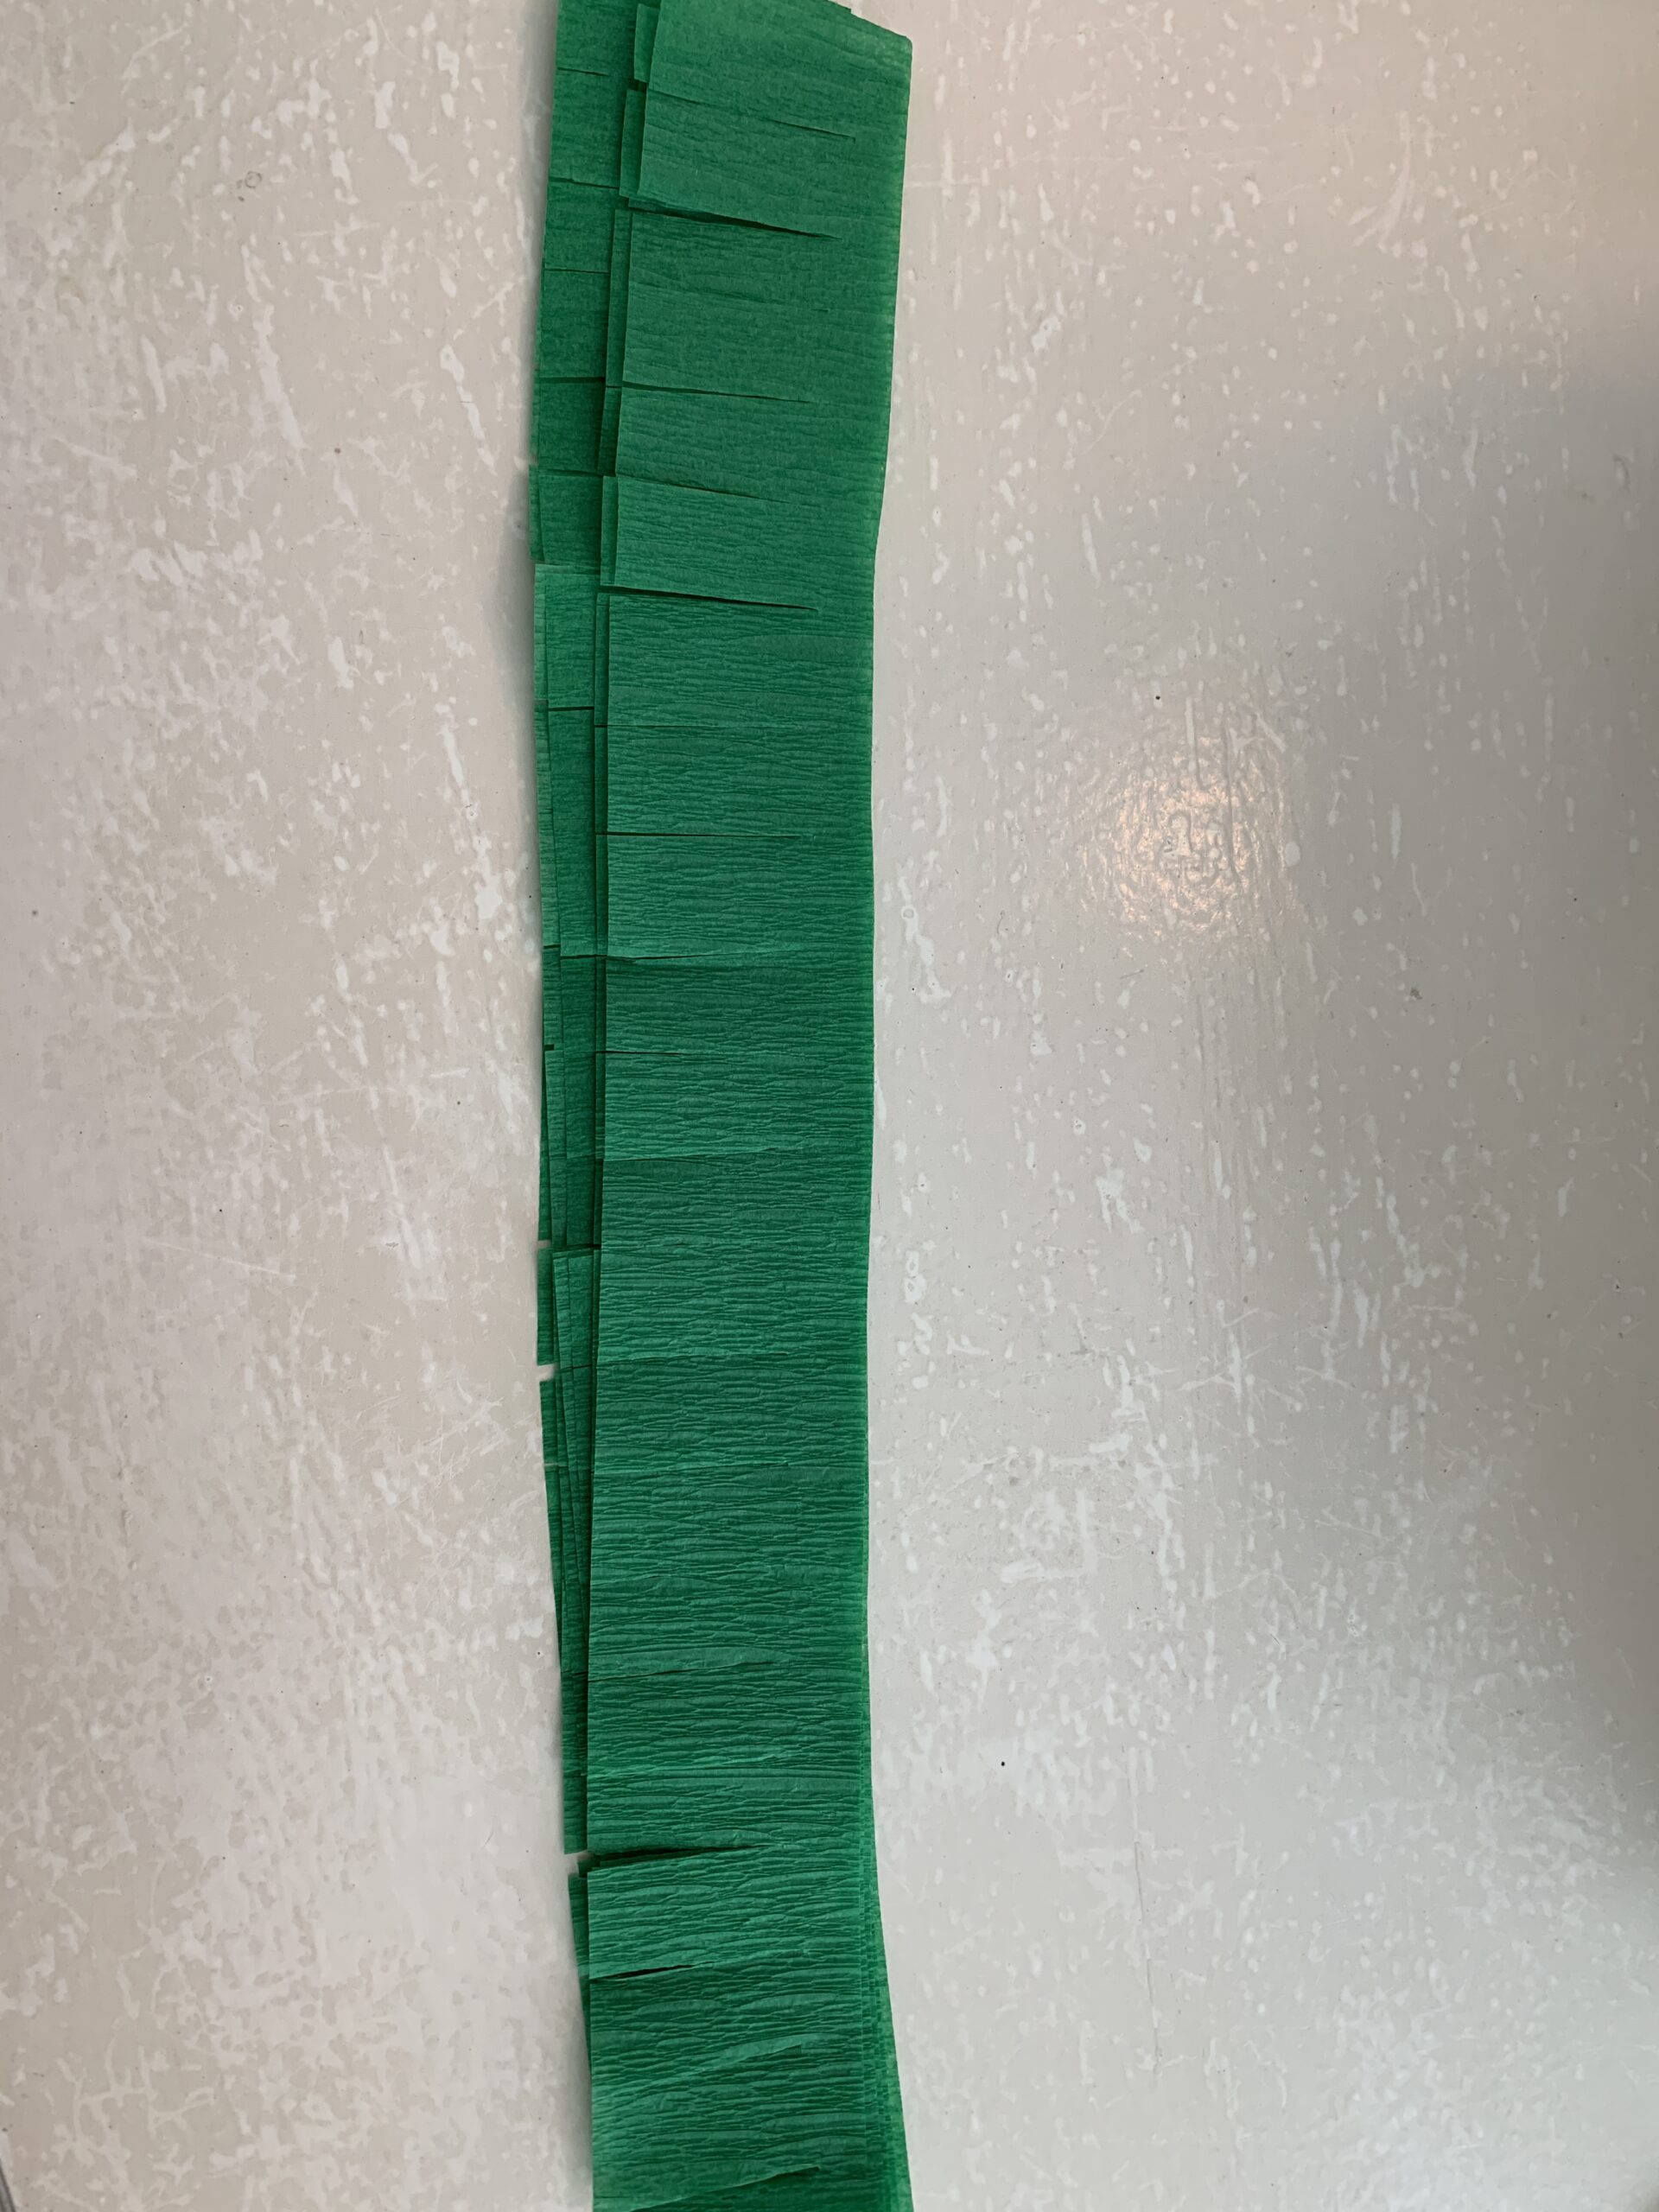
To make this little DIY project go even faster you can layer a few rows of crepe paper to cut at the same time.
Step 4: Gluing Creeper Crepe Paper
With your crepe paper cut into strips and fringed you are ready to start gluing. The simplest way I found to glue was using a glue stick. You’ll start by placing the crepe paper on the sides of the box so pick a side to start on.
Run a line of glue along one side of the box starting at the bottom. Then quickly press a strip of crepe paper to the glue. You only need to glue down the part of the crepe paper that you did not fringe. I chose to do the bottom of each side of the box before moving up a row.
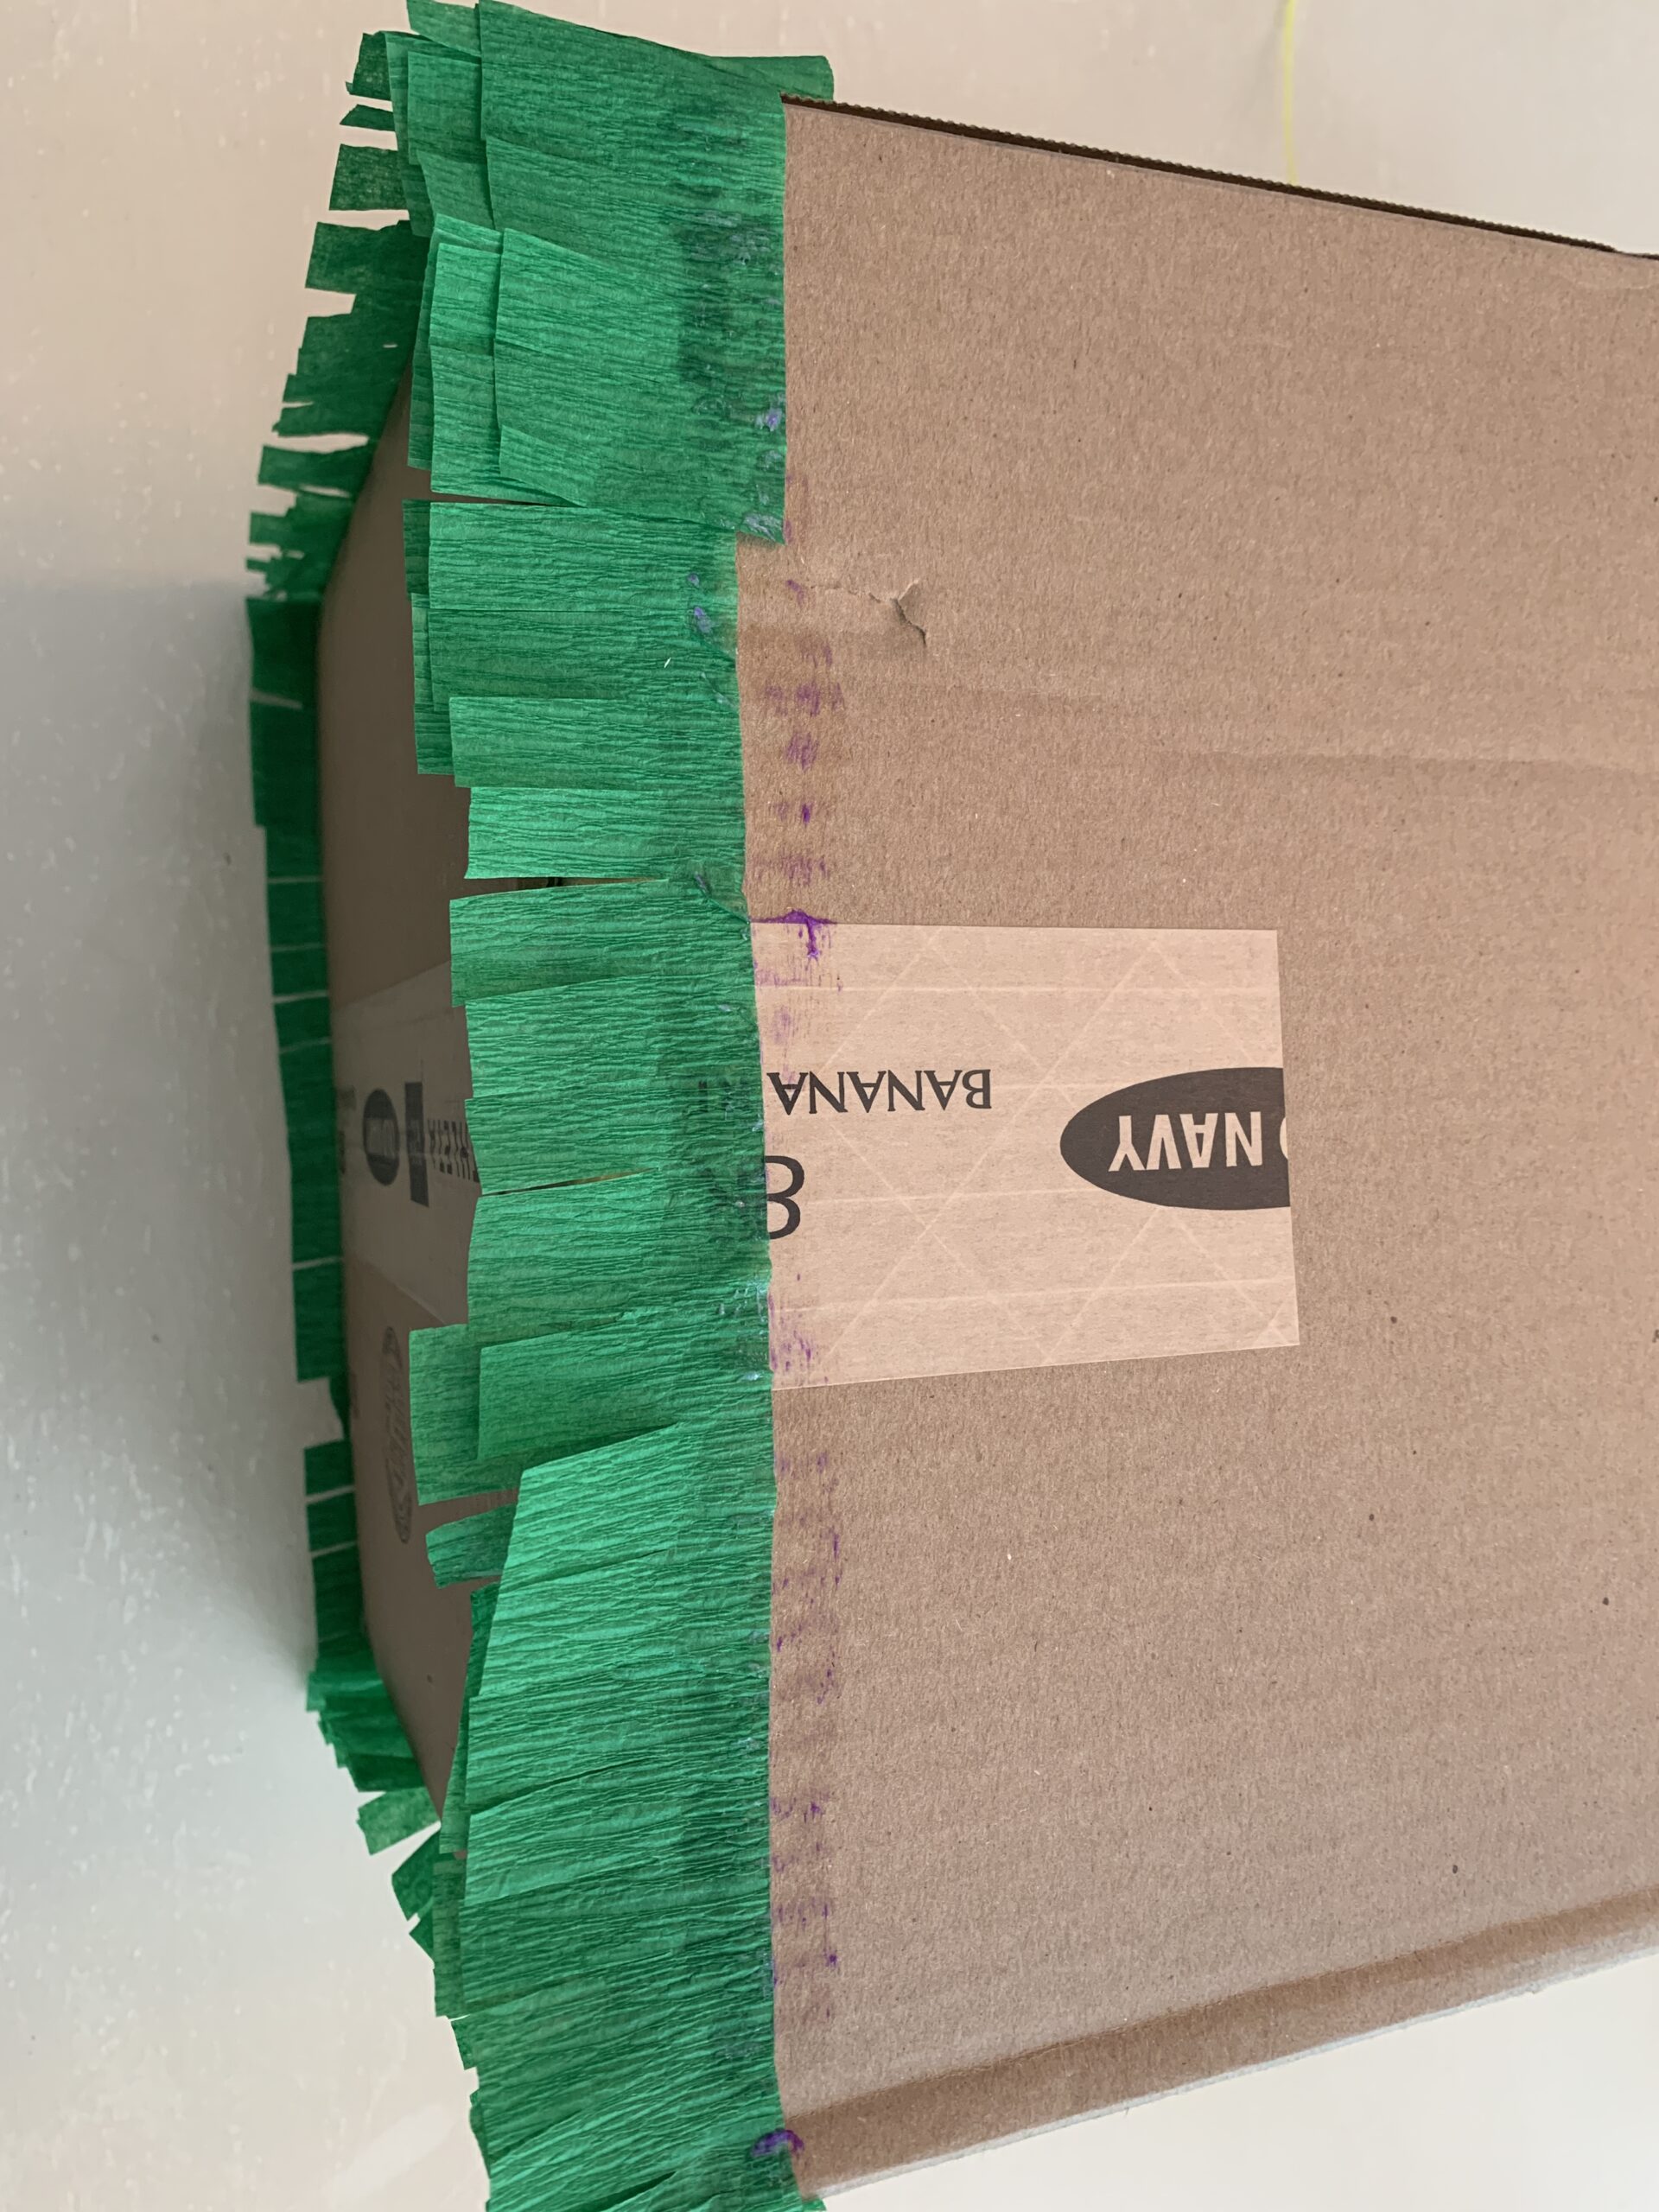
After finishing a row around all the sides of the box then move to the next row. Place a line of glue just above the crepe paper row you just finished and add a second row to each side of the box. Continue adding crepe paper row by row around the box.
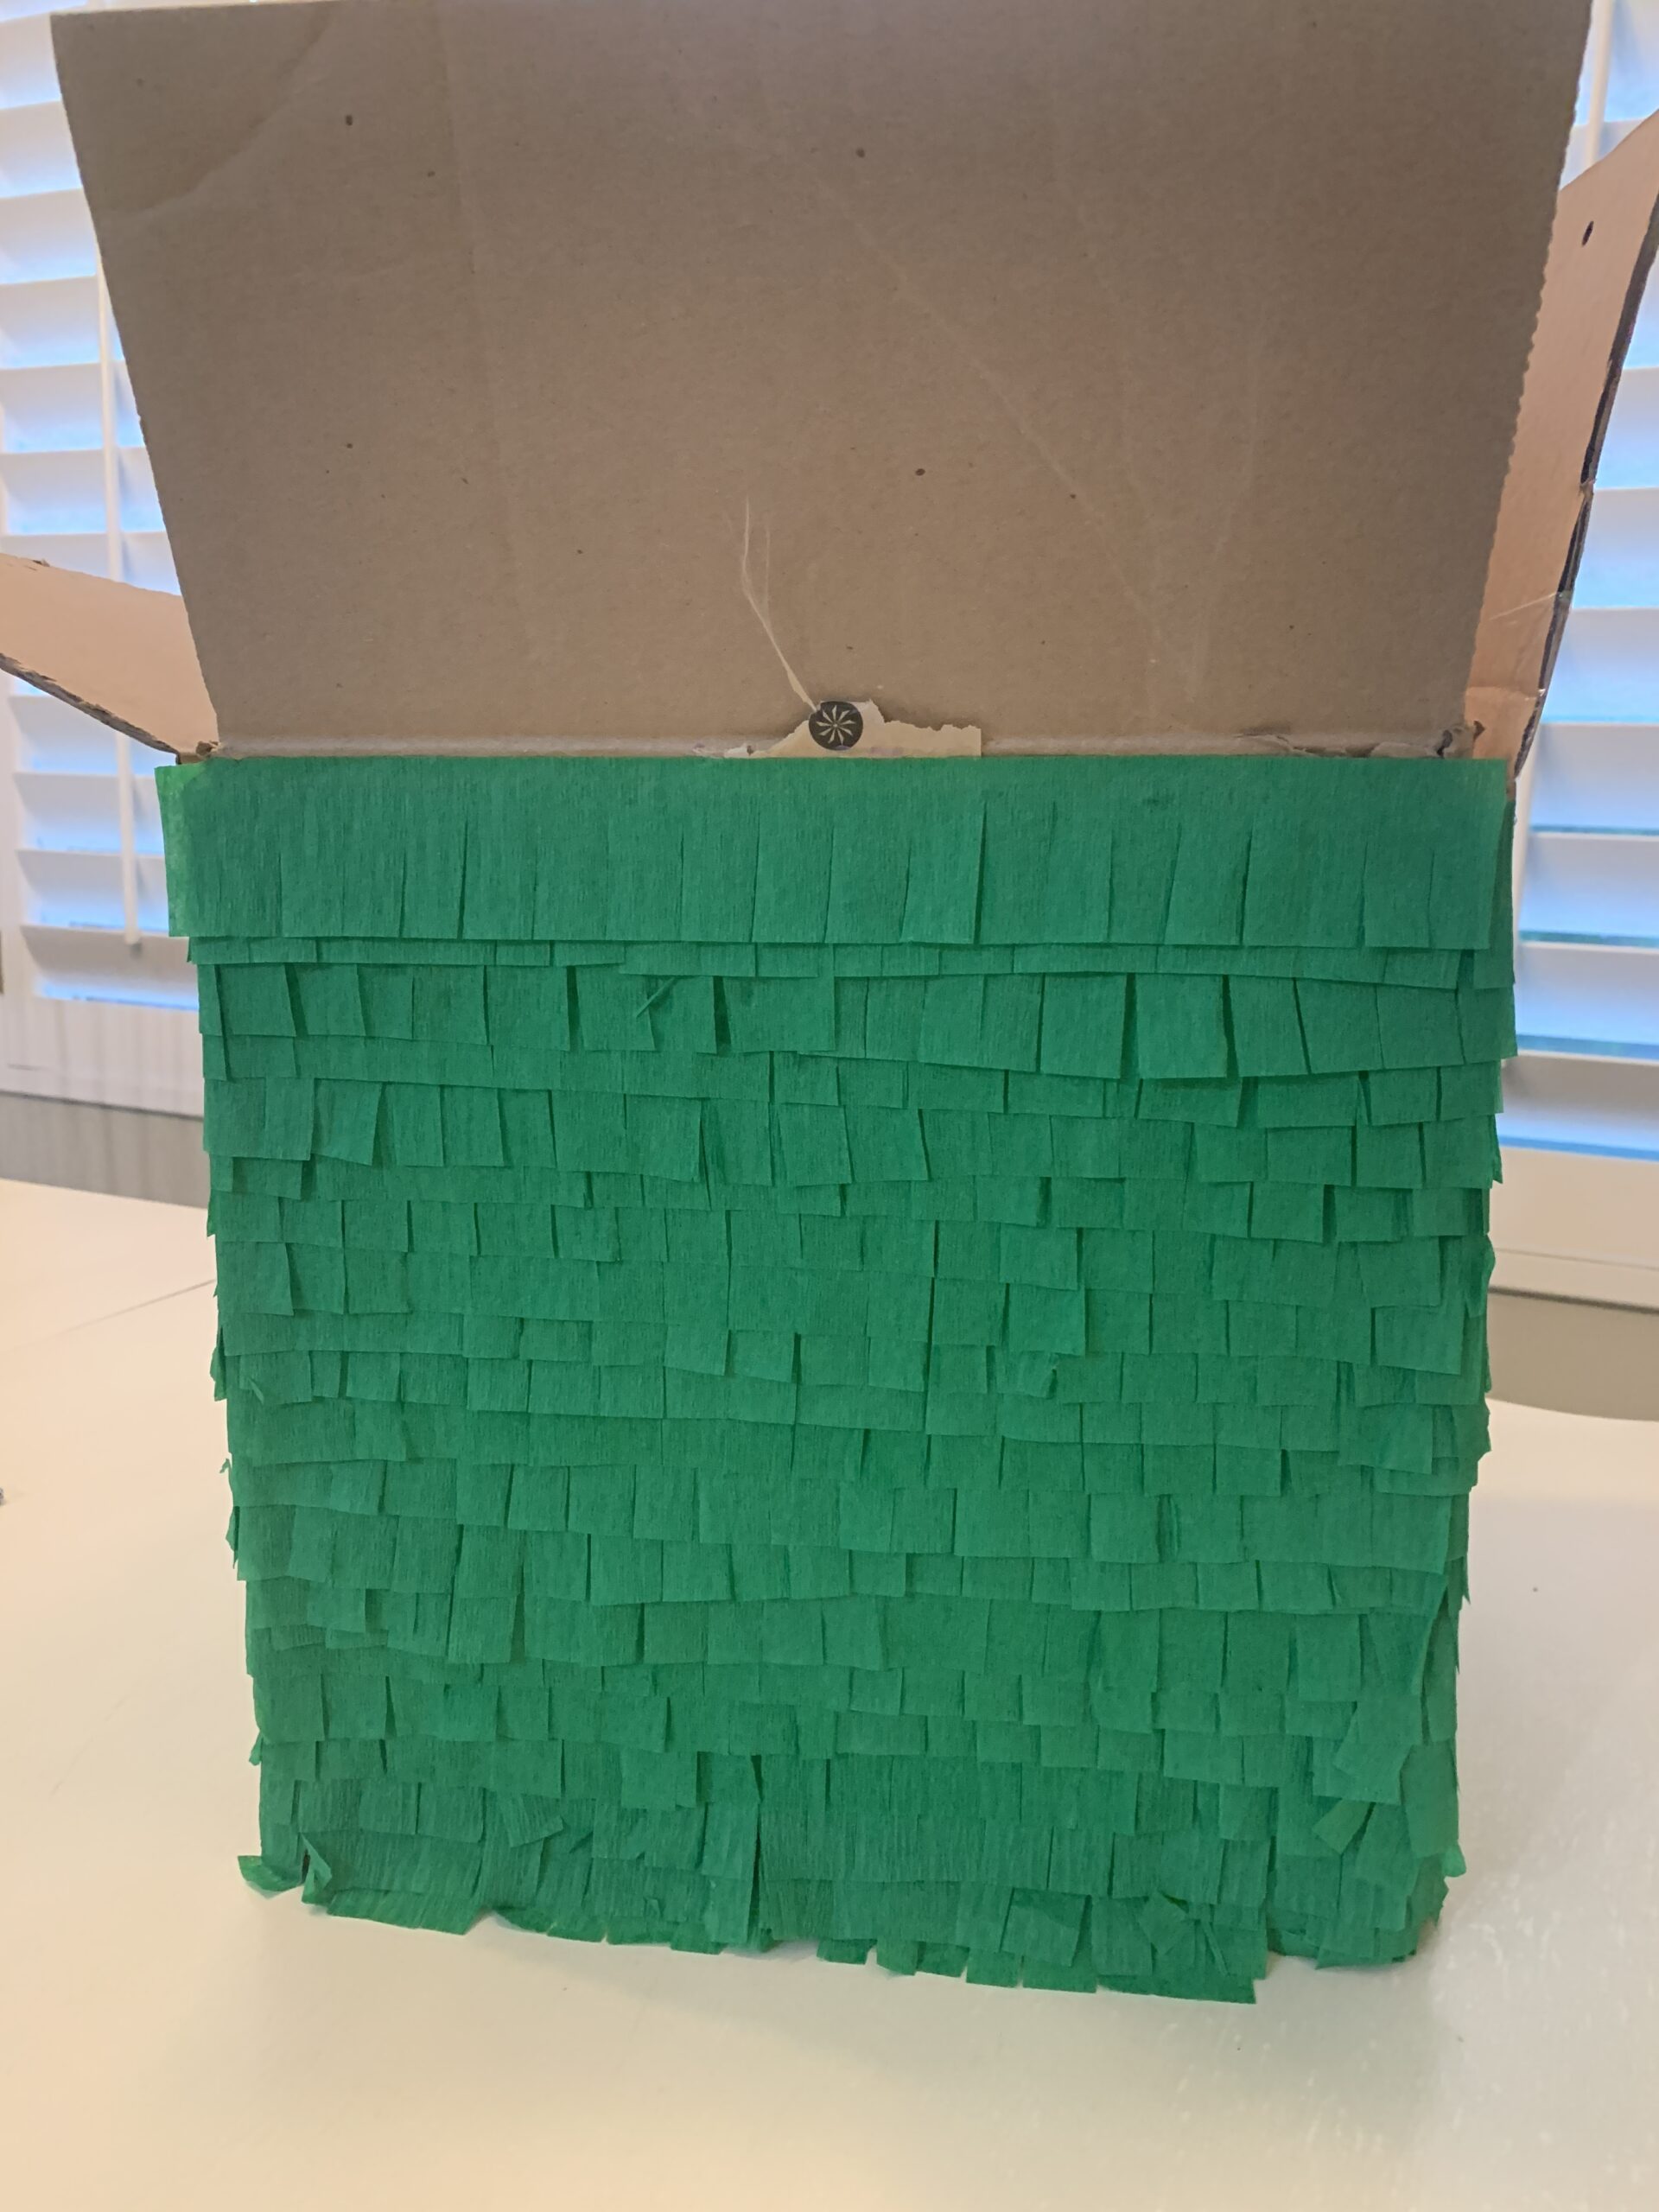
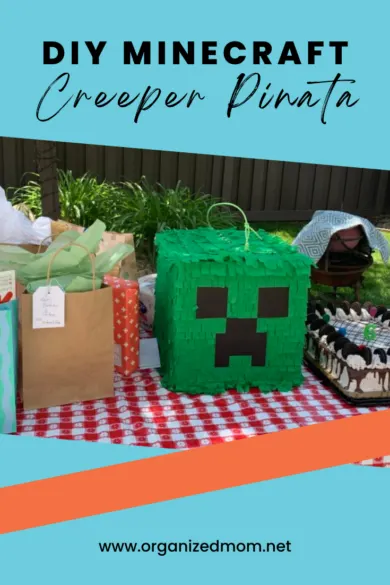
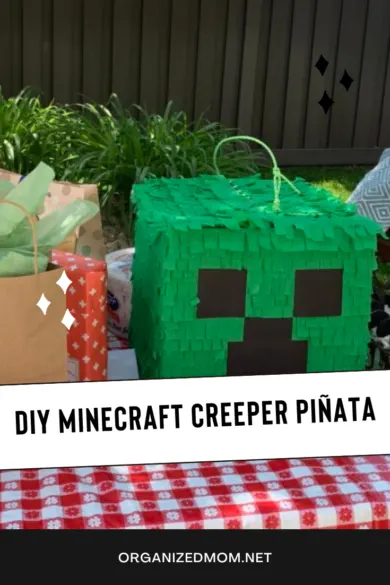
For a fuller look you can make the rows closer together. For a less full look glue them further apart. Continue by adding crepe paper to the top flaps of the box. Don’t forget to use your black paper to add your Creeper eyes, nose and mouth.
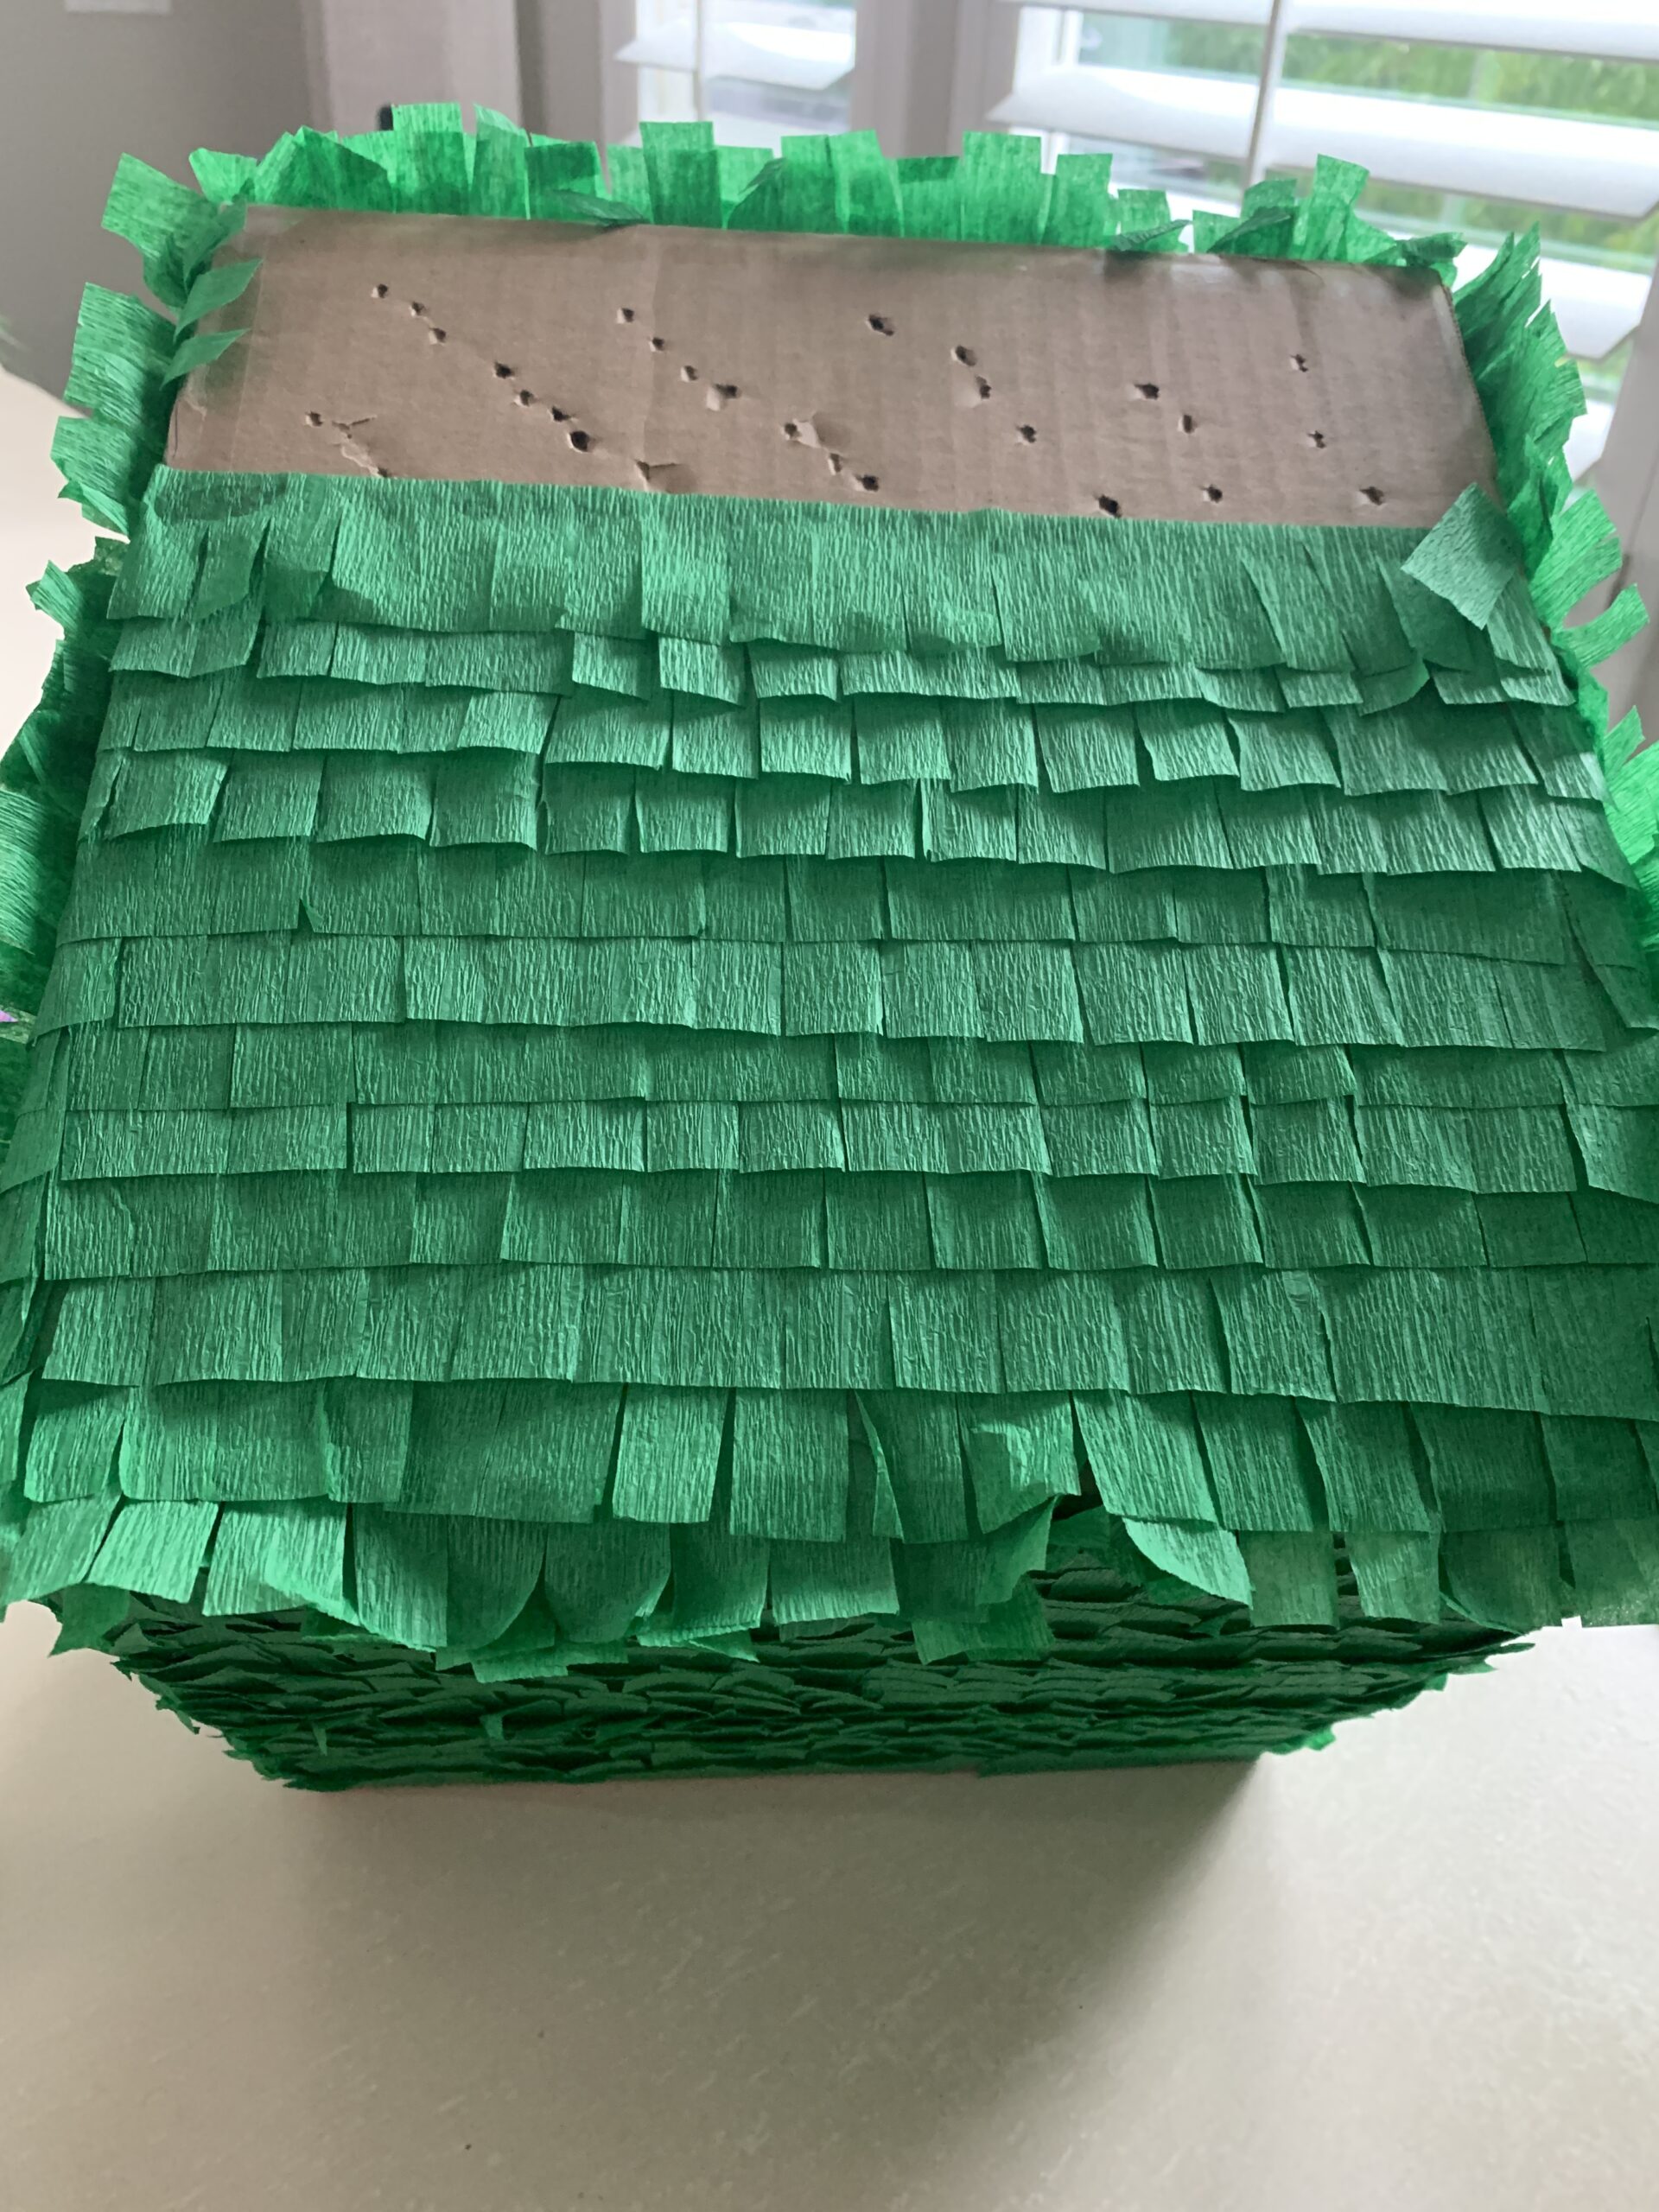
You can also add crepe paper strips to the bottom of the piñata. Before adding the paper I chose to poke the box and make some small holes. I was worried it might be indestructible so I wanted to add a little weakness to ensure it would eventually be broken open.
Step 5: Final Touches on Your DIY Minecraft Creeper Piñata
The last step is filling the box and closing it up. Grab your candy and toys and whatever else you are putting into your piñata and fill it up (make sure it’s not too heavy).
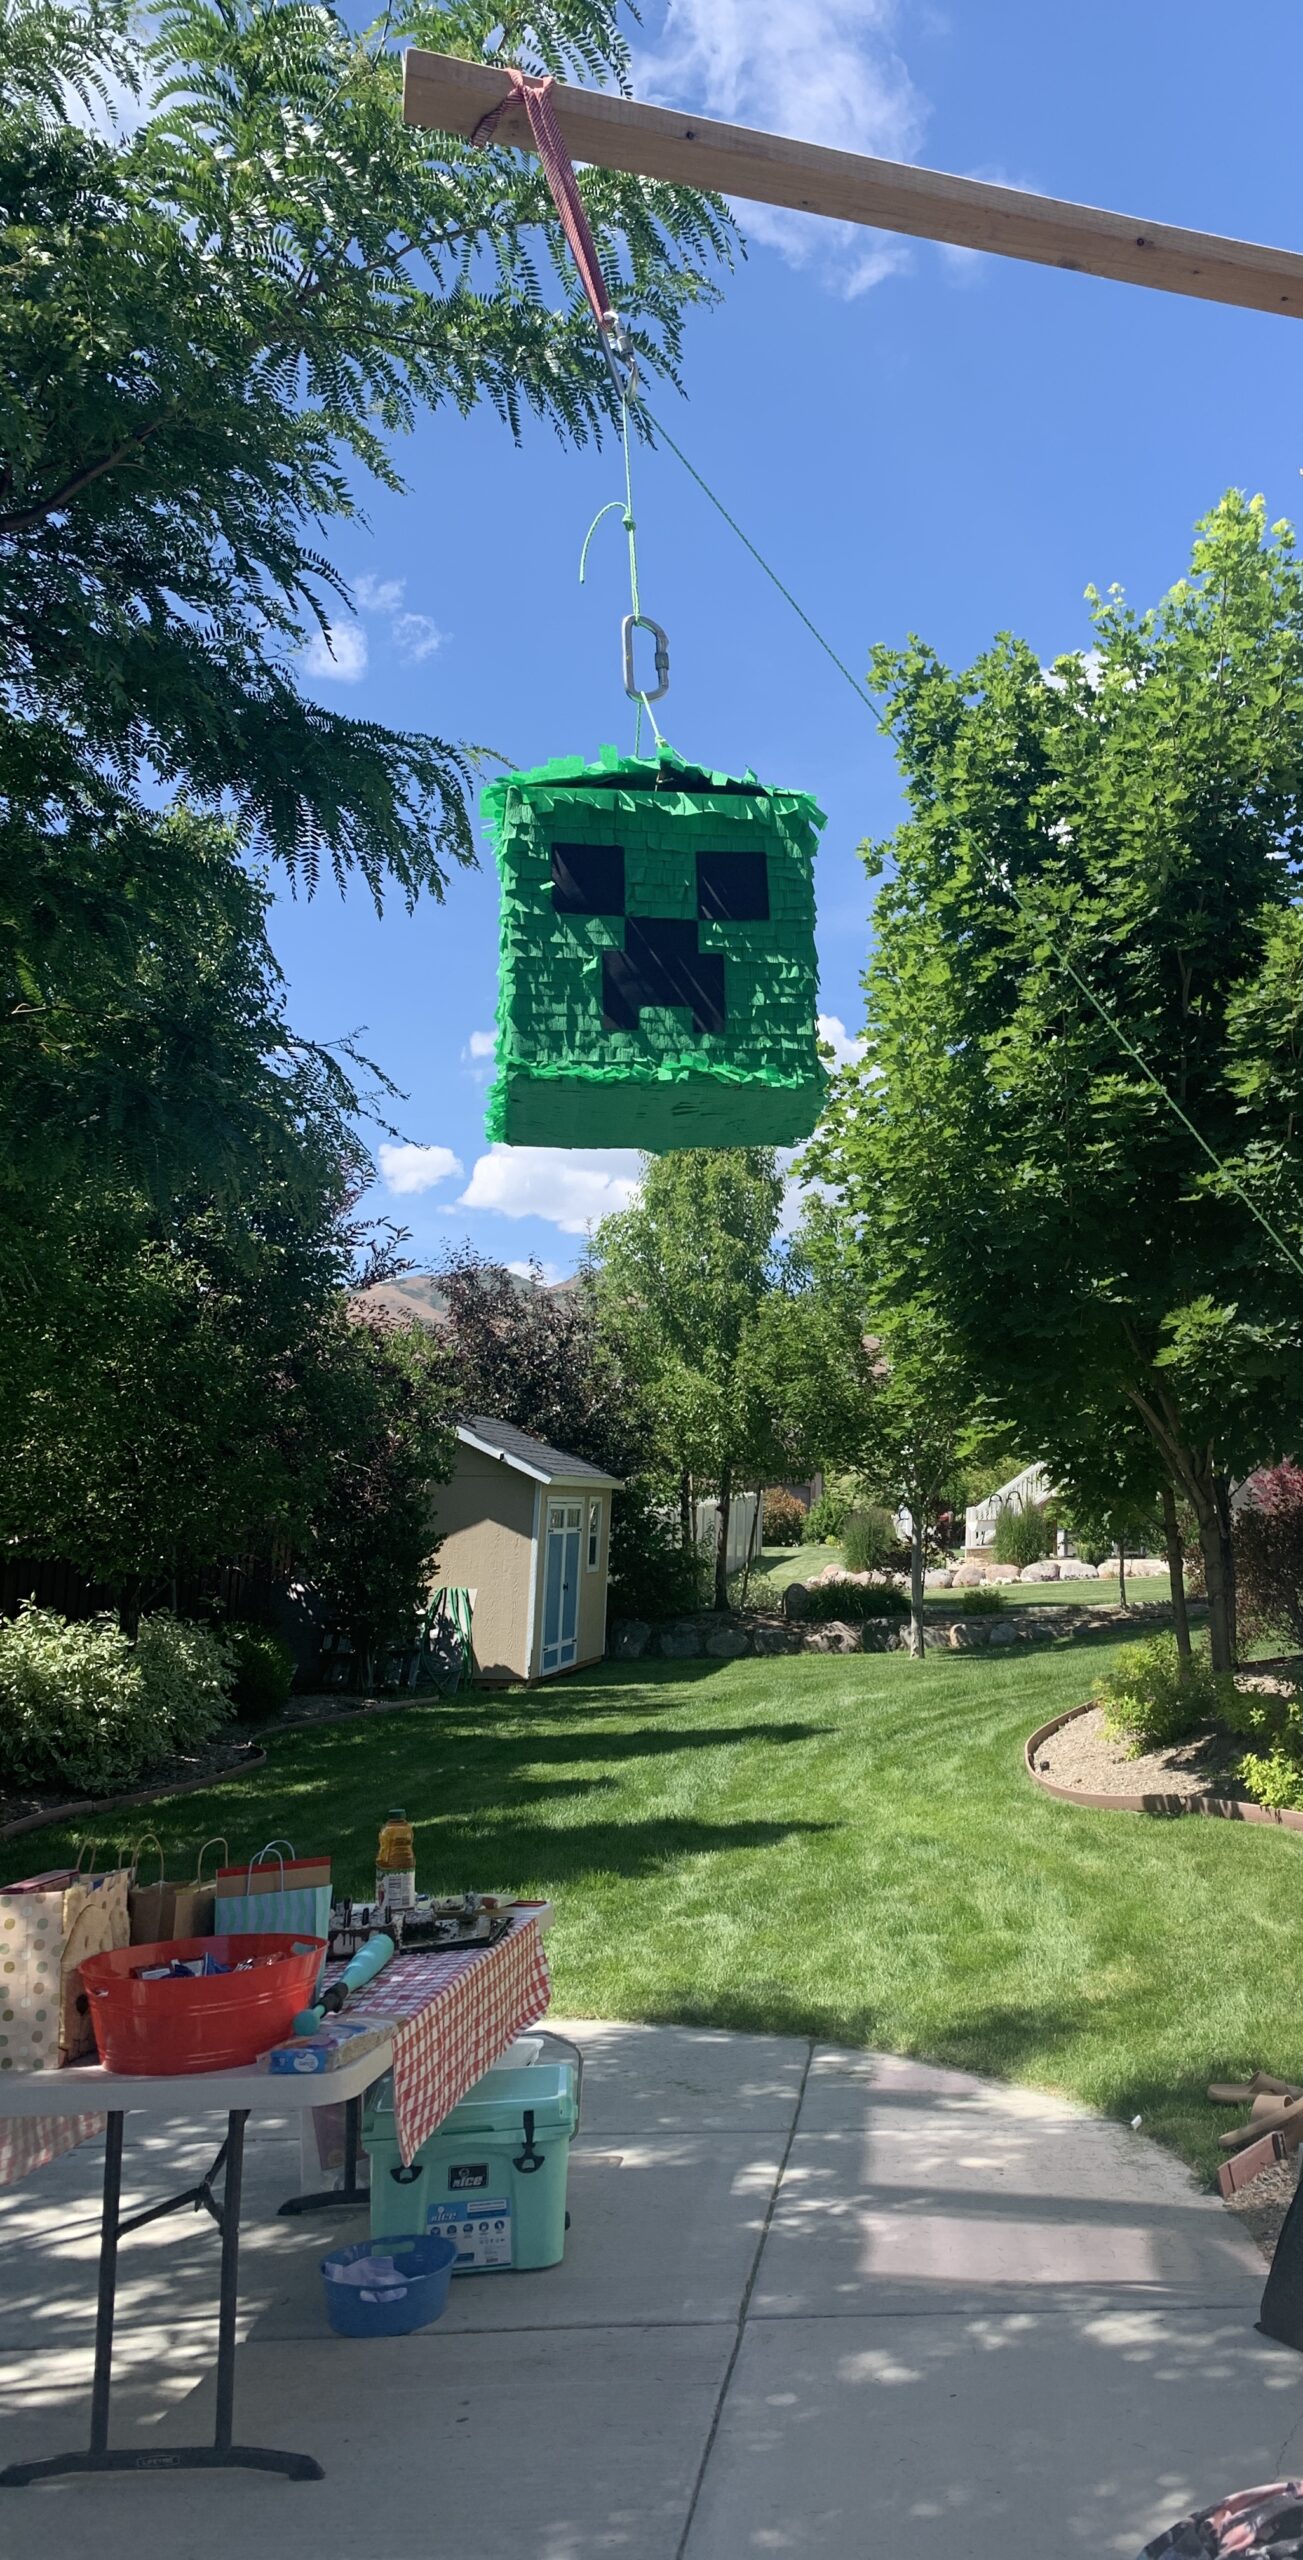
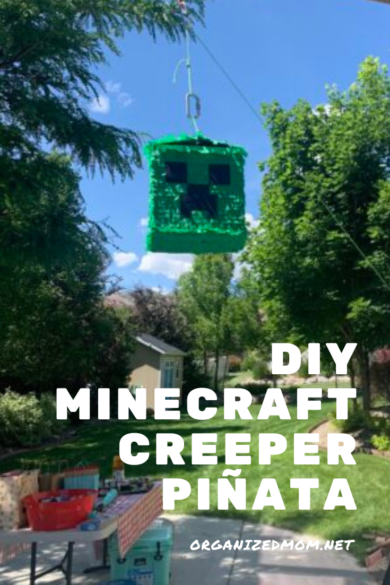
Next, take your paracord or other strong rope/string and sew it up. Be sure to leave enough at the end to tie it back to the beginning creating a handle. This is what you will later hang your piñata from.
Be creative with how and where you hang it. Then find a plastic bat or stick and let the fun begin with your DIY Minecraft Creeper piñata!
Optional additions:
- If you’ve seen the common pull string pinatas out there, it may be helpful to add some pull strings to the bottom of the pinata cardboard boxes. These can be good if you have a younger crowd who may give up on the pinata after too many failed attempts. Pulling on the pull strings will release the bottom of the pinata and will let the goodies free fall from the sky for everyone to get their hands on.
- Depending on your venue, you may or may not have an easy place, like a tree branch, to hang your pinata, so it may be helpful to use a pinata hanger where you can easily, and safely hang it from on top of the pinata.
What should you put in your Minecraft Creeper Pinata?
When it comes to filling your DIY Minecraft Creeper piñata, the possibilities are endless! There’s so much more to put inside the box than just a couple pounds of candy.
If you’re at a loss on what to put inside, the good news is, we have some pinata filler ideas.
Here are some fun and creative pinata fillers to consider:
1. Mini Minecraft figurines: Fill your piñata with small plastic or rubber Minecraft figurines. This will surely excite any Minecraft fan and add to the gaming experience.
2. Candy and sweets: Fill the piñata with an assortment of candies and sweets. From chocolate bars to lollipops, make sure to include a variety to cater to different taste preferences.
3. Stickers and temporary tattoos: Add some Minecraft-themed stickers and temporary tattoos to the mix. This will give the kids something to take home and enjoy even after the party is over.
4. Miniature Minecraft-themed toys: Include small toys like Minecraft-themed keychains, mini swords, or even mini TNT blocks. These little surprises will surely delight the partygoers.
5. Glow sticks: Create an element of surprise by adding glow sticks to the piñata. These small party favors will add a fun glow-in-the-dark effect especially if you’re having an evening or indoor party.
6. Minecraft-themed stationery: Add some pencils, erasers, and notepads featuring Minecraft characters or designs. This will be a hit among the school-aged kids attending the party.
7. Mini puzzles or brain teasers: Challenge the partygoers’ minds by including small Minecraft-themed puzzles or brain teasers. This will keep them entertained and engaged even after the party.
8. Mini bags of chips or snacks: Don’t forget to include some savory treats like mini bags of chips or snacks. This will balance out the sweetness and give the kids some energy to keep the party going.
Remember, you can mix and match these ideas or come up with your own unique surprises to make the Minecraft Creeper piñata truly special.
What do you hit pinatas with?
Here is a list of things you can use to hit a piñata with:
- Baseball bat
- Wooden stick
- Plastic bat
- Foam bat
- Piñata bat
- Plastic sword
- Light saber toy
- Wooden spoon
- Whiffle ball bat
- Plastic golf club
Remember to always exercise caution and ensure the safety of everyone involved when hitting a piñata.
Can I use tissue paper instead of crepe paper to make my pinata?